2. How Does It Work?
Open up the cable that connects your electric guitar to your
amplifier, and you’ll find two wires—one “ground” and one
held at positive voltage relative to ground. The changing
electrical potential between these two wires is what carries
the sound signal. If you short-circuit these wires, the sound
goes away, because the charge finds its way home, without
bothering to go all the way through your amplifier.
But what if you bridge the two wires with a variable resistor?
You have a volume control: turn the resistance way up,
and the sound stays loud; turn it way down, and the sound
vanishes down the short-circuit path. And here’s where
Charles had his clever idea: use a variable resistor that
responds to light! If you put a photoresistor behind a spinning
transparent disk with opaque bands on it, then the volume
will follow the shadow pattern on the disk, repeating as it
spins. And that’s tremolo—a repeating variation in volume.
Plug your guitar into light-programmable waveforms with this unique effects box!
OPTICALTREMOLO BOXa celebration of amazing creations
andthepartsthatmadethempossible.
Tremolo—it’s that pulsing undulation of high and low volume
that makes music sound like it’s being played underwater or
through a spinning fan.
Made famous by 1950s guitarists Bo Diddley (who actually
used a fan in front of his amp), Duane Eddy and Link Wray,
the tremolo sound saturated ’60s surf and garage rock, and
was revived in the ’80s by players like Poison Ivy Rorschach
(The Cramps) and Jimmy Wilsey (Chris Isaak). You’ve heard
it in hits by Pink Floyd (“Money”), The Smiths (“How Soon
Is Now?”), R.E.M. (pick a song on Monster), Rage Against
the Machine (“Guerrilla Radio”), Green Day (“Boulevard of
Broken Dreams”) and the Black Keys (“Howlin’ for You”).
When MAKE contributing editor Charles Platt wrote about
DIY tremolo and fuzz guitar effects in MAKE Volume 15,
he proposed a Hypothetical Tremolo Wheel that would vary
the volume based on how much light fell on a photosensor.
Well, it’s hypothetical no more. I took Charles’ cue and built
this Optical Tremolo Box, which reads a patterned disk with
a light sensor to create tremolo effects that you can custom-
program with any pattern you like. It’s a great project for
anyone who likes music, guitars or electronics, and it’s like
no effects box you’ve seen before.
ADVERTORIAL
3. To submit your own creation,
explore other great creations
and get the hard-to-find parts
you need, visit RadioShack.com/DIY.
The Optical Tremolo Box is simple to build and sounds great.
A rheostat controls the tremolo motor speed, while an audio
potentiometer controls the tremolo intensity. You can customize
the disks with any pattern you want and create tremolo effects
that have never been heard before.
It also looks pretty cool, with its flexible LED light and spinning
disks. Build it and I guarantee your friends will want one!
—Sean Ragan, MAKE Technical Editor
To see full build instructions, wiring diagrams, disk art and
project photos, visit the project page for this build:
radioshackdiy.com/project-gallery/optical-tremolo-box.
Audio jack, ¼"
Motor,
1.5V–3VDC
Photoresistor,
6mm
Potentiometer, 10K
Rheostat, 25Ω
Parental supervision is strongly recommended when using power tools and solder. Always wear safety
glasses. Avoid breathing fumes and always work in a well-ventilated area. Wash hands thoroughly
after use. Follow all safety instructions on solder and soldering equipment packaging. California residents:
WARNING: Soldering products contain, or when used for soldering and similar applications produce,
chemicals known to the state of California to cause cancer and birth defects (or other reproductive harm).
Switch, DPDT
4. 2
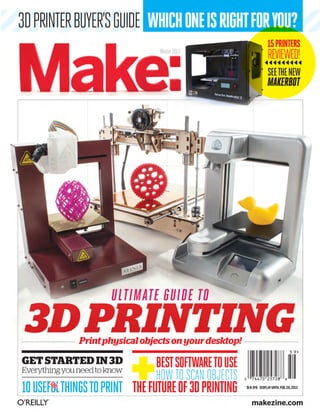
Contents
082
010
034
038
080
020
018
086
074
024088
GETTING
STARTED
006 Welcome:
Dreaming of
3D Printers
008 The Promise of
3D Printing
010 Additive vs.
Subtractive
Fabrication
012 Getting Started with
a 3D Printer
018 10 Coolest Objects
020 10 Most Useful
Objects
092
40Whatthisowl’sbeak
willtellyouaboutYOUR3Dprinter
022 Plastics for
3D Printing
024 3D Printing Using
Alternate Materials
and Methods
026 Software Overview
030 Beginner 3D Design
Using Tinkercad
034 Using 3D Printing
Services
036 Service Providers
& Resources
BUYER’S
GUIDE
038 Buyer’s Guide
Rating System
042 3DTouch
044 Afinia H-Series
046 Bukobot 8
048 Cube
050 Felix 1.0
052 LulzBot AO-100
054 MakerGear M2
056 MendelMaxPro
058 Printrbot LC
060 Printrbot Jr.
062 MakerBot
Replicator 2
064 SeeMeCNC
H1.1
066 Solidoodle 2
068 Type A Series 1
070 Ultimaker
072 Buyer’s Guide
Comparative Review
074 Standouts from
Our Tests
076 3D Printers of
the Future:
Ones to Watch
MADE
IN 3D
080 Objects on the
Market Now
082 3D Printing in
Medicine
086 Kevin Mack’s 3D Art
088 Solar Sinter
090 Printcrime
092 Skill Builder:
3D Scanning
106 Scanning Options
110 Just the Thing I Need
8. At a recent talk at New York
University just before World
Maker Faire 2012, I asked the audience,
mostly undergrad and graduate students,
how many of them had 3D printers. None
of them raised a hand. Then I asked
how many wanted a 3D printer, and
all the hands in the room shot up.
Immediately.
The market for personal 3D print-
ers is still in its early stages but it’s becom-
ing very hot. The dream of 3D printers stirs
our imagination.
The challenge for personal 3D printers
is to make them practical and affordable to
do what we dream of doing. At the same
time, the challenge for anyone who justifies
spending a couple thousand dollars on a
3D printer is to dream of something more
interesting than duplicating colorful, plastic
tchotchkes from Thingiverse.
Several years ago MakerBot Industries
released the Cupcake CNC 3D printer as a
kit that makers could build for themselves,
starting off the personal 3D printing revolu-
tion. Before that, commercial 3D printers
were industrial machines for a highly spe-
cialized design market. MakerBot founders
Bre Pettis, Adam Mayer, and Zach “Hoeken”
Smith adapted and simplified open source
technology developed in the RepRap com-
munity and produced a working model with
a homely laser-cut case. Sure, it might’ve
taken weeks to put this model together, but
makers could realize their dream of owning
a 3D printer.
Like the first personal computers, 3D
printers were signposts for an unsettled
territory, awaiting the pioneers to explore
the future.
MakerBot is still the leader in personal
3D printing, announcing the all-black, ready-
to-run Replicator 2 in September. They have
a strong brand and a vibrant community.
Yet the announcement caused shock waves
with its mixed message about the openness
of the platform. Built on the contributions
of the open source hardware community,
MakerBot signaled that they needed
to “lock down” some of the designs
and software in order to remain
competitive and prevent others
from cloning them.
A new crop of 3D printers, many of them
crowdfunded as Kickstarter projects, are
providing more options for buyers, but the
competition is also confusing. In the early
days of a new product category (think MP3
players), many different models compete,
offering varied design choices. Each model
introduces new features, testing what users
want and what they’re willing to pay for.
Eventually the best features will be consoli-
dated into a few surviving models. Yet before
that happens, we can enjoy the variety of
prototypes and their experimental nature.
To help you choose among these new
machines, we put together a team of experts
to test and review 15 desktop 3D printers on
the market today. We learned an enormous
amount, and we’re confident you will too in
our Buyer’s Guide beginning on page 38.
I also enjoy learning more about the mak-
ers of these new models. Diego Porqueras
of Pasadena, Calif., developer of the Bukobot,
told me he read Volume 21 of MAKE, which
featured Bre Pettis on the cover, and decided
to build a 3D printer himself, relying on
general skills he acquired in metal shop
and computer science classes. Diego raised
$167,410 on Kickstarter from 290 backers.
Few of these 3D printer makers have
specialized expertise, or vast amounts of
capital, but they have the determination to
do something they really believe in — and
their belief is democratizing 3D printing.
Dreaming of
3D Printers
WRITTEN
BY
Dale
Dougherty
A new wave of affordable machines is democratizing 3D printing.
Dale Dougherty is the founder and publisher of MAKE.
Getting more people to use 3D printers
is not just about getting the hardware right.
Many of our 3D printer testers commented
that the software needs to be better. The
problem is certainly the lack of a polished
user interface for many open source soft-
ware tools.
But there’s another problem. We have to
learn to design in 3D. Turning our ideas into
3D objects that are suited to production on
a 3D printer demands more of us than just
clicking the Print button. In this guide, we’ll
show you how to design 3D objects easily
in Tinkercad (page 30) and how to prep 3D
models captured by Kinect or 123D Catch
(page 92). All of us will require training,
along with the energy and enthusiasm of
makers like Riley Lewis, a high school fresh-
man in Santa Clara, Calif., who says he first
picked up 3D printing in sixth grade. Now
Riley teaches workshops in 3D printing at
area schools and has been a guest blogger
for 3D Systems, makers of the Cube printer.
Riley reminds me of another dreamer
with a practical mind, Ben Franklin, the
apprentice printer who was the prototype
American maker. I’d like to know more
about what Riley dreams of doing, and I look
forward to seeing what makers are actually
doing with 3D printers.
6
welcome
The challenge for
personal 3D printers?
To make them practical
and affordable to do
what we dream of doing.
9.
10. The Promise OF
3D Printing
It’s a vision from a futuristic Star
Trek universe: effortlessly creating three-
dimensional objects on a machine in your
home (or starship). And it’s here today.
The dam has now burst on the 3D printing
market and this once out-of-reach
technology is now available to just
about anybody, for less than $1,000.
Will being able to print 3D objects
on your desktop change the world?
Spend a few minutes talking to manufac-
turers of 3D printers or early adopters and
you’ll quickly hear them drop such heady
adjectives as “game-changer,” “disruptive,”
and “revolutionary.”
An Economist article from April 2012
by Paul Markillie declared 3D printing and
associated technologies nothing short of
the “third industrial revolution.”
“As manufacturing goes digital, a third
great change is now gathering pace,” he
writes. “The wheel is almost coming full
circle, turning away from mass manufactur-
ing and towards much more individualized
production. And that in turn could bring
some of the jobs back to rich countries that
long ago lost them to the emerging world.”
The personal computer, the printer,
and the internet made us all publishers.
Now with 3D printers, 3D scanners, and
3D design software, we can all be manu-
facturers, as well.
Already companies are jockeying for
position. High-end 3D printing pioneer 3D
Systems bought competitor Z Corp. Two
other big players — Objet and Stratasys
— are planning to merge. Industry darling
MakerBot was named one of the top 20
startups in New York City and was one
of Fast Company’s 2012 Innovation by
Design awardees.
3D printers, machines that “print” three-
dimensional, CAD-rendered objects by layer-
ing precisely extruded bits of molten plastic,
resin, metal, and other materials, have
actually been around since 1985 — ironi-
cally the same year the standard-setting HP
LaserJet printer was introduced. The laser
printer has become as commonplace as the
personal computer. The same can’t
be said of the 3D printer. But that
could be about to change.
Until recently, 3D printers were
prohibitively expensive, less than user friend-
ly, and hidden behind the doors of factories
and R&D labs. But thanks to the innovative
efforts of makers and the open source
movement (which encourages freely sharing
designs and software among enthusiasts),
the price of the machines has reached the
consumer level. Now, a growing community
of makers, designers, and artists are embrac-
ing the technology and taking it in new
directions. And, you don’t have to own one
of the machines to use them. There are
service providers that will do the printing
for you. What you do with all this desktop
manufacturing power is up to you.
To borrow a line (paraphrased from Karl
Marx) from Wired Editor-in-Chief Chris
Anderson’s book, Makers: The New Industrial
Revolution, power belongs to those who con-
trol the means of production. The power to
manufacture a growing list of objects (toys,
jewelry, spare parts, even prosthetic limbs) is
now available to the masses — and the tech-
nology fits on your desktop.
“Global manufacturing can now work on
any scale,“ Anderson states, “from one to
millions. Customization and small batches
are no longer impossible — in fact, they’re
the future.”
He too sees revolution in the air: “The
third industrial revolution is best seen as the
combination of digital manufacturing and
personal manufacturing: the industrialization
of the maker movement.”
Looking at the growing number of
WRITTEN
BY
Stett
Holbrook
Printing the world on your desktop.
Stett Holbrook is a senior editor at MAKE.
consumer-level 3D printers on the market
has Anderson seeing 1983 all over again —
the so-called “Mac moment” when Apple
gave the masses a computer of their own:
the Apple II. Apple didn’t invent the com-
puter, they just democratized it, Anderson
notes. The same can be said of RepRap and
MakerBot, two pioneers in the affordable
consumer 3D printer market.
“A new class of users will produce a new
class of uses,” says Anderson. “I think it’s
historic.”
Will 3D printers become as common in
the home as DVD players and computers?
Wonky software and documentation are the
weak links now, but that will surely change.
For now, Anderson tells parents this
is the year to buy their kids a 3D printer
for Christmas.
“They’re not going to be quite sure what
to do with it, but their kids will figure it out.
That’s the way big things start.”
Dale Dougherty, founder and publisher
of MAKE, isn’t ready to pronounce the 3D
printer a revolution just yet.
“I think we’re at the very early stages,
with hackers and early adopters figuring out
what to do with it,” he says. “It’s opening
new avenues for people who are creative and
making things.”
But the transformative potential is plain to
see, Dougherty states. “It’s Wal-Mart in the
palm of you hand. That’s the crazy promise
of it.”
Part of the excitement that surrounds
3D printing is the belief that now the barrier
to entry has dropped; the genie is out of the
bottle. Where this goes, nobody knows.
“We live in a 3D world, but we currently
create things in 2D,” says Dougherty. What
will it mean to have the means to live and
create in the same dimension?
“We may go to a very different place.”
8
GETTING STARTED
11.
12. When Less is
MoreWRITTEN
BY
Tom Owad
The takeaway on milling
vs. 3D fabrication. GregoryHayes
DIY CNC
Going with milling doesn’t mean you have to give
up on self-replication or on making your own
machine. Patrick Hood-Daniel makes a scratch-
build CNC kit capable of making all of its custom
parts, just like the RepRap 3D printer and its
progeny. The frame is built of custom-cut ply-
wood. Everything else is standard hardware.
The aluminum angle, bolts, and screws are
available from any hardware store. The lead-
screws and anti-backlash nuts will probably
have to be mail-ordered from McMaster-Carr
and DumpsterCNC, but you can get by with
lesser hardware store parts in a pinch. The step-
per motors and stepper drivers are completely
generic and available from countless sources.
The spindle is an ordinary wood router. I use
a Porter-Cable 892.
As with the RepRap, the trick with Patrick’s
CNC router is getting a seed unit. Fortunately,
any CNC router that can handle a 2'×4' sheet of
plywood is capable of making the parts. Check
out your local hackerspace, TechShop, and even
the MAKE forums or the Home Shop Machinist,
and you’re likely to find somebody local with the
necessary equipment. (If you can’t find anybody
to cut the parts for you, Patrick sells several kits.)
To get the CAD and CAM files for the parts,
go to buildyourcnc.com/cnckit2.aspx and down-
load the plans for the CNC Routing Machine Kit
Version 1.3. Videos on the website explain how
to put everything together. The files are licensed
under the Creative Commons Attribution-
Noncommercial license, which means you can
make machines for yourself and for your friends,
but you can’t sell them commercially.
The CAM files are in the proprietary CamBam
format, but there’s a free version available, and
it can read and write DXF files. Most good CAM
software is very expensive, though, so if you don’t
already have a favorite, stick with CamBam. It can
do both CAD and CAM, and even the free version
is tremendously full-featured.
Another exciting new option is the MakerSlide
system, available from Inventables (inventables.
com). Perhaps the most significant weakness
in the BuildYourCNC design is decreased rigid-
ity and precision due to its wooden design.
MakerSlide integrates V-rails into what is other-
wise a standard aluminum extrusion system
(available from 80/20, Misumi, and others). By
building your machine out of a combination of
MakerSlides and stock aluminum extrusion,
it’s possible to create a more rigid, precise
machine than you could with wood.
there’s a lot of well-deserved Excitement
surrounding 3D printers, and for the avid DIYer much of it
is focused on their ability to “self-replicate” by making their
own parts. But is a 3D printer the right tool for you?
A 3D printer’s fabrication technique is additive — most
of them use a hot plastic extruder to “print” a plastic model.
This contrasts with subtractive fabrication tools, which start
with a solid block of material and use a cutter to remove
the excess. Subtractive fabrication is far more common than
additive, especially when working with metal and wood.
Lathes, mills, saws, and drills are all subtractive tools.
10
GETTING STARTED
13. A CNC milling machine or router is the
subtractive equivalent to the 3D printer.
For the hobbyist, milling is inferior to
printing in numerous ways:
»» Milling inherently causes waste, and
without some sort of dust control, that
waste gets flung throughout the room.
»» Milling is more dangerous — while
it’s possible that a plastic extruder might
overheat and catch fire, I’ve already had a
(minor) fire with my CNC router, and there’s
the added danger of a blade, spinning at
20,000rpm, sending bits of itself, or even
your workpiece, flying at you.
»» A mill or router is necessarily larger
and heavier, and consequently more expen-
sive and more difficult to move. It requires
a positioning system that can maintain
accuracy when encountering resistance,
and motors powerful enough to drive it.
»» Software preparation is also more
complex for milling. After drawing the
object you wish to make in a CAD or 3D
modeling program, it’s necessary to generate
toolpaths with CAM (computer-aided
manufacturing) software. This involves
specifying the dimensions and location
of the stock material, the dimensions and
characteristics of the end mill (cutter), and
speeds for the axes and spindle. The tools
to do this tend to be complex, and a bit
daunting for the first-time user.
From the user’s perspective, CNC milling
is a much more complex process than print-
ing is. CNC milling does, however, have a
significant advantage over 3D printing: the
technology is mature. Home 3D printers are
improving at a tremendous rate, but there’s
often still a lot of tinkering and experimenta-
tion involved in getting a good print.
What Do You
Want to Make?
If your interests tend toward larger and
more structural creations, go with milling.
Also consider that it’s cheaper to work in
wood than in plastic, and that you’re likely
to get substantially superior results.
On the other hand, making complex 3D
objects is a lot more complicated with CNC
milling than with a 3D printer. There are free
tools for doing 2.5D milling (the z-axis never
moves when the x- and y-axes are moving),
but CAM software for 3D milling is very
expensive and difficult to use.
Doing 3D work for 3D printing is much
easier. You can design your models in a free
program like SketchUp or Inventor Fusion,
and then export an STL file. Skeinforge soft-
ware converts the STL file automatically to
tool paths in G-code, then Printrun software
sends the G-code directly to your 3D printer.
With 3D printing, there’s no need to tweak
cutting paths, and no worry about the tool
crashing into your work.
If creating small 3D objects is your goal,
a 3D printer is the right choice.
One final tip: If you can’t decide whether
you want to do CNC milling or 3D printing,
start with milling. A 3D printer isn’t designed
to handle the stresses of milling, but a mill
can be easily retrofitted to support a plastic
extruder for printing.
Tom Owad is a Macintosh consultant in York, Pa., and editor
of Applefritter (applefritter.com). He is the author of Apple I
Replica Creation.
makezine.com 11
Additive vs. Subtractive Fabrication
14. Early in 2012, I picked up an Ulti-
maker, put it together, and joined the
growing ranks of 3D printing households.
It has been an adventure both filled with
reward and rife with frustration. The goal
of this article is to share what I’ve learned
while studying the DIY portion of the 3D
printing realm. The focus is on budgets
less than $2,500, with a goal of producing
parts out of various kinds of plastic.
Plastic parts are wonderful for prototyp-
ing. You can print that engine part in plastic,
make sure it fits perfectly, and then send the
3D model off to a company like Shapeways
to have your prototype turned into a produc-
tion piece in the metal of your choice (see
prototyping sidebar, right).
Most of the printers discussed here are
hackable. Their designs are amenable to
being modified and tuned to fit your needs.
The software used to drive these printers
is almost all open source, though there are
commercial slicers and modelers commonly
used in the 3D printing community.
Choosing a Printer
The 3D printers discussed here are of
the additive manufacturing variety. They
create parts by adding material together
and are the new hotness in the field of
manufacturing. So hot, in fact, that the
Obama administration created the National
Additive Manufacturing Innovation Institute
(NAMII) to foster innovation in this field.
There are three approaches to additive
manufacturing in common use: photopoly-
merization (using light to cure a liquid
material into solids of the desired shape),
granular materials binding (using lasers,
hot air, or other energy sources to fuse
layers of powder into the desired shape),
and the focus of this article, molten polymer
deposition (MPD; extruding molten material
in layers to build up the desired shape).
In short, MPD, aka fused deposition
modeling (FDM) or fused filament fabrica-
tion (FFF), describes pushing a filament of
solid plastic (or other materials like metal or
chocolate) into a hot-end that then extrudes
a thin stream of molten material in layers
to build up the desired piece.
Of these technologies, MPD is the most
common and most accessible (though
EMSL’s CandyFab definitely bears mention
because any printer that smells like crème
brûlée deserves a shout-out).
Focusing on MPD, there are a handful of
different styles of printers. The differentiation
is largely focused on exactly how the printer
moves the extruder to a particular point to
extrude the plastic.
Buying Options:
Turnkey, Kit, or DIY
With this information in hand, it’s time to
choose a printer! There are many turnkey
Printer
Getting
Started
with a
3DWRITTEN
BY
Bill
Bumgarner
Are you interested in buying one? Read this first.
12
GETTING STARTED
15. solutions that go well beyond our targeted
price range. And there are some that are
quite affordable. The Up 3D printer (same
as the Afinia H-Series, see page 44) is an
example of a “ready-to-print” device that
requires relatively little maintenance. The
MakerBot Replicator is similarly focused, but
is both more versatile and may require a bit
more maintenance.
A word of warning: when buying a turn-
key printer, be wary of “razor vs. blades”
business models. 3D printers exist that are
seemingly cheap, but which require proprie-
tary filament cartridges, where the consum-
able filament costs two to three times the
going market rates.
Moving to kits, both the Printrbot and
Ultimaker are examples of printers that
arrive as kits to be assembled by the end
user. Both feature great instructions, and
assembly is focused on mechanical con-
struction, since both include all electronics
pre-soldered and ready to go.
If you’re interested in the full DIY experi-
ence, both the RepRap printers and the
Rostock are entirely DIY. Both printers are
composed of a combination of 3D-printed
parts and various metal or wood bits, along
with some electronics. You can order pre-
printed parts kits from a variety of sources
(eBay included). Electronics and/or mechan-
ical packs are available, too. Generally, the
more cutting-edge the printer version, the
more parts you’ll need to source.
On pages 14–15, you’ll find an overview
of 3D printer anatomy, breaking down posi-
tioning systems, parts, and filament.
Software
The workflow for turning an idea into a
3D print can be summed up as model (or
capture), fixup, slice, and print. At each step,
there are multiple software solutions to
choose from.
»» Generating STL files STL files are the
lingua franca of the 3D printing world. If
an application can export a 3D model as
an STL file, then that STL file can be sliced
and printed. STL files can be generated
using a CAD program. SketchUp (sketchup.
com) is quite popular, as are a number of
open source 3D modelers. On Mac OS X,
Autodesk has released Inventor Fusion (labs.
autodesk.com/technologies/fusion), which
combines significant power with a relatively
easy-to-use package. Both are free.
Regardless of which modeler you choose,
expect the learning curve to be steep. The
key challenge is to translate what you want
to make into a set of primitive shapes and
elements in the modeler, such that the result
is possible to print. For example, any over-
hang shallower than about 45° cannot be
printed without support material (which con-
sumes material that will be tossed, increases
print time, and requires significant cleanup)
because the plastic will sag (the actual angle
varies from printer to printer and depends
on how you configure the slicer).
Alternatively, models can be generated
using a parametric CAD program, of which
OpenSCAD (openscad.org) is quite popular.
Instead of drawing what you desire, you
write code in a simple language that tells
the CAD system what you want.
Many of the mathematics-targeted pack-
ages like Mathematica can also produce
STL files.
Models can also be generated from
photographs or videos. Autodesk’s 123D
Catch (123dapp.com/catch) can process a
series of photos and turn them into a 3D
model (see page 92). With an iPhone or iPad,
you can take up to 40 pictures of a model
using 123D and then upload them to a server
that processes the images into a 3D model.
Note that Autodesk also released 123D
Make (123dapp.com/make), which slices
3D models into plans for constructing the
model out of cardboard or paper.
Often the model for what you want has
already been created by someone who
shared it online. The most popular repository
for pre-made models (and full-on projects)
(cont. on page 16)
plastic
prototyping
Bathsheba Grossman’s beautiful (and
incredibly popular) Klein Bottle Opener
is a perfect example of the prototype-
in-plastic, print-in-metal process that
allows for lots of cheap plastic drafts
before committing to the relatively
expensive process of procuring a fin-
ished metal part. On the left is a 3D print
of Grossman’s bottle opener. On the right
is the same model printed in stainless
steel and brass from Shapeways. You
could tune and print the model all day
long for very little money (less than $1 in
plastic per print) and then commit to the
metal version once fully satisfied with
geometry, fit, functionality, etc.
1. A draft print of the Klein Bottle
Opener still attached to the print bed
with the support visible at the bottom.
2. Removing the support.
3. The finished draft beside the
final piece.
BathshebaGrossman
1
2
3
makezine.com 13
Getting Started with a 3D Printer
16. 3D Positioning
System
Within the build volume, the printer must be able
to position the hot-end at any point to be able to
precisely extrude material within the layer being
printed. However, motion doesn’t have to be lim-
ited to the hot-end.
3D printers may move the hot-end or the print
bed in a number of different ways. Here are three
primary designs in use today.
Gantry This style of printer moves the
extruder in the x- and y-axes, while the bed
moves only in the z-axis. Both the Ultimaker
(Figure A) and the MakerBot Replicator (Figure
B) use a gantry to move the extruder. However,
the similarity ends there. The Replicator
integrates the extruder with the hot-end. The
Ultimaker uses a Bowden cable to separate the
two. The Replicator has a simpler design, where-
as the Ultimaker greatly decreases the weight of
the print head, allowing for greater print speeds
(at the cost of additional maintenance issues).
C
D
BA
Moving Bed Instead of moving the print head
in x-y, one of the axes is changed by moving the
print bed itself. Usually, a moving-bed printer
will move the print head in the z-axis. This is
a mechanically simpler design in that the x-
and y-axis are managed independently using
entirely linear motion. It has the disadvantage
of requiring the printer to move a significantly
heavier print bed, which could knock loose
the printed part. Slower, but simpler. Printrbot’s
models (Figure C) are examples of moving-bed
printers that trade print speed for low cost and
ease of maintenance.
Deltabot Industrial pick-and-place robots
typically use this design. A deltabot has three
control rods connected to the toolhead, and
these rods can be moved to control the position
of the head. Recently, Johann Rocholl adapted
this technology to 3D printing and created the
Rostock (Figure D). Hard to explain, it looks like
an alien probe is printing your favorite model.
The Rostock printers (so far) use a Bowden
setup to separate the hot-end from the extruder,
allowing for very quick and precise head posi-
tioning with relative mechanical simplicity. The
downside is increased complexity in the driver;
the hot-end positioning is not a linear set of
steps because of the non-linearity of the motion
between the vertical axis and the planar posi-
tioning of the hot-end.
14
GETTING STARTED 3D Printer Anatomy
17. 3D PRINTER PARTS
Print Bed This is the bed upon which the
printed part rests during production. Bed
temperatures can be ambient or heated. A non-
heated bed is often covered in painter’s tape,
as seen in the Ultimaker (Figure A), to which
the printed material adheres. Heated beds, as
seen in the Printrbot (Figure C), keep the part
warm during the print and prevent warping.
Depending on material, a heated bed will
maintain a temperature from 40°C to 110°C
throughout the print. Let it be noted that the
insides of a 3D printer are not a finger-friendly
zone (and I have the blisters to prove it)!
Extruder The extruder is not actually the
part that squirts out plastic. The extruder is
the part that feeds the plastic filament into the
hot-end. Extruders may be integrated into the
hot-end or they may be remote, typically push-
ing the filament through a stiff PTFE (Teflon)
tube (this is the Bowden cable) into the hot-end
(Figure E).
With a dual extruder (Figure F), you can print
two different materials or colors simultaneous-
ly. This versatility comes at a cost of complexity
(and price), as it requires an extra extruder, hot-
end, and all the bits in between. Some printers,
like the Ultimaker, can be upgraded from single
to multiple extruders. Others cannot.
Hot-End The hot-end is comprised of a heater,
a temperature sensor, and an extrusion end
through which the plastic filament is pushed
to deposit molten material (Figure G). Hot-ends
are often assembled within an aluminum block
or are configured in a barrel-type shape.
Note that the interface between the hot-end
and the extruder — be it directly integrated or
with a Bowden cable between the two — can be
exceptionally problematic on some printers or
on a printer that is not adjusted properly.
The hole in the nozzle may range in size,
typically between 0.2mm and 0.8mm. The
smaller the nozzle, the more detailed the print,
but the longer it takes.
Plastic Filament The filament is the con-
sumable of the printer. Like an inkjet squirts ink,
a 3D printer squirts melted filament.
Choosing filament
There are a handful of plastics that are compat-
ible with MPD-based printers. Each has their pros
and cons. Personally, I’ve chosen to print exclu-
sively with PLA because of its low toxicity and
general environmental friendliness.
Note that not all printers are compatible with
all materials. Some materials may really stress
a printer, as the temperature range for extrusion
may vary from 160°C to 305°C, depending on
material. A printer designed for PLA/ABS at a max
of 250°C may fail entirely at 300°C.
F
E G
With that in mind, the three most common
materials are PLA, ABS, and PVA. (Read more
about materials choices on page 22 and 24–25.)
ABS (acrylonitrile butadiene
styrene), the cheapest of the three, is typi-
cally extruded at between 215°C–250°C, and
does best with a heated bed to prevent warping.
ABS creates mild, generally tolerable fumes that
may be dangerous to sensitive people or cer-
tain pets (personally: fume hood, please!). ABS
can be quite versatile. It can be sanded, and by
mixing ABS with acetone, it can be easily glued
together or smoothed to a glass-like finish.
PLA (polylactic acid or polylactide)
is a biodegradable plastic typically made from
corn or potatoes. PLA filament is extruded at
a lower temperature of 160°C–220°C and does
not require a heated bed (painter’s tape is just
fine). When heated, PLA smells a bit like sweet,
toasted corn. PLA tends to be stiffer than ABS.
While PLA does not require a heated bed, it
can warp a bit during cooling, something that a
heated bed can greatly improve. Note that there
is a “flexible PLA” variant that, while trickier to
use, will result in objects that are squishy.
PVA (polyvinyl alcohol) is a specialty
plastic used on multiple-extruder printers to
print support material. PVA is typically extrud-
ed at 190°C, is water soluble, and can be used
to print support material in complex 3D prints
with lots of overhangs. PVA absorbs water like
a sponge, which can make for extremely prob-
lematic use in high-humidity environments.
Alternative Materials While MPD
printers are generally tuned to filament print-
ing, it’s not hard to adapt them to support other
materials. A common mod is to add a syringe-
style extruder that can handle materials from
chocolate to frosting to various kinds of clays.
makezine.com 15
Getting Started with a 3D Printer
18. Bill Bumgarner (friday.com/bbum) plays with high voltage, cooks
with fire and water, incubates microbes, hacks code, corrals
bugs with his son, and tries to make stuff do things that were
never intended.
Five 3D-printed
replacement parts for
my Ultimaker: a new
drive gear, the white
knob holding the gear
on, the Bowden tube
clamp (the white piece
at the top of the
extruder assembly),
the orange piece on
the left that holds
the extruder in place,
and a filament spool
holder (hidden).
is Thingiverse (thingiverse.com), where you
can find thousands of printable solutions for
everyday problems: phone cradles, earbud
holders, silverware dividers, quadrocopters
(yes, printable quadros), camera parts, game
pieces, printable 3D printers, etc. You name
it, there are likely at least a few good starting
points on Thingiverse.
»» Slice The slicer is what turns an STL
file into a series of commands — typically
G-code — that tell the printer where to
move the print head and when to extrude
plastic. While the printer’s driver software
is dictated by the printer, it’s actually a criti-
cal piece, as the printer software will often
model the motion dictated by the stream
of commands and will vary the acceleration
of the motors to eliminate print artifacts.
Slicing is a critical phase of the print.
It’s a careful balance between quality, speed,
and amount of material used. In many cases,
the choice of appropriate slicing parameters
is the difference between a successful print
and a pile of spaghetti.
»» Fixup During fixup, the STL to be print-
ed is often checked for errors (modelers
sometimes dump 3D descriptions that look
OK, but can’t translate directly to a 3D print
because the structure is invalid). The model
may be rotated or scaled, or it may be dupli-
cated to print multiple copies simultane-
ously. Often, slicing and fixup are contained
in the same program (sometimes with the
printer driver, too). Cura (wiki.ultimaker.
com/cura) and Slic3r (slic3r.org) combine
slicing with limited fixup, offering the ability
to rotate, scale, and print multiple differ-
ent STL files in a single print run. Netfabb
(netfabb.com), a commercial package,
has extensive mesh debugging and fixup
capabilities, along with basic layout tools
and a powerful slicer (see page 98).
Your First Print Job
Now that you have a background on all
things 3D printing and have bought or built
your first 3D printer, how do you go about
creating useful things (or creating useless,
but very cool, things)?
The first step is to know your tools. If
applicable, download and print all of the
upgrades and replacement parts for your
printer. For the Ultimaker, I've printed a
number of parts, some of which can be
seen in the image above.
Then download and print some useful
things from Thingiverse. Start with small
items — but not too small — like an earbud
holder, bottle opener, or a simple charac-
ter. Choose something where lots of folks
have uploaded photos of their own versions
(under the “Who’s Made It?” section). By
starting with a known, working model with
lots of examples, you can compare your
product to others and will have a much bet-
ter basis for fixing any problems and tuning
your workflow (likely the slicer, in particular)
to maximize print quality from your printer.
Each type of 3D printer has a particular
sound of a successful print. Learning it
can help you identify problems before they
become serious. I can be in a different room
and still tell when a print on my Ultimaker is
about to fail just because it starts to sound
out of whack.
Have a look at how various models are
constructed. The key challenge in creating
a 3D model is how the desired real-world
object can be broken down into a series of
commands — “draw a line and a curve,”
“extrude this surface,” “fillet that corner,”
“cut a hole here” — that you can use to cre-
ate the object. If you can find some models
on Thingiverse that are in a file format you
can edit, try your hand at editing them to
see if you can add a feature you desire.
Once you’re ready to start from scratch,
the first tool you’ll need is a set of calipers.
Digital slide calipers with 0.01mm accuracy
can be had for less than $20. Try creating
hangers or hooks that require a precise mea-
surement to fit snugly on an already-existing
object (like over a door), giving both a feel
for using the calipers and helping you dial
in how your printer maintains dimensions
throughout the printing process.
One unique challenge is learning to think
in a 3D-printer-compatible way. As men-
tioned, objects with structures that tilt at
more than 45° can’t be printed without
support material because the object will sag.
Note that bridges — linear spans of plastic
over a gap — work surprisingly well, but
print them so the first layer of the bridge is
on the inside of an object and won’t be seen.
While you can turn on “support material”
in most slicers, doing so often causes a lot
of extra material to be used, which is both
wasteful and requires a ton of post-print
cleanup. Note that, with a dual extruder
printer, you can print PLA or ABS on one
extruder while printing with water-soluble
PVA on the other extruder, making cleanup
a simple matter of soaking the piece in a
bucket overnight.
There is also a balance between creating
walls that are too thin and too thick. Thin
walls can lend elegance to an object, but
print too thin and that single or double layer
of linear plastic filament will fail quickly.
Naturally, this all becomes more intuitive
with practice and experience.
16
GETTING STARTED
19. 1. Replacement screw cap for
a large bottle of Jack Daniels
(thingiverse.com/thing:18194)
2. Case for a Teensy-based IR
Blaster (thingiverse.com/
thing:19315)
3. Ultimaker tool holder
(thingiverse.com/thing:18098)
4. Nautilus-shaped earrings
(thingiverse.com/thing:13450)
5. Aeroponic grow pods for a
winter herb/salad garden
(thingiverse.com/thing:32613)
6. Drawer divider for my son’s
screw sorting efforts
(thingiverse.com/thing:32614)
7. Fan shroud with spacer
(thingiverse.com/thing:16530)
8. Raspberry Pi case
(thingiverse.com/thing:25363)
Not shown:
»» Flashlight wall mounts
»» Fixes for our shower (rod caps
and washcloth holders)
»» iPad stand and iPhone stand
customized to application
»» Klein Bottle Opener (page 13)
»» Multiple octopodes
»» Earbud holders
»» Razor scraper
»» Wii sensor bar mounts
custom-fit to the top of our TV
»» 3D models from a friend’s
video game he built in school
»» Multiple items to fix doors and
switches in a friend’s house
»» Bottoms for our soap dispens-
ers so they don’t stain the
counter with rust
»» Feeder for our parakeet, Steve
»» Alien-faced tops for our lava
lamp collection
»» Various Ultimaker upgrade
parts on the extruder: gear,
nut handle, extruder lock,
Bowden lock, feet
NextSteps:WhattoMake
Once you start to get the hang of 3D printing, a world of possibilities opens up. I’ve given many of these things away as gifts. The material costs are very
cheap and the look of surprise when you say, “Yeah, I printed that. You want it? Different color? Nah, no problem, I can print as many as you want easily,”
is priceless! With my Ultimaker, I have printed the following handy bits, and many, many more.
1
4
7 8
2
5
6
3
makezine.com 17
Getting Started with a 3D Printer
20. GETTING STARTED
tk
compiled
BY
Gareth
Branwyn
InMoov
Robotic Arm
“Hairygael”
This is not a toy. The
functionality of this
arm is impressive.
thingiverse.com/hairygael
letsmakerobots.com/node/31978
Clutch: Printable
Purse
Kacie Hultgren
This purse is as cool
as it is compact.
thingiverse.com/thing:31234
Octopod Underwater
Salvage Vehicle
Sean Charlesworth
Until we can afford an amphibious
car this model is the next best thing.
opus5.complex88.com
Interviewed by MAKE: makezine.com/go/octopod
10
6-Stage Planetary Gear Set
Richard Horne aka “RichRap”
Planetary gears exemplify the
complexity you can achieve with
3D-printed objects and this set is a gem.
thingiverse.com/thing:25769
Coolest
3D-Printed
objects
21. Working Oscillating
Steam Engine
Charles Babbage
Not quite steampunk.
How about steam plastic?
thingiverse.com/thing:25624
Sue: The
Model T. Rex
Mike Moceri
Who needs Toys “R” Us
when you can print
your own dinosaurs?
thingiverse.com/thing:25779
Crania
Anatomica Filigre
Joshua Harker
If there’s a cooler
3D-printed object than
this we’re not aware of it.
joshharker.com
McCormick
D326 Tractor
Juan Esteban Paz
The detail on this
model is amazing.
thingiverse.com/thing:29869
3D-Printed Bikini
Mary Haung and Jenna Fizel
Looks cool, but not sure how cool it would
feel on a hot day at the beach.
shapeways.com/n12_bikini
continuumfashion.com
10 Coolest Objects
Puddle Jumper
Whirligig
“23Meteor”
Print, glue, snap, spin,
and watch it fly.
thingiverse.com/thing:22454
22. Desk Lamp
MakerBot Industries
Just snap this together, add
a bulb and a power source,
and you’ve got light.
thingiverse.com/thing:27062
AA-to-C Battery Adapter
“Zero_o”
If your device calls for a C battery and
all you’ve got is a AA, print out this
adapter and you’re back in business.
thingiverse.com/thing:8226
10Most Useful
3D-Printed
objects
Coin Sorting Tray
Xander Brown
Stack them and shake
them to sort.
thingiverse.com/thing:30631
Giant Keys Baby Toy
Nirav Patel
Print usable house key duplicates
for your visiting guests. Or scale the
key model up 200% and you’ve got a
a classic baby toy — giant plastic keys!
Another fun infant toy: Roll-A-Hedgehog.
thingiverse.com/thing:8925, thingiverse.com/thing:27487
compiled
BY
stett
holbrook
GETTING STARTED
23. Watering Can Spout
Mark Edmondson
Broken watering can spout?
Print one that’s built to last,
with ⅛" walls. You can’t buy
that at the store.
thingiverse.com/thing:9535
Padlock
and Key
Tomi Salo
Seriously.
thingiverse.com/thing:27205
Joystick
Mark Dufour
Keep the joy alive with
a new joystick.
thingiverse.com/thing:30008
Bag Clips
“Jinja”
A high-tech solution to
a low-tech problem:
stale chips.
thingiverse.com/thing:30664
13:30 Printable
Headphones
John Mabry
Because everybody loses
their headphones.
thingiverse.com/image:31392
Desktop
Network Socket
Ralph Bolton,
Perfect for connecting your
3D printer to your computer.
thingiverse.com/thing:30574
10 Most Useful Objects
24. Acrylonitrile
butadiene
styrene(ABS)
Polylactic acid
(Soft PLA)
Polylactic
acid
(PLA)
Polycarbonate
(PC)
Polyvinyl
alcohol
(PVA)
High-density poly-
ethylene(HDPE)
»»Nozzle temp: 215–250°C
»»Bed temp: 90–103°C
»»Print surface: Kapton tape
»»Environmental footprint:
Non-biodegradable, recycling code
#9, not normally allowed in mixed
recycling streams
»»Notes: Plastic used in Lego elements.
Most popular choice for 3D printing.
»»Nozzle temp: 200–220°C
»»Bed temp: Ambient
»»Print surface: Glass plate
»»Environmental footprint:
Biodegradable, recycling code #7, may
cause problems in mixed recycling streams
»»Notes: Flexible/rubbery, limited colors, and
limited sources. Likely to get easier to find
as 3D printing spreads.
»»Nozzle temp: 160–220°C
»»Bed temp: Ambient to 60°C
»»Print surface: Blue painter’s tape
»»Environmental footprint:
Biodegradable, recycling code #7, may
cause problems in mixed recycling streams
»»Notes: Available in hard and soft grades.
Gaining popularity fast, may overtake ABS
in the near future.
»»Nozzle temp: 280–305°C
»»Bed temp: 85°–95°C
»»Print surface: Kapton tape
»»Environmental footprint:
Non-biodegradable, recycling code #7
»»Notes: Requires high-temperature nozzle
design. Proof-of-concept stage.
»»Nozzle temp: 180–200°C
»»Bed temp: 50°C
»»Print surface: Blue painter’s tape
»»Environmental footprint:
Biodegradable, water soluble
»»Notes: Used as dissolvable support
material or for special applications.
Likely to see more use as multi-head
printers proliferate.
»»Nozzle temp: 225–230°C
»»Bed temp: Ambient
»»Print surface: Polypropylene sheet
»»Environmental footprint:
Non-biodegradable, recycling code #2,
resists almost all solvents and glues
»»Notes: Difficult to use due to shrink/
warp/curling problems. Rarely used.
Not all filament is created
equal. From rigid to rub-
bery, water-soluble to
solvent-proof, here’s the
skinny on the stringy stuff.
plastics for
3D Printing
GETTING STARTED
WRITTEN
BY
Sean
ragan
22
25. TORMACH MAKER PROFILE - BROOKLYN CUSTOM
www.tormach.com/brooklyn
Tormach PCNC mills are the ultimate
maker machines. Whether you’re a maker,
fabber, innovator, or builder, a Tormach
PCNC will enable your ideas with real CNC
capability and precision. Don’t let your
tools hold back your innovation –
visit www.tormach.com.
● Read the full story at:
Tormach PCNC 1100 Series 3
$8480
(plus shipping)
starting at:
Shown here with optional
stand, LCD, machine arm,
tool rack, and keyboard.
● Brooklyn Custom Metal Fabrication specializes
in custom fabrication for architects, artists, and
designers, with installations.
● Over the last decade, owner David Stanavich
has built a portfolio of high-end custom metal
drawer pulls, knobs, and architectural hardware
for a diverse commercial and residential
clientele. Digital design and CNC fabrication
techniques are essential to his products.
● “What drew me to Tormach was the affordability
of the PCNC mills,” relates Stanavich. On the
importance of the PCNC 1100 to his business:
“What’s happening now is that I’m making the
shift from a contract fabricator who has never
done the same job twice to small-run production
work that I am designing.”
●
● CAD CAM and Controller software programming
examples for a CNC machined prototype part.
● Stanavich is also using his PCNC 1100 to machine the
permanent molds for toys he uses as unique calling
cards for the shop.
www.tormach.com/brooklynRead the full story at:
● Stanavich is also using his PCNC 1100 to machine the
permanent molds for toys he uses as unique calling
cards for the shop.
26. Composites&
Ceramics
CourtesyofShapeways
There has never have been a better time to purchase
a desktop 3D printer. Nonetheless, they are still too expen-
sive for many users. If you can’t justify the cost of a personal
printer, you may be able to access one at a local hackerspace,
and there are many online 3D printing services to choose from,
including Ponoko, Shapeways, and i.materialise. These companies
use a variety of printing technologies to create physical objects
from your digital designs and can print in many other materials
besides extruded thermoplastic.
Stuart Deutsch is a DIYerwho writes a whole lot about tools at toolguyd.com.
ExtruderExtruder
WRITTEN
BY
Stuart
Deutsch
A guide to 3D printing materials
and methods.
Beyond
the
Powder bed and inkjet head printers use inkjet-type print
heads to deposit tiny droplets of liquid binder on top of a thin layer of
powder. Once the build platform lowers, a roller spreads and compacts
a fresh layer of powder across the surface. The final object is essentially
a stack of powder layers finely glued together. Dyed binders can be
used in certain machines to produce full-color display models (above).
Treatment with super glue and UV protectants can improve model
strength and reduce color fading.
The powder bed/inkjet system can also be used to create food-safe
ceramic models (right). The use of ceramic powder has become quite
popular with online printers who now offer a rainbow of single-color
options. After removal from the powder bed, raw ceramic parts undergo
a series of heat treatments to dry, fire, and glaze the model, improving
both strength and appearance.
Food-safe
ceramic, via
powder bed/inkjet
process, followed
by heat treatment.
Bowie the Bunny in fine mineral
powder, with color binders, via
powder bed/inkjet process.
24
GETTING STARTED
27. Plastics
metals
Stereolithography (SLA) is the original
3D printing process, in which a liquid plastic
resin is selectively hardened by exposure to
high-intensity light, often from a laser. After the
laser has drawn a 2D path along the surface,
the freshly polymerized model layer is lowered
into the surrounding resin bath. The laser traces
over the fresh surface, curing and joining the
resin to the previous layer. SLA produces prints
of exceptional smoothness.
Selective laser sintering (SLS) uses a
high-power laser to melt and fuse particles of
very fine plastic powder, often nylon. The laser
scans across a leveled and compacted powder
surface, and when each layer is completed,
the entire bed is lowered and fresh powder is
spread on top. As the laser works its way across
the new layer, molten powder particles in the
top surface fuse to each other and to the layer
below. The unfused powder acts as support
material, so SLS fabrication works well for
models that have thin sections, overhangs, or
complex geometries.
SLS is one of the most economical 3D print-
ing methods and is forgiving in terms of design
guidelines. Most vendors charge by volume
of powder consumed, so you can often save
money by “hollowing out” solid models and
printing them as shells. Most vendors also
charge for “trapped” powder, however, so mod-
els printed as shells will usually need to include
at least one small hole so that the powder can
be recovered when the print is done.
Direct metal laser sintering (DMLS)
uses a laser to directly fuse certain metal pow-
ders, such as titanium, in a fashion very similar
to SLS in plastics. Other specialty alloys can be
printed via DMLS, but high costs and stricter
design guidelines make the process less acces-
sible to beginners.
Direct metal printing uses a multi-
step method to create powder-based metallic
models, mainly from stainless steel. First, the
object is printed into a bed of very fine stainless
steel powder using the inkjet-binder process.
A carefully controlled heat treatment then
burns out the plastic binder and fuses the steel
particles together. Finally, the porous sintered
model is infused with molten bronze, which
UV-curing acrylic, via photopolymer
jetting.
Photopolymer jetting uses movable
heads, like an inkjet printer, to deposit droplets
of resin onto a build platform through a number
of very small jets. Once the droplets are in posi-
tion, a UV lamp moves across the platform to
harden the resin. A support material may be
printed surrounding the droplets and can be
removed, manually or by washing, once the
print is complete. Photopolymer jetting can
create very finely detailed models with smooth
surfaces and multiple materials — tinted, clear,
rigid, flexible, etc. — in a single print. It is not
widely available from 3D printing services, yet.
Fused nylon powder, via
selective laser sintering.
Bronze-infused stainless steel,
via direct metal printing.
wicks into the empty spaces and fills them.
The finished model is a kind of stainless steel
sponge filled with bronze, and can be given a
variety of surface treatments including plating
with gold or other metals.
Indirect printing methods create
positive or negative models that can be used
with conventional casting processes to create
metal parts. For instance, a sacrificial model
of a part can be 3D printed in a wax-like resin
using stereolithography, and then duplicated
in metal using the traditional lost-wax process.
Alternately, the powder bed/inkjet process can
be used to print molds in silica sand or other
traditional foundry media, which are then
used to cast metal parts in the normal way.
makezine.com 25
28. You’ve got a shiny new 3D printer
and a brilliant idea for your first
original design — now what?
Creating and printing your own unique
3D models requires three kinds of software.
First, there’s the 3D modeling program
used to design the shape of your creation.
Traditionally, the use of software to proto-
type physical objects has been referred to as
computer-aided design (CAD). Second, there’s
the computer-aided manufacturing (CAM)
program (commonly referred to as a slicer)
that converts your model into specific,
mechanical instructions for the printer robot.
Third, there’s the printer control software, or
client, that sends those instructions to the
printer at the right time, and provides a real-
time interface to the printer’s functions
and settings.
An overview of the CAD, CAM, and client software you need.
The3DPrinting
Software
Toolchain
WRITTEN
BY
Matt Mets
and
Matt
Griffin
3D Modeling/CAD
Software
Probably the most important software
choice you’ll make is what kind of modeling
program to use. There are many to choose
from, but they fall into four basic types: solid,
sculpting, parametric, and polygonal. Each
type will help you turn your idea into reality,
but one may be handier for, say, designing a
mechanical part, and another for sculpting
an action figure.
Solid modeling programs mainly use a
method called constructive solid geometry
(CSG), or similar techniques, to define com-
plex 3D shapes. Popular free solid modeling
programs include SketchUp, Autodesk 123D,
and Tinkercad (which runs entirely in your
web browser; read a tutorial on page 30). In
a solid modeling program, simple “primitive”
Beginner-
friendly
options:
CAD: Tinkercad
CAM: Slic3r
Client: Pronterface
Basic Boolean operations illustrated in Tinkercad. From back to front:
union, two possible differences, and intersection of concentric cube and sphere.
26
GETTING STARTED
29. shapes like boxes, cylinders, and pyramids
are manipulated to make more complex
shapes, often using Boolean operations. For
instance, a hollow box can be modeled by
drawing two overlapping cubes, one slightly
smaller than the other, and “subtracting”
the smaller from the larger.
Solid modeling programs have three big
advantages. First, the solid modeling design
process tends to be more intuitive than
other methods, and is often the easiest way
for beginners to get started. Second, the
interface usually makes it easy to set precise
measurements between objects, which is
handy for creating mechanical parts. Third,
the software handles most issues of mani-
fold integrity (“water-tightness”) for the user
automatically, despite the very large number
of operations that may go into shaping a
complex form.
Sculpting modeling programs, such as
ZBrush, Sculptris, and Mudbox use a more
freeform interface to slice, tug, twist, and
press the surface of a “blob” into the desired
shape. This makes them great for forming
organic surfaces such as faces or figures,
but less suitable for precise parts or flat sur-
faces. A great tool to start with is Sculptris,
little brother of the more expensive ZBrush.
(Many polygonal modeler applications such
as Blender, Modo, and Maya are beginning
to offer built-in sculpting tools as well.)
Parametric modeling programs, such as
OpenSCAD, are fairly unique; instead of
drawing shapes using a mouse, objects are
modeled by writing simple programs that
describe how to combine different shapes
Convolution,courtesyofNervousSystem
together. Because each dimension can be
specified precisely, this kind of tool is great
for quickly creating things such as techni-
cal parts like enclosures, gears, and other
mechanical objects.
On the other hand, parametric modelers
are also useful for producing generative
artwork. Tools such as Marius Watz’s
ModelBuilder and the Grasshopper editor
for Rhino are geared toward generating
unexpected, abstract forms by processing
other objects or data, or by pure math.
Designers like Nervous System use them to
create complex organic shapes that would
be practically impossible to model by hand.
Polygonal modeling programs represent
objects using thousands of tiny triangles
arrayed together in a mesh that defines
Pixologic’s
Sculptris allows
you to sculpt 3D
models like blobs
of clay. Tooltips
have names like
crease, inflate,
smooth, pinch,
and flatten.
Nervous System’s
“Convolution” bangle,
stainless steel, based
on simulated forces
in a cellular network.
makezine.com 27
The 3D Printing Software Toolchain
30. One type of modeling program may be handier
for, say, designing a mechanical part, and another
for sculpting an action figure.
Blender is a
free, open source
polygonal 3D
modeling program
that is extremely
powerful, but
challenging to
learn.
Laying out
a build plate
in ReplicatorG.
All of these
parts will print
simultaneously.
model surfaces. Notable examples include
Blender, 3ds Max, Maya, and Modo. They’re
great for 3D graphics and animation, but
require a bit of care when used for 3D
printing to make sure that meshes remain
manifold or water-tight, i.e. without missing
polygons or disconnected vertices. If a model
is not manifold, the slicer may not be able to
tell its inside from its outside, and may refuse
to process the model at all, or may produce
G-code containing serious errors.
Polygonal modeling programs offer a
tremendous amount of control, but are often
challenging to learn. Effective mesh modeling
requires mastering a number of sometimes
counterintuitive principles like working with
“quads” (instead of triangles or “n-gons”),
developing “edge-flow” to quickly manipulate
models with operations like edge-cutting and
loop-cutting, and using “subdivision” tools
to automatically smooth jagged surfaces
into more organic forms. Extensive tutorials
covering these topics in most of the major
programs can be found online. Watching
a few videos demonstrating best practices,
early on, can save a lot of trouble as your
skills develop.
Your CAD program will produce a 3D
model in some file format, commonly STL.
Depending on what software was used
to produce it and how complex it is, your
STL file may contain errors, such as holes
or reversed normals, that will need to be
corrected before it will print correctly. Your
CAM software may detect these errors
automatically, and some CAM packages,
notably Slic3r, include repair routines that
will try to automatically fix simple errors, but
you cannot always rely on these to produce
reasonable toolpaths. Models can also be
repaired manually using a polygonal modeler.
Another option is MeshLab, an advanced,
open source STL processing and editing tool
that is very powerful, but may be intimidating
to beginners.
As you become more experienced with
3D printing, you might want to consider
investing in a commercial STL analysis and
repair tool such as Netfabb Studio. While
their Basic suite works well for solving
manifold issues quickly and effectively, the
Professional version allows you to target
specific elements of the model for manipula-
tion, decimation, and re-meshing, as well as
offering stable Boolean operations to split up
a model into multiple parts. The Professional
package also offers built-in slicing utilities
and drivers for operating some of the printers
directly, in some cases entirely replacing the
CAM/client pipeline.
Slicing/CAM Software
Once you have a manifold, error-free 3D
model, it must be converted into specific
toolpath instructions that tell the printer
where to move the hot end, when to move it,
and whether or not to extrude plastic along
the way. This process is sometimes referred
to as skeining or slicing. The standard format
for these instructions is a simple program-
ming language called G-code.
Historically, most printers have relied
on the open source Skeinforge engine for
preparing G-code from model files. Recently,
however, alternative slicing programs have
started appearing, most notably Slic3r,
which has been slowly overtaking Skeinforge
as the tool of choice.
A fairly recent closed-source utility called
KISSlicer, available in free and pro versions,
boasts some unique features, such as adap-
tive sparse infill (using more material near
the edges of a print and less in the center)
and multi-extruder support (using different
28
GETTING STARTED
31. Matt Mets is a makerwho uses electronics to create playful
objects that teach and inspire. Matt Griffin is the former
community manager at MakerBot, and is currently director of
community support and evangelism at Adafruit. He is writing
a MAKE book on design for 3D printing.
material for separate models, support
structures, and infill).
Finally, there's the new open source
slicing engine from MakerBot called
Miracle-Grue. As of this writing, it’s still
a work-in-progress, and not yet as mature
as Slic3r. It can be tricky to set up as a
freestanding application, but for coders
it’s really fun to play with.
Though most slicing engines can be run
as standalone programs, they’re commonly
built into integrated printer client packages
like ReplicatorG and Pronterface, so that
the same interface used to control the
printer can also be used to load and slice
3D models directly.
Note that, because a 3D print proceeds
layer-by-layer, the G-code to print a single
copy of a model is very different from the
G-code to print, say, four copies side-by-
side. If you want to print multiple parts per
job, one option is to simply lay out build
plates, as they’re called, directly in your 3D
modeling program. Another option, which
many find more convenient, is to lay out
build plates at the CAM level. Many slicing
engines, as well as integrated print environ-
ments like ReplicatorG, now provide tools
that allow easy scaling, repositioning, and
duplicating of CAD models before slicing.
These usually include a virtual environment
that shows how everything will fit into the
printer’s build chamber.
The slicing program will provide an inter-
face to adjust a number of variables related
to print speed and quality, such as layer
height, maximum print-head speed, infill
density, number of “shells” surrounding the
infill in each layer, and whether or not to
print support structures or “rafts.” Many
slicing engines have built-in profiles to get
you started, and most work well right out
of the box. Eventually, you’ll probably want
to experiment with these settings to suit
specific geometry or design challenges.
A handy practice when getting familiar
with slicer settings is to use a G-code visual-
izer to preview the print. A visualizer will
display the G-code commands as a series of
lines to represent the print-head toolpaths.
Scrolling through the layers can help you
learn how the slicing software tackles the
geometry of the original object, and will
reveal errors without using up any plastic.
Saving a series of G-code “drafts” of a figure
before actually running a print job is a great
way to gauge the effect of adjustments to
the various slicer settings. If you’re using
ReplicatorG, grab Pleasant 3D (Mac) or
GCode Viewer for Blender (cross-platform).
Both Pronterface and Repetier-Host have
built-in G-code viewing utilities.
Printer Control/
Client Software
Finally, there’s the client, which is basically
the printer’s real-time control panel. It
provides a software interface where you
can start, stop, or pause the printing process
at will, as well as set the temperature of
the extruder nozzle and the bed heater, if
present. The client will usually provide a
set of directional buttons that allow you to
incrementally move the print head in any
direction, which can be useful for bed level-
ing, calibration, and manual zeroing.
Historically, most machines relied on
ReplicatorG for machine control. Recently,
though, some alternatives have appeared,
and the amount of innovation is impressive.
The Printrun suite (featuring Pronterface)
and Repetier-Host are the most actively
developed and used. Some closed-source
printers, such as PP3DP’s Up, ship with cus-
tom client software that will usually include
a similar set of features.
In use, the essential function of the
client is to send toolpath instructions to
the printer over a wi-fi or USB connection.
Many printers are designed for operation in
“untethered” mode, in which the printer runs
on its own without a computer connection.
In untethered mode, no client program is
necessary; the printer automatically reads
and follows CAM instructions from an SD
card or USB thumb drive plugged into it
directly. Untethered printing can be useful,
for instance, for long-running prints during
which you may want to use your computer
elsewhere, or if you have more printers than
computers to run them. CAM information
is usually stored on removable media as
G-code instructions.
What next?
Your printed object will inspire improve-
ments and new ideas. The design pipeline
is really a cycle.
Now that you’ve got the basic workflow
down, you're ready to make anything!
Remember that 3D design and printing is an
iterative process, and that things rarely turn
out perfectly the first time around. If you
aren’t comfortable with any of the tools that
you tried, be sure to look at others — there’s
no reason to limit yourself to only one work-
flow. Experiment, tweak, observe, repeat! Try
to learn something from each mistake, and
always remember to have fun.
Visualizing G-code in Pleasant3D. The interface allows you to scroll
through the toolpaths one layer at a time.
makezine.com 29
The 3D Printing Software Toolchain
32. Three-dimensional printing offers
exciting applications, from art to
product design to rolling your
own replacement parts. But if you’re
new to this technology, the modeling soft-
ware and printer hardware can be intimidat-
ing. The learning curve is steep as you go
from concept to 3D model to printed object.
If only you could create a simple design
on your desktop, have it printed on a high-
end 3D printer, and delivered to your door.
Turns out, you can!
Tinkercad is an intuitive, browser-based
CAD modeling application that allows you
to quickly box out your design and hit a Print
button to send it off to 3D printing services
like Shapeways or Sculpteo. You can go from
concept to ready-to-print 3D model in min-
utes with little to no modeling experience.
To get you started and to show just how
easy it is to make something fun and unique,
I’ll walk you through the process for creating
a robot-head pencil topper. All you need is a
computer with an internet connection.
Use Tinkercad to design a robot-head pencil topper in minutes.
Design
for the Complete
Beginner
WRITTEN
BY
Blake
Maloof
1. Create a Tinkercad
account
Tinkercad costs $10 a month, but you can
sign up for a 15-day free trial at tinkercad.
com. Then click the Design a New Thing
button. Tinkercad will give your new thing
a name; change it by clicking the gear icon.
2. Make a hole
To make the hole that your pencil will fit
into, measure the width and height of a pen-
cil eraser. It’s about 8mm at the widest, so
click and drag a cylinder onto the Tinkercad
“workplane” (the blue grid) and scale it to
10mm diameter. This will provide 1mm of
wiggle room all around the pencil. To scale
something in Tinkercad, first select it by
clicking on it, then click on one of the small
white rectangles situated around the object
— these are called handles — and drag it.
To scale the shape uniformly in all directions,
hold the Shift key while dragging.
The height of the eraser is about 20mm,
so stretch the cylinder to 20mm using the
Understanding
Positive &
Negative Space
To utilize Tinkercad to its full potential
you need to understand the concepts
of positive and negative space. For
example, you can place a box, which
represents a solid, positive shape, and
you can also place a hole, a negative
shape. Holes remove any solid material
within their shape.
This will become very important
when you submit your model for print-
ing. Because the cost depends on the
solid volume of the print, you’ll want to
make the object as hollow as you can.
30
GETTING STARTED
3D
33. D
3D Design for the Complete Beginner
tips
If you make a mistake, use the
Undo button or type Ctrl-Z (Cmd-Z
on a Mac) to undo the step.
It’s often useful to view your
design from a different angle. To
do this, click on the arrow buttons
in the upper left corner of the win-
dow. The + and – buttons are for
zooming and unzooming.
A
B C
top handle. Don’t use the Shift key here,
because you want to stretch only the height,
not the diameter.
Now, with the cylinder selected, click
the Hole icon (next to Color in the upper
right corner of the workplane window). This
will turn the cylinder into negative space,
indicated by gray stripes (Figure A).
3. Make the robot head
Make a box for the robot head. You can
make it any size, as long as the width and
depth will encompass the negative cylinder
with at least 1mm–2mm on each side. I
made a head that was 34mm wide × 24mm
deep × 24mm high, and placed it alongside
the hole (Figure B).
4. Align the head
and the hole
To make sure the hole is in the center of
the box, use the handy Align tool. Select
both the box and the hole cylinder by shift-
clicking each object, or click-dragging your
cursor to create a Select box around them,
or using Ctrl-A (Cmd-A on a Mac) on your
keyboard to select everything. Look for the
small gray circle with 3 white lines next to
your selection. Click it and select Align.
Tinkercad will highlight both objects
with alignment dots. Click the 2 middle dots
on the horizontal plane to position the hole
in the center of the box (Figure C). Don’t
center the hole on the vertical axis, because
that would seal the hole entirely inside the
box, which would make it impossible to fit
a pencil in the bottom.
5. Combine the head and
hole into a single object
Select both pieces and combine them into
a single object by clicking the Group icon
(Figure D).
makezine.com 31
34. 6. Make the head hollow
Make a hole box to put inside the robot’s
head. Size it 4mm smaller than the head in
both width and depth. This will leave the
head with 2mm-thick walls.
We don’t want the inside to be completely
hollow, as we need material at the bottom
to hold the pencil in place. So leave about
10mm of material at the base by making
your hole box 10mm shorter than the head.
In my case, the interior hole is 30mm wide
× 20mm deep × 14mm high (Figure E).
Use the Align tool to align the hole box
to the top of the robot head, by selecting the
topmost vertical dot (Figure F). Now select
just the hole box and use the arrow handle
to move it down 2mm (Figure G).
Select the hole box and the head box
again, and align them on the horizontal
plane (but again, don’t click the vertical align
buttons or else the hole box will move to the
top or bottom of the head box).
Select all the pieces and combine them
into a single object by clicking the Group
icon. You now have a nice 2mm border on
the top and sides of your hollow robot head.
7. Make your
robot’s mouth
Start by making a mouthpiece with a box
that’s smaller than the robot’s head.
To create the speaker-grill ridges, make
a series of even smaller hole boxes. You can
make one and create copies by clicking the
Copy button, or using copy-paste keyboard
commands, or clicking on the original and
holding the Option key and dragging off a
clone. Space them evenly apart and slide
NOTE
It’s important to know
the minimum wall
thickness of the mate-
rial you’ll be printing
in. For Shapeways’
standard plastic, the
minimum is 0.7mm,
so 2mm is plenty
of thickness.
X-RayVision
How can you verify that the hole box
is positioned correctly inside the head?
Here’s a little hack that provides a clearer
view inside your work.
Drag a box onto the workplane, turn
it into a hole and change its dimensions
until it’s larger than one side of your design.
Move the hole box so that it intersects your
design, select all the objects, then click
Group. Voilà! An interior view. Now, just
Undo your way back to where you left off.
E
F
G
32
GETTING STARTED
35. Blake Maloof is a game designer at Toys for Bob (makers of
Skylanders), and he sometimes writes about games for MAKE.
them into the mouth box.
Then, with only the hole boxes and the
mouth box selected, click Group. This will
apply the hole objects to the box, cutting out
the negative shapes, and turning them into
holes (Figures H and I).
Place the mouthpiece so it sticks out from
the front and bottom of the head box. (Don’t
push it in so deep that it intersects the pencil
hole.) Group the head and the mouthpiece
(Figure J).
8. Make your robot’s eyes
To make the eyes, drag 2 cylinders into the
workspace and make them holes. See those
curved arrows next to the cylinder? Click
and drag on them to rotate the cylinder into
the proper orientation (Figures K and L).
You need to raise the cylinders above the
workplane grid so you can place them above
the robot’s mouth. Use the black arrow han-
dle above the cylinder. Make the cylinders
different sizes to add a little personality. Be
sure the cylinders intersect with the head by
1mm. Select the cylinders and the head and
Group them (Figures M–O).
Tada! You now have a print-ready robot-
head pencil topper. Just hit the Print 3D
button, select a printing service, and order
yourself a new toy that you designed!
3D Design for the Complete Beginner
TIPS
By default, the workspace has a grid snap size
of 1mm, so when adjusting the space between
2 objects, you can use the arrow keys to move
the selected shape in 1mm increments.
Notice that a selected shape casts a shadow on
the blue gridded plan of your workspace. Use
this shadow to help you place your pieces into
their proper locations.H I
J
M
K
N
L
O
Check out the 3D model here:
makezine.com/go/topperbot
makezine.com 33
36. I’m incredibly lucky to have a job
that even two years ago, I never
would have imagined could exist.
I create 3D-printed jewelry and own a busi-
ness, Wearable Planter, all thanks to tools
and technology that have only been
available for a few years.
When I studied industrial design
at Georgia Tech from 2006–2010,
3D printing wasn’t a tool we used frequently.
We learned how to use 3D design programs
to mock up our projects, but we typically
used the resulting 3D files for product
rendering. Of course we had access to a
3D printer, but few people knew how to
use it, and the models it made were fragile
and expensive.
It wasn’t until my last semester of college
that I worked on a project that required 3D
printing. I handed the flash drive with my files
to the lab assistant, thinking it would never
work, and then watched with amazement as
my jewelry piece was printed layer by
layer exactly as I had intended.
Most people with the desire to
imagine and prototype a new prod-
uct don’t have immediate access to a profes-
sional-quality 3D printer. The good news is
that access to this technology is increasing
at an unprecedented rate.
When I design a new product or piece
of jewelry, I begin by creating sketches of
what it will look like. This part of the process
often takes the longest, as I am deciding
WRITTEN
BY
Colleen
Jordan
How and why to use 3D printing services
instead of a desktop machine.
on the form and feel of the object. I then
create a 3D model in SolidWorks, Rhino, or
whichever program I feel will allow me the
most creativity with my knowledge of the
software. After I’m done creating, I export
the file for printing, and I run checks with a
program like Netfabb Studio to make sure
it’s suitable for printing.
I then use 3D printing services like
Shapeways and Ponoko — both to prototype
and to create my final products.
When I use these services, I have to wait
two weeks or longer to see how my print
turned out. That can seem like a long time,
but it affords you a new perspective when
you’re forced to step away from your project
momentarily. Sometimes when I get my first
print back it’s exactly what I was expect-
ing, but often I see changes that need to be
made, whether in material choice or wall
thicknesses or other details.
3DPrinting
Without a
Printer
Portable Greenery
3D printed mini pots
from Wearable Planter.
34
GETTING STARTED
37. Clockwise from top:
A modified bike
pedal using pieces
of the original part,
3D-printed components,
and a laser-cut strap.
By Dan Emery, parts
from Ponoko. The
Rocket Espresso Cup,
3D-printed in ceramic
at Shapeways, by Craig
Kaplan. A Bit Cross
by Michiel Cornelissen,
3D-printed in stainless
steel at Shapeways.
The fantastic thing about using 3D print-
ing services is that I’m able to run a business
with tools that these companies have created
— to experiment with different materials and
new products inexpensively and with little
overhead. In the past, creating a prototype
could be costly, and production of even a
limited run of items could be thousands of
dollars. Also, I’m able to keep a limited inven-
tory on hand because I can restock it quickly.
This beats previous business models where
I might have needed to order a cargo con-
tainer full of pieces from overseas.
There are more advantages to using 3D
printing services than just running a busi-
ness. We’re coming into a new era where
mass customization is driving the production
of new objects. Access to these technologies
is now open to everyone, from beginners
making character models with Minecraft, to
doctors making personalized prosthetics.
For example, if you’d like to create your
own phone case or dishware, but don’t have
any 3D modeling experience, you can use
one of the many “creator” programs to make
your own customized item. Sculpteo and
the Society for Printable Geography recently
released an app to create iPhone cases with
the terrain of your favorite place. Shapeways
lets you create a sake set by playing around
with the shape of curves. These apps let you
create your own unique manufactured item
with minimal cost.
These companies have also begun to offer
training so you can learn to use their tools.
Ponoko offers online training classes, aimed
at beginners, that are free to watch and
participate in. Shapeways offers Skillshare
classes to teach introductory skills as well
as more complex, generative software.
Sending your work off to 3D printing
services has many advantages over using
equally popular desktop 3D printers. You
won’t have the upfront investment of $300
to $2,000, and you won’t spend time tinker-
ing with settings and hardware. You also can
create more complex and higher resolution
objects, as desktop 3D printing still doesn’t
match the quality of professional machines.
The technology does come with its dis-
advantages. As this is a rapidly growing field,
sometimes the demand is greater than the
capabilities of these companies, and unex-
pected delays in lead times arise. The quality
of materials isn’t always as good as a similar
mass-produced piece; 3D-printed plastic
parts, for example, can be more fragile
than a similar injection-molded piece. And,
importantly, not all of these materials are
food-safe or suitable for use in toys. While
these disadvantages may discourage you,
keep in mind that this amazing technology
wasn’t available to the public even five years
ago, and it’s developing very quickly.
Colleen Jordan is a designer and makerwho likes to create
objects that make life more interesting. She is the founder of
Wearable Planter (wearableplanter.com), and dreams of one
day having a pet dinosaur.
Ponoko;Shapeways;StephenMalik
If you have an
idea you’d like to
bring to life, there’s
no better time
to see what may
come from it.
3D Printing Without a Printer
makezine.com 35
38. Shapeways
shapeways.com
Shapeways caters to hobbyists and
designers, offering high-quality
prints in a wide range of materials,
including sterling silver, stainless
steel, and ceramic. They often have
the lowest prices, but with produc-
tion based in the Netherlands,
their stated shipping times of 2–3
weeks haven’t always been accu-
rate. They’re currently building a
production facility in New York to
meet demand.
Shapeways also offers a market-
place of designs where users can
open their own shops. Because
theirs is the most visible of these
services, having a shop on their
site is almost essential to getting
started selling your work. There’s
little upfront cost or commitment.
Ponoko
ponoko.com
Ponoko offers 3D printing in a
wide range of materials, from
plastics and ceramics to stainless
steel, gold plate, and Z Corp
plasters. They also offer laser
cutting and CNC routing in a huge
variety of materials, so you can
supplement your 3D-printed
project with other custom parts.
Prints from Ponoko are
generally very good quality
and reasonably priced, but their
pricing structure and system for
uploading models are confusing.
They do have a very good support
staff who will go above and beyond
to help you with any questions.
Ponoko operates several regional
production facilities, so printing
and shipping times vary.
Sculpteo
sculpteo.com
Material choices from this France-
based company include multi-
colored plastic, resin, ceramic, and
silver-plated plastic. The company
sells a sample kit of materials for
$5. They offer a preview and live
printability check that is very use-
ful, and automatic model repair
inside the web interface. They also
offer many “creator” apps for you to
begin making right away. Shipping
times vary from 1–30 days depend-
ing on the material (upload your
files for real-time estimates). Users
may also post their objects for sale
on the company’s website.
i.materialise
i.materialise.com
Another 3D printing service based
out of the Netherlands, they have
a very clear and easy-to-use inter-
face. Choose from more than 20
materials — titanium! — and print
objects as large as 6 feet. Objects
you create can be sold on the com-
pany’s gallery. Depending on your
location, objects ship in 1–5 days.
ZoomRP.com
zoomrp.com
Here’s a self-service website for
those who need plastic prototypes
in a hurry. The site, a division of
Solid Concepts, specializes in
same-day 3D printing and ship-
ping, with next-day and next-week
options too. It’s best suited for
customers who know their way
around CAD and 3D design.
Fast, but it costs more.
RedEye
redeyeondemand.com
RedEye, a division of 3D printing
giant Stratasys, serves the archi-
tectural, medical, engineering, and
aerospace industries with rapid
prototyping. The company prints
objects in various thermoplastics,
UV photopolymers, and resins.
Professional services, professional
prices. Shipping time ranges from
1–2 weeks.
service
providers
Compiled
BY
Colleen
Jordan
AND
Stett
holbrook
If you don’t have a 3D
printer, you can still
enjoy the benefits and
fun of turning a CAD file
into a physical object.
So it’s worth getting familiar
with the growing number of 3D
printing service providers. And
commercial providers can print
in a surprising range of materials
not available to the home printer
user. Even if you do own a print-
er, it’s great to be able to turn a
piece of art or technology you
prototyped in plastic into some-
thing enduring, like titanium or
stainless steel.
A Strandbeest mechanism by
Theo Jansen, printed in nylon
on an EOS selective laser
sintering (SLS) machine at
Shapeways headquarters in
New York. Dust it off and
it’s ready to walk.
36
GETTING STARTED
39. Books
Practical 3D Printers — The
Science and Art of 3D Printing
by Brian Evans, (Apress)
Expert tinkerer Brian Evans exam-
ines a number of different 3D
printers and the software and elec-
tronics that make them work. You’ll
learn how to calibrate, modify, and
print objects with your 3D printer.
Getting Started with MakerBot
by Bre Pettis, Anna Kaziunas France,
and MakerBlock, (O’Reilly/MAKE)
Get a hands-on introduction to the
world of personal fabrication with
the popular MakerBot 3D printer.
Not only will you learn how to
operate, upgrade, and optimize
your MakerBot, you’ll also get
guidelines on how to design and
print your own prototypes.
Read an excerpt on page 92.
Getting Started with RepRap
by Josef Průša, (O’Reilly/MAKE)
This book provides an overview
of RepRap, the 3D printer that’s the
basis of nearly every inexpensive
3D printer on the market. You’ll
learn what it can do, how to model
objects, and how to print the best
parts possible.
3D Design for 3D Printing
by Matthew Griffin (due out
September 2013; O’Reilly/MAKE)
One to keep an eye out for next
year, this book arms those entering
the passionate, fast-moving field of
3D design with practical 3D design
techniques, and provides insights
on designing for 3D printing
through interviews and practical,
hands-on examples.
3D Model
Repositories
Thingiverse
thingiverse.com
The Grand Bazaar of the 3D print-
ing world, Thingiverse is where the
DIY community shares 3D models,
laser-cut files, and PCB layouts of
their projects and printers.
Although under the owner-
ship of MakerBot, it remains an
important resource for hosting
and distributing files for many of
MakerBot’s competitors. Users
select from an array of Creative
Commons licenses, including the
option for public domain.
Blender 3D Model Repository
blender-models.com
Blender 3D Model Repository is
another free site that hosts shared
3D model files. It’s designed to be
a resource for Blender 3D model-
ing software users to download,
submit, and share their collective
knowledge. Along with models,
the site features user-submitted
Blender tutorials.
TurboSquid
turbosquid.com
TurboSquid is the leading paid
3D-model repository, with over
200,000 models to download.
News
3Ders.org
3D printing news, updated daily.
Makezine.com/3Dprinting
The latest 3D printing news,
reviews, and projects.
Physical
Destinations
Hackerspaces
hackerspaces.org/wiki/List_
of_Hacker_Spaces
Many hackerspaces have 3D
printers you can try out. Visit your
local hackerspace to learn what
equipment they have.
TechShop
techshop.org
TechShop is a membership-based
community workshop that has
3D printers available for members
to use. There are TechShop loca-
tions in California, North Carolina,
Michigan, Texas, and New York.
Brick &
Mortar
Stores
There are a few 3D printer stores
sprinkled across the U.S. If you find
yourself in one of these locales,
don't pass up the opportunity to
check these out!
Deezmaker
deezmaker.com
290 North Hill Ave. #5
Pasadena, Calif.
3D Creations
3dcreationsllc.com/store
161 W. Wisconsin Ave. #13
Milwaukee, Wisc.
MakerBot
makerbot.com/retail-store
298 Mulberry St.
New York, N.Y.
3D Printer
History
RepRap Family Tree
makezine.com/go/repraptree
Shows the development of the
RepRap 3D printer and its progeny.
Printers,
Filament
& Parts
Maker Shed
makershed.com
Afinia H-Series, MakerBot
Replicator 2, Printrbot LC & Jr.,
and Type A Series 1 — all reviewed
in this issue are available now.
Accessories too.
Printing Material Suppliers List
makezine.com/go/suppliers
A detailed directory of filament
vendors that includes location,
material specs, notes, and price.
UltiMachine
ultimachine.com
RAMPS electronics, PLA,
and ABS filament.
Faberdashery
faberdashery.co.uk
PLA filament in a variety of colors.
Printbl
printbl.com
High impact, impact-modified
and normal PLA.
ProtoParadigm
protoparadigm.com
Polyimide tape, polycarb, PLA,
and ABS.
QU-BD
qu-bd.com
High-quality yet affordable
extruders and heater pads.
3D printing
Resources
Adafruit’s 3D
Printing Skill Badge
adafruit.com/products/490
Declare to the world your
proficiency in the world
of 3D printing with this
embroidered skill badge
from Adafruit.
Sign up for the MAKE newsletter for exclusive 3D content and the latest deals from the Maker Shed. makezine.com
makezine.com 37
40. W
hat makes a great desktop 3D printer? In September,
MAKE invited me to put together a team of reviewers from the
3D printing community to advise MAKE’s readers about the state
of the art of DIY 3D printing.
Our team investigated 15 of the most promising fused-filament fabrication
(FFF) printers on the market — devices that melt and extrude plastic filament
to form solid objects, layer by layer, the most popular method of 3D printing.
We reached back to 2010 and into the future, previewing still-under-wraps
machines weeks before their launch at World Maker Faire New York. But first
we had the tough task of working out how to test and review these machines.
WRITTEN
BY
Matt
Griffin
Here’s how we torture-tested and rated 15 machines.
Buyer’s
Guide
Ultimate
3D Printer
Buyer’s
Guide
38
BUYER’S GUIDE
41. What makes a successful print?
Here are key questions from our
testing sheet. Our ratings indicate
that reviewers disagreed strongly (1)
or somewhat (2), were neutral (3), or
agreed somewhat (4) or strongly (5).
»» Print job horizontal surfaces were
“true”/no rippling/level.
»» Top layers of horizontal surfaces
“capped” successfully, without gaps.
»» Vertical surfaces were “true.”
»» Vertical surfaces lacked gaps.
»» Vertical surfaces lacked tool/layer-
completion seams.
»» Print remained fixed on plate.
»» Registration of layers was consis-
tently accurate.
»» Plastic was consistent color.
»» Overall, this machine was precise.
»» Layer height remained consistent.
»» Discernable detail resolution
approximated vertical resolution.
»» Layer-height resolution allowed
for organic curves and folds with
minimal stair-stepping.
»» Scale accuracy: size and shape
of resulting parts matched intention.
»» Machine could handle overhangs up
to 45° with minimal dropped loops.
»» Machine accurately reproduced
sharp corners.
»» Output had no ripples or wobbles.
»» Surfaces were clean and smooth
in places the artist intended.
»» Machine was fast.
»» Machine interface was reliable.
»» Rarely had to retry failed parts.
»» Could hit print and the machine
would work without babysitting.
»» Print could be removed easily
with tools or by hand.
»» Post processing (cleanup, support/
raft removal) was quick and easy.
performance
GregoryHayes
During the 3D
Print Shop week-
end, the MAKE
offices became
a vortex of 3D
printers and the
geeks who love
them.
makezine.com 39
Ratings