7. Placement.pdf

Placement is the process of determining the locations of circuit devices on a die surface. It is an important stage in the VLSI design flow, because it affects routability, performance, heat distribution, and to a less extent, power consumption of a design. Traditionally, it is applied after the logic synthesis stage and before the routing stage. Since the advent of deep submicron process technology around the mid-1990s, interconnect delay, which is largely determined by placement, has become the dominating component of circuit delay. As a result, placement information is essential, even in early design stages, to achieve better circuit performance. In recent years, placement techniques have been integrated into the logic synthesis stage to perform physical synthesis and into the architecture design stage to perform physical-aware architecture design

Recommended
More Related Content
What's hot
What's hot (20)
Similar to 7. Placement.pdf
Similar to 7. Placement.pdf (20)
More from Ahmed Abdelazeem
More from Ahmed Abdelazeem (12)
Recently uploaded
Recently uploaded (20)
7. Placement.pdf
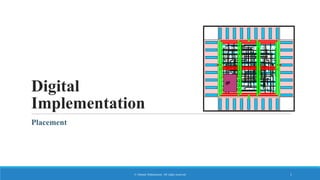
- 1. IP Digital Implementation Placement © Ahmed Abdelazeem. All rights reserved 1
- 2. Contents After completing this unit, you should be able to: ❑ Apply pre-placement setup to control: • Design and flow requirements • Congestion, timing, area, and power QoR. ❑ Perform placement and related optimizations ❑ Analyze congestion, timing, power, and area 2/28/2024 2 © Ahmed Abdelazeem. All rights reserved
- 3. Facilities Building Hours Restrooms Meals Messages Smoking Recycling Phones Emergency EXIT Please turn off cell phones and pagers 3 © Ahmed Abdelazeem. All rights reserved 2/28/2024
- 4. Workshop Goal Use IC Compiler II to perform placement, DFT, CTS, routing and optimization, achieving timing closure for designs with moderate to high design challenges. 4 © Ahmed Abdelazeem. All rights reserved 2/28/2024
- 5. Target Audience ASIC, back-end or layout designers with experience in standard cell-based automatic Place&Route. 5 © Ahmed Abdelazeem. All rights reserved 2/28/2024
- 6. High-Level IC Compiler Flow Gate-level netlist Synthesis Design & Time Setup Floorplan Definition Placement & Optimization CTS & Optimization Routing & Optimization Signoff IC Compiler II 6 2/28/2024 © Ahmed Abdelazeem. All rights reserved ✓ ✓
- 7. Key Steps of the Placement Phase The “placement phase” involves several key steps: ❑ Placement readiness check ❑ One-time design and flow requirement setup ❑ Congestion, timing, power, and area QoR setup, as needed ❑ Placement and optimization 2/28/2024 © Ahmed Abdelazeem. All rights reserved 7 Design Setup Pre-placement Check Design and flow requirement setup QoR setup Placement and Optimization CTS Placement
- 8. Design Status Prior to Placement ❑ Design Planning is completed ❑ Second-pass synthesis is completed ❑ Second-Pass Data Setup is completed ❑ “Floorplanned cell” is generated- ready for placement • Core and periphery areas defined • Macros are placed and “fixed” • Placement blockages defined • Power grid pre-routed • Standard cell placement is discarded 2/28/2024 © Ahmed Abdelazeem. All rights reserved 8 Pre-placement Check
- 9. Pre-placement Check ❑ IC Compiler II offers a large number of checks that can be performed at various stages ❑ Use get_design_checks to list all available checks ❑ Before placing the design, run the following: ❑ Performs various checks on floorplan objects such as layers, bounds, placement blockages, cell instances, macros, site rows, etc., to ensure correctness ❑ Example: 2/28/2024 © Ahmed Abdelazeem. All rights reserved 9 Pre-placement Check check_design -checks pre_placement_stage check_design -checks physical_constraints Information: The layer 'M9' does not contain any PG shapes. (DCHK-104) Warning: Keepout margin Of cell I_PCI_TOP/PCI_FIFO_RAM_8 lies partially or completely outside the bounds of the core. (DCHK-085)
- 10. What Is Placement? ❑ Placement is the process of placing the standard cells and blocks in a floorplanned design and giving an exact location. • Placement does not just place the standard cell available in the synthesized netlist, it also optimizes the design ❑ When a design is read in, the tool creates rows for the standard cells to be placed into by the placer. ❑ A row is a multiple of a SITE that is defined in the LEF file. ❑ There can be several types of rows, for example, standard cell rows and IO rows 2/28/2024 © Ahmed Abdelazeem. All rights reserved 10
- 11. Placement Problem 2/28/2024 © Ahmed Abdelazeem. All rights reserved 11 The goal of placement is to minimize the total area and interconnect cost. Circuit placement becomes very critical in 90nm and below technologies. The quality of the attainable routing is highly determined by the placement.
- 12. Input Information for Placement 2/28/2024 © Ahmed Abdelazeem. All rights reserved 12
- 13. Physical Libraries 2/28/2024 © Ahmed Abdelazeem. All rights reserved 13
- 14. CEL vs Frame Standard Cell 2/28/2024 © Ahmed Abdelazeem. All rights reserved 14 Metal Pins A B Y NAND_1 GND VDD Abstract View Layout View A B VDD GND Y • A standard cell library also contains a corresponding abstract view for each layout view • Abstract views contain only the minimal data needed for placement
- 15. Global and Detailed Placement ❑ In general, most tools partition the placement task into two stages: 2/28/2024 © Ahmed Abdelazeem. All rights reserved 15 Reading Gate-Level Netlists from synthesis Global Placement Detailed Placement Placement optimization
- 16. Global Placement 2/28/2024 © Ahmed Abdelazeem. All rights reserved 16 Bad Placement Good Placement Standard cells must be in groups in such a way that the number of connections between groups is minimum This issue is solved through circuit partitioning As a basic criterion, the minimum is taken among group connections
- 17. Detailed Placement 2/28/2024 © Ahmed Abdelazeem. All rights reserved 17 Acceptable Congestion? Yes Legalization of Cell Placement Modification of Physical Constraints and/or Floorplan No Placement Optimization Coarse Placement Detailed Placement As a rule, detailed placement is solved in two stages: ▪ Coarse placement ▪ Legalization of cell placement
- 18. Coarse Placement 2/28/2024 © Ahmed Abdelazeem. All rights reserved 18 All the cells are placed in the approximate locations, but they are not legally placed No logic optimization is done Coarse Placement • In a coarse placement all the cells are placed in the approximate locations, but they are not legally placed. • Cells overlap and are not on-grid. • Large cells (e.g. RAMs) form large placement blockages for other smaller leaf cells. • Power routing forms routing layer blockages that will also be checked and avoided if specified. • No logic optimization is done create_placement
- 19. Legalize Cell Placement 2/28/2024 © Ahmed Abdelazeem. All rights reserved 19 Legal placement of cells is not required for analyzing routing congestion at an early stage Ensure that legal placement is done before saving the design. legalize_placement
- 20. Placement and Optimization 2/28/2024 © Ahmed Abdelazeem. All rights reserved 20 Placement and Optimization place_opt Performs standard cell placement and optimization Design Setup Pre-placement Check Design and flow requirement setup QoR setup Placement and Optimization CTS Placement place_opt Coarse Placement AHFS Physical Optimization Placement Legalization
- 21. Placement and Logic Optimization: place_opt 2/28/2024 © Ahmed Abdelazeem. All rights reserved 21 place_opt Performs placement+optimization and more -list_only List the 5 optimization stages -from Specify which major stage to start with (default is initial_place) -to Specify which major stage to end with (default is final_opto) ❑ By default, place_opt runs all five stages ❑ Use the -from / -to controls for exploration and debugging • Allows you to verify quickly whether each stage will be successful ❑ Various aspects can be controlled via app options Placement and Optimization
- 22. The Five Stages of place_opt 1. Initial Coarse Placement (initial_place) • Performs buffering-aware timing-driven placement and scan chain optimization 2. HFN buffering (initial_drc) • Removes buffer trees, performs high fanout synthesis and logic DRC fixing 3. Initial Optimization (initial_opto) • Performs quick timing optimization 4. Final Placement (final_place ) • Performs incremental and final timing-driven and global-route based congestion-driven placement, as well as scan optimization 5. Final Optimization (final_opto ) • Performs final full-scale optimization and legalizes the design 2/28/2024 © Ahmed Abdelazeem. All rights reserved 22 Placement and Optimization
- 23. Recommended place_opt Exploration Flow ❑ Initially, perform design/flow setup and run all five stages of place_opt ❑ Analyze congestion “at initial_place, and initial_drc” • If not acceptable, return to unplaced design • Apply congestion-focused setup steps, re-run place opt ❑ Analyze timing, power, and area (once congestion is acceptable) “at initial_opt, and finial_opt” • If not acceptable, return to initial design • Apply timing-, power- and/or area-focused setup steps, and re-run place_opt ❑ Execute and analyze after intermediate stages to speed up the QoR iterations 2/28/2024 © Ahmed Abdelazeem. All rights reserved 23 Placement and Optimization
- 24. Timing-Driven Placement (1) 2/28/2024 © Ahmed Abdelazeem. All rights reserved 24 Virtual Route ❑ All steps including placement are timing-driven ❑ Timing-driven placement tries to place critical path cells close together to reduce net RCs and to meet setup timing ❑ RCs are based on Virtual Route (VR)
- 25. Timing-Driven Placement (2) 2/28/2024 © Ahmed Abdelazeem. All rights reserved 25 ❑ Timing-driven placement based on Virtual Route • Tries to place cells along timing-critical paths close together to reduce net RCs and meet setup timing • Net RCs are based on Virtual Routing (VR) estimates
- 26. Timing-Driven Placement (3) 2/28/2024 © Ahmed Abdelazeem. All rights reserved 26 BUF2B VDD VSS MUX21 VDD VSS INV1 VDD VSS NOR3 VDD VSS XOR2 VDD VSS INV1 VDD VSS NA21 VDD VSS INV1 VSS VDD AND2 VSS VDD DFFSR1 VSS VDD AOI221 VSS VDD JKFF VSS VDD Placement Rows Timing-critical cells placed together ❑ Standard cells are placed in “placement rows” ❑ Cells in a timing-critical path are placed close together to reduce routing-related delays → Timing-Driven Placement
- 27. Logic Restructuring for Area and Timing 2/28/2024 © Ahmed Abdelazeem. All rights reserved 27 Area restructuring finds functionally equivalent cones of logic that improve area/leakage without degrading timing Timing-based restructuring solutions are evaluated in parallel with other transforms like sizing and buffering, to find the best overall timing solution
- 28. The Logic Synthesis Netlist is Not Optimal 2/28/2024 © Ahmed Abdelazeem. All rights reserved 28 How does synthesis determine Rnet and Cnet for timing analysis? ◼ Logic Synthesis is timing-driven ◼ Synthesis netlist typically meets timing ◼ Remember: timing = net + cell delay ◼ Net and cell delays depend on parasitic wire R/C's Synthesis Netlist d[0] d[1] d[2] scan_in1 scan_in2 scan_in3 scan_en dout_1 dout_2 dout_3 scan_out1 scan_out2 scan_out3 FF FF FF FF FF FF FF FF FF clock resetn
- 29. Estimating Rnet and Cnet Before Placement 2/28/2024 © Ahmed Abdelazeem. All rights reserved 29 Net Fanout Resistance KW Capacitance pF 1 0.0498 0.045 2 0.1295 0.0812 3 0.2092 0.1312 4 0.2888 0.1811 Statistically Based Wire Load Model (WLM) Synthesis Netlist Under buffered Over buffered
- 30. Congestion-driven Placement 2/28/2024 © Ahmed Abdelazeem. All rights reserved 30 Global Bin Global Bin Edge Routing demand = 3 Assume routing supply is 1, overflow = 3 - 1 = 2 . Overflow on each edge = Routing Demand - Routing Supply 0 (otherwise) Total Overflow = overflow all edges S ❑ Congestion occurs when the number of required routing tracks exceeds the number of available tracks. • Congestion can be estimated from the results of a quick global route. • Global bins with routing overflow can be identified.
- 31. Congestion-driven Placement: Routing resource 2/28/2024 © Ahmed Abdelazeem. All rights reserved 31 Is there a limit to the number of nets that can be routed through this small area? Std cell/macro pins Yes! When you approach or exceed this limit, this area is said to be congested.
- 32. Congestion-Driven Restructuring (CDR) ❑ Designs with complex AOI/OAI logic structures can cause many net crossings, thereby creating substantial core congestion hotspots ❑ CDR identifies tangled nets that drive input pins of commutative and associative logic trees ((N)AND/OR/XOR trees), reorders and places them more optimally • Alleviates congestion • Reduces wire length 2/28/2024 © Ahmed Abdelazeem. All rights reserved 32
- 33. Placement Issues with Congestion 2/28/2024 © Ahmed Abdelazeem. All rights reserved 33 ◼ If congestion is not too severe, the actual route can be detoured around the congested area ◼ However, the detoured nets will have worse RC delay compared to the VR estimates In highly congested areas, delay estimates during placement will be optimistic – NOT GOOD. Congestion hot spot Congestion Map ≥2 ≥3 ≥4 ≥5 ≥6 ≥7 Detour
- 34. Not Routable on Severely Congested Design 2/28/2024 © Ahmed Abdelazeem. All rights reserved 34 Severe congestion can cause a design to be un-routable – REALLY NOT GOOD! It is important to minimize or eliminate congestion before continuing.
- 35. Is the Design Congested? 2/28/2024 © Ahmed Abdelazeem. All rights reserved 35 Placement Exploration Acceptable Congestion? Yes Fast Placement Modify command options, physical constraints and/or floorplan No Congestion map (heat map)
- 36. Understanding the Congestion Calculation 2/28/2024 © Ahmed Abdelazeem. All rights reserved 36 Congestion map (heat map) Routing tracks Global routing grid 29/28 28/28 39/35 40/35 Nets crossing the global routing cell (GRC) edge per available routing tracks route_global -congestion_map_only true -effort_level medium
- 37. Global Route Congestion Map 2/28/2024 © Ahmed Abdelazeem. All rights reserved 37 route_global -congestion_map_only true -effort_level medium
- 38. Congestion Segment Labels ❑ The congestion segment labels have the format: • “Signed congestion overflow" / “total supply” • (both numbers are in units of routing tracks) ❑ For example, this segment: +4/20 • Capacity (supply): 20 tracks • Overflow: +4 tracks • Underflow (here -4) is counted as 0 2/28/2024 © Ahmed Abdelazeem. All rights reserved 38
- 39. Analyzing the Congestion Map 2/28/2024 © Ahmed Abdelazeem. All rights reserved 39 1. Review the congestion map. - Where are the potential hot spots? - Are these in expected areas? - Any blockages missing or needed? 2. Review cell placement in the GUI. - Are cells placed where they should not be? - Is cell density in a region causing a congestion hot spot? Use a global route congestion map for better correlation to post-route results
- 40. What does Congestion-Driven Placement do? 2/28/2024 © Ahmed Abdelazeem. All rights reserved 40 Spreads apart cells that contribute to high congestion. What happens to timing when the connected cells are moved apart? ≥2 ≥3 ≥4 ≥5 ≥6 ≥7
- 41. Effect of P/G Rails on Congestion 2/28/2024 © Ahmed Abdelazeem. All rights reserved 41 VDD VSS VDD VSS P/G rails Make sure that the standard cell P/G rails have been pre- routed prior to Auto-Place (during floorplanning) ◼ Standard cell P/G rails, usually M1, take up routing resources ◼ Congestion-driven placement optimizes placement and logic based on available routing resources
- 42. Congestion vs. Timing Driven Placement 2/28/2024 © Ahmed Abdelazeem. All rights reserved 42 ◼ Cells along timing critical paths can be spread apart to reduce congestion ◼ These paths may now violate timing TIMING CONGESTION Path delay increased ≥2 ≥3 ≥4 ≥5 ≥6 ≥7 Small timing violations can be resolved later by incremental logic optimization.
- 43. Global Route (GR) for Congestion Map 2/28/2024 © Ahmed Abdelazeem. All rights reserved 43 ❑ GR assigns nets to specific metal layers and global routing cells (GRCs) • The detailed router will follow GRCs path ❑ GR determines if each GRC along a path has enough wire tracks for assigned nets ❑ If not enough wire tracks, GR reassigns metal layers or GRC accordingly X Y virtual route global route congested area X Y Z GRC M1 M2 M3 wire tracks global route
- 44. Strategies to Fix Congestion 2/28/2024 © Ahmed Abdelazeem. All rights reserved 44 Trying each recommendation one-by-one, in sequence, then in combination if needed Placement Exploration Acceptable Congestion? Yes Coarse Placement Modifying physical constraints and/or floorplan No Acceptable Congestion? ❑ Rerunning coarse placement with congestion-driven option ❑ Modifying physical constraints • Adjusting cell density in congested areas • Adding/modifying blockages ❑ Modifying the floorplan • Moving macros • Changing core shape/size • Moving pins/pads • …
- 45. Fix Congestion: Modify Floorplan ❑ Top-level ports ◦ Changing to a different metal layer ◦ Spreading them out, re-ordering or moving to other sides ❑ Macro location or orientation ◦ Alignment of bus signal pins ◦ Increase of spacing between macros ❑ Core aspect ratio and size ◦ Making block taller to add more horizontal routing resource ◦ Increase of the block size to reduce overall congestion ❑ Power grid: Fixing any routed or non-preferred layers 2/28/2024 © Ahmed Abdelazeem. All rights reserved 45
- 46. Modifying Physical Constraints: Cell Density 2/28/2024 © Ahmed Abdelazeem. All rights reserved 46 set_congestion_options -max_util 0.4 -coordinate {x1 y1 x2 y2} ❑ Cell density can be up to 95% by default ◦ Density level can also be applied to a specific region ❑ Lower cell density in congested areas using – coordinate option x1 y1 x2 y2
- 47. Add or Modify Global Placement Blockages 2/28/2024 © Ahmed Abdelazeem. All rights reserved 47 RAM4 RAM2 RAM1 RAM3 RAM5 Hard blockage always created on all four sides Soft blockage created only for the channels between the macros or between the macro and the core boundary
- 48. Macro Blockage Margin (Padding) 2/28/2024 © Ahmed Abdelazeem. All rights reserved 48 RAM5 Pins are on left and right create_keepout_margin -type hard -outer {10 0 10 0} RAM5 {left bottom right top} hard or soft
- 49. Coordinate-based Placement Blockages 2/28/2024 © Ahmed Abdelazeem. All rights reserved 49 create_placement_blockage –name CORNER_1 -type hard -bbox {{214.750 588.260} {251.240 621.470}}
- 50. High Fanout Synthesis ❑ What is fanout? • Fanout is the number of gate inputs to which the output can be safely connected. i.e., The load that a gate output can drive. • The maximum fanout of an output measures its load-driving capability. Fanout belongs to the output. ❑ What are High Fanout Nets(HFN) ? • High Fanout Nets are the nets that drive more load. We set some max fanout limits by using the command set_max_fanout • The nets which have greater than these limitw are considered as High Fanout Nets (HFN). • Generally, clock nets, reset, scan, and enable nets are High Fanout Nets 2/28/2024 © Ahmed Abdelazeem. All rights reserved 50 Design and flow setup
- 51. What is High Fanout Net Synthesis? ❑ High Fanout Net Synthesis (HFNS) is the process of buffering the High Fanout Nets to balance the load. ❑ To balance the load HFNS is perfomed. ❑ Too many loads affect delay numbers and transition times, ❑ Because the load is directly proportional to the delay. ❑ Generally, at the placement step HFNS is performed. HFNS can also be performed at the synthesis step using a Design Compiler. But it’s not a good idea, Buffers will be removed during PD and again HFNS is performed. ❑ Care that should taken during HFNS: • Make sure an appropriate fanout limit is set using set_max_fanout command • Verify the SDC used for PD should not have set ideal network or set_dont_touch commands on High Fanout Nets. • Use ideal clock network – As clock nets are synthesized separately during the Clock Tree Synthesis (CTS) step, we set the clock network as an ideal network. 2/28/2024 © Ahmed Abdelazeem. All rights reserved 51 Design and flow setup
- 52. High Fanout Nets are NOT Minimized 2/28/2024 © Ahmed Abdelazeem. All rights reserved 52 ❑ Non-clock High Fanout Nets are signals that fan out to many gates ◦ Fanout >=10 ◦ Example: Reset, Data Select, Scan-Enable ❑ HFN trees can contain a large number of buffers which can significantly impact placement ❑ So, instead of minimizing HFN buffer trees using RC=0, Astro rebuilds the HFN trees based on more accurate RC estimates FF FF FF FF FF FF FF FF Fanout = 64 HFN
- 53. HFN Synthesis 2/28/2024 © Ahmed Abdelazeem. All rights reserved 53 ❑ High fanout buffer trees (Fanout >= 10) are first collapsed ❑ Larger HFNs (Fanout >= 40) are then synthesized based on estimated VR RCs from a quick "throw-away" placement Re-built (synthesized) HFN buffer tree based on quick placement HFN buffer tree from Synthesis Netlist Collapsed tree FF FF FF FF FF FF FF FF FF FF FF FF FF FF FF FF
- 54. High Fanout Synthesis (HFS) 2/28/2024 © Ahmed Abdelazeem. All rights reserved 54 Placement Logic Circuit High Fanout Synthesis buffers added The number of placed cells increases. It leads to the violation of initial placement. Design and flow setup
- 55. High Fanout Synthesis Port Punching ❑ High fanout synthesis I buffering occurs during the initial_drc stage ❑ By default, port punching may add or remove ports at hierarchy boundaries for HF synthesis ❑ To disable port punching on specified cells: 2/28/2024 © Ahmed Abdelazeem. All rights reserved 55 set_freeze_ports -data|-clock|-all [get_cells cellA] Design and flow setup
- 56. Remove Unwanted Ideal Networks ❑ Ideal Network constraints on high fanout nets (like set/reset, enable, select) prevent buffering during placement - probably not desired. • Can be found using ❑ Remove all ideal network constraints to allow HFN buffering during placement: 2/28/2024 © Ahmed Abdelazeem. All rights reserved 56 Enable D Q D Q D Q Ideal network remove_ideal_network -all report_ideal_network Design/flow setup D Q
- 57. Spare cells ❑ Spare cells generally consist of a group of standard cells mainly inverter, buffer, nand, nor, and, or, exor, mux, flip flops, and maybe some specially designed configurable spare cells. ❑ spare cells do not perform any logical operation in the design and act as filler cells only. ❑ The inputs of spare cells are tied to either VDD or VSS through the tie cell and the output is left floating. ❑ Input can not be left floating as a floating input will be prone to get affected by noise and this could result in unnecessary switching in ❑ space cells which lead to extra power dissipation 2/28/2024 © Ahmed Abdelazeem. All rights reserved 57 Design/flow setup
- 58. Use of Spare cells ❑ Spare cells enable us to modify/improve the functionality of a chip with minimal changes in the mask. ❑ We can use already placed spare cells from the nearby location and just need to modify the metal interconnect. ❑ There is no need to make any changes in the base layers. Using metal ECO we can modify the interconnect metal connection and make use of spare cells. ❑ We only need to change some metal masks, not the base layer masks. 2/28/2024 © Ahmed Abdelazeem. All rights reserved 58 Design/flow setup
- 59. Even Distribution of Spare Cells - Automatic ❑ Spare cells can be included in the synthesis netlist • Included in the top module and/or sub-design modules • With identifiable instance or cell names ❑ Spare cells will be placed along with regular standard cells and automatically spread out evenly • Controlled by place.coarse.enable_spare_cell_placement default ➢ When set to false, spare cells are still placed, but not spread out evenly ❑ Placement is hierarchy aware, so spare cells will be placed along with their intended hierarchy • During standard cell placement, all cells with the attribute is_spare_cell = true will be automatically placed along with the standard cells. • The placement is hierarchy-aware, meaning: Any spare cells that are at the top-level of the design netlist (top module), will be physically placed throughout the entire design; Spare cells in sub-module A, for example, will be limited to a rectangular area defined by the placement of the standard cells in module A. 2/28/2024 © Ahmed Abdelazeem. All rights reserved 59 true Design/flow setup
- 60. Spare Cells Identification- Automatic versus Manual ❑ All cells in the netlist have the attribute spare_cell_mode set to auto by default • Cells auto-identified as spare cells will have is_spare_cell set to true ❑ Cells are identified as spare cells if: • All inputs are floating or tied high or low • Register clock, set/reset and scan pins can be connected • All outputs are floating • Cell is not a physical-only cell • Physical-only: Contain only PG pins or no pins, for example, tap, end-cap, filler cells ❑ To manually mark cells as spare cells: 2/28/2024 © Ahmed Abdelazeem. All rights reserved 60 Design/flow setup set_attribute [get_flat_cells *SPARE_REG*] spare_cell_mode true
- 61. Add Spare Cells Not Already in the Netlist ❑ If your design doesn't Contain spare cells already, or you want to add additional, spare cells, you can add spare cells after place_opt as well. 2/28/2024 © Ahmed Abdelazeem. All rights reserved 61 Original Netlist place_opt .... # spare cells from design netlist are # placed and spread during place_opt add_spare_cells -cells_name SPARE_PREFIX_NAME -lib_cell {NOR2 NAND2} -num_instarnces 20 legalize_placement -incremental set_placement_status legalize_only [get_flat_cells -filter is_spare_cell] CTS and Routing 20 sets of list cells are spread evenly across the core area, Cells in this list(NAND, NOR) will be placed close together Design/flow setup
- 62. Library Cell Purpose ❑ Every library cell can be restricted to certain optimization tasks using a library cell purpose (attribute: valid_purposes) ❑ The following lib cell purposes are set by default: • power • hold • cts • optimization ❑ If the original cells in the liberty library (used to create the CLIB) have dont_use=true, then no purposes are set 2/28/2024 © Ahmed Abdelazeem. All rights reserved 62
- 63. Restrict Library Cell Usage ❑ You may want to restrict the use of specific cells during CTS, timing, electrical DRC or power optimizations, for example: • Big drivers (EM or crosstalk issues) • High-leakage registers in ultra-low Vt libraries ❑ To determine the current lib cell purpose setting: 2/28/2024 © Ahmed Abdelazeem. All rights reserved 63 set_lib_cell_purpose -include none [get_lib_cells "*/*BUF_X64* */*REG_ulvt*”] report_lib_cells -columns {name valid_jpurposes} -objects [get_lib_cells "*/*BUFFX2*"]
- 64. DSM Power Issues 2/28/2024 © Ahmed Abdelazeem. All rights reserved 64 Dynamic Power 1 out of 5 Chips Fail because of Excessive Power Fail IR-Drop (Voltage Drop) Electromigration (EM) Leakage Power (Static Power)
- 65. Power Components 2/28/2024 © Ahmed Abdelazeem. All rights reserved 65 In Out Vdd Gnd Cload Cload P N Vdd Isw Ileak Isht Out Cint P N Iintsw Isht Ileak In Gnd Total Power = Dynamic Power + Static Power ❑ Switching power (dynamic): ◦ Charging output load ❑ Internal power (dynamic): ◦ Short circuit ◦ Charging internal load ❑ Leakage power (static): ◦ Stable state
- 66. Preroute Power Optimization ❑ By default, ICC II does not perform power optimization The following power optimization modes can be enabled: • Leakage • Dynamic • Total (leakage + dynamic) ❑ Power optimization is only performed in active scenarios enabled for power, for example, to enable total power optimization: 2/28/2024 © Ahmed Abdelazeem. All rights reserved 66 set_app_options -list {opt.power.mode none|leakage | dynamic | total} set_scenario_status {func.ss_125c} -leakage_power true -dynamic_power true Design/flow setup
- 67. Leakage Power Optimization ❑ Tradeoff between • Faster, higher leakage low-Vth, and • Slower, lower leakage high-Vth ❑ Leakage Power becomes a component of the overall optimization cost. ❑ Multi-Vth/L libraries should be made available ❑ Occurs if power optimization mode is leakage or total 2/28/2024 © Ahmed Abdelazeem. All rights reserved 67 Design/flow setup Trade-Off High-Vth Cells Slow, Low Leakage Low-Vth Cells Fast, High Leakage set_app_options -name opt.power.mode -value leakage| total
- 68. Leakage Improvement by Vt Swapping ❑ In addition to cost-based leakage optimization, you can also enable Vt swapping to possibly reduce leakage power further • Algorithm exchanges LVT cells with identical RVT or HVT cells, if positive slack is available • To enable, tag cells to be reduced (e.g. low- and ultra low-Vth) as low_vt: • Vt swapping runs in all active scenarios, independent of whether any power optimization is enabled, or whether the scenarios are configured for leakage opt. 2/28/2024 © Ahmed Abdelazeem. All rights reserved 68 set_threshold_voltage_group_type -type low_vt "LVt ULVt"
- 69. Dynamic Power Optimization ❑ Includes dynamic power in the overall cost function for optimization • Any optimization transformation will take dynamic power into account • Has a lower optimization priority than timing/DRC • Requires switching activity to calculate dynamic power • Occurs if power optimization mode is dynamic or total 2/28/2024 © Ahmed Abdelazeem. All rights reserved 69 Design/flow setup set_app_options -name opt.power.mode -value leakage| total
- 70. Total Power Optimization ❑ In advanced nodes, leakage, and dynamic power may trend differently within a Vth class (e.g. different channel lengths) • Leakage: XLVT-S > XLVT-L • Dynamic: XLVT-S < XLVT-L ❑ Total Power optimization creates a composite cost of dynamic and leakage power numbers and includes this composite cost in the overall optimization costing function 2/28/2024 © Ahmed Abdelazeem. All rights reserved 70 set_app_options -name opt.power.mode -value total L = Long, S = Short Design/flow setup
- 71. Concepts Of Switching Activity 2/28/2024 © Ahmed Abdelazeem. All rights reserved 71 Design/flow setup ❑ Toggle and TC: Toggle is a logic value change. For example: a logic transition of 0→1 or 1→0 TC is the toggle count ❑ Toggle Rate (Tr): Number of toggles per unit of time Tr = TC / duration ❑ T1 , T0: Duration of a design object at logic 1, 0 ❑ Static Probability (Sp): Probability of logic 1 for a node Sp = T1 / duration Using the graph on the left, fill in the following: TC = , Tr = , T1= , and SP= 0 ns 15 ns 30 ns
- 72. SAIF File to Provide Switching Activity 2/28/2024 © Ahmed Abdelazeem. All rights reserved 72 Design/flow setup (SAIFILE (SAIFVERSION "2.0") (DIRECTION "backward") (DESIGN ) (DATE "Mon May 17 02:33:48 2022") (VENDOR "Synopsys, Inc") (PROGRAM_NAME "VCS-Scirocco-MX Power Compiler") (VERSION "1.0") (DIVIDER / ) (TIMESCALE 1 ns) (DURATION 10000.00) (INSTANCE tb (INSTANCE macinst (NET (z[3] (T0 6488) (T1 3493) (TX 18) (TC 26) (IG 0) ) ... ... (z[32] (T0 6488) (T1 3493) (TX 18) (TC 26) (IG 0) ) ... ... ) (INSTANCE U3 (PORT (Y (T0 4989) (T1 5005) (TX 6) (COND ((D1*!D0) | (!D1*D0)) (RISE) (IOPATH S (TC 22) (IG 0) ) COND ((D1*!D0) | (!D1*D0)) (FALL) (IOPATH S (TC 21) (IG 0) ) COND_DEFAULT (TC 0) (IG 0) ) ... ...
- 73. Dynamic Power Optimizations Require Switching Activity ❑ Accurate power calculation requires accurate switching activity: • Applied by reading SAIF files from simulation (recommended) • Alternatively, by “manually” applying toggle information to primary inputs and black box outputs 2/28/2024 © Ahmed Abdelazeem. All rights reserved 73 set_scenario_status -dynamic_power true slow_ssl25 read_saif design_sim.saif -scenario slow ssl25 Black Box clk rst a b scan_en x current_scenario slow_ssl25 set_switching_activity [get_ports "rst scan en"] -toggle_rate 0.0 -static_probability 0.0 set_switching_activity [get_ports a] -toggle_rate 0.02 -static_probability 0.7 set_switching_activity [get_ports b] -toggle_rate 0.06 -static_probability 0.3 • Unannotated points use default switching activity ❑ ICC II will propagate switching activity throughout the design Design/flow setup
- 74. What are Scan Chains? 2/28/2024 © Ahmed Abdelazeem. All rights reserved 74 ❑ Scan chains already present as groups of FFs that are serially connected through SI/SO pins ❑ Scan chain paths are active only during “test mode”, not during “functional mode” ❑ FFs are typically connected in alphanumeric order during synthesis – irrelevant for DFT, but not optimal for routing IN[0] SCAN_IN OUT[0] SCAN_OUT B D IN[1] OUT[1] E C A F
- 75. What’s the Issue with Scan Chains? 2/28/2024 © Ahmed Abdelazeem. All rights reserved 75 What happens if placement is done with scan chains connected? ❑ If serially connected FFs are placed far apart this may require a lot more routing resources than necessary ❑ If FFs are placed close together, according to their scan chain ordering, this may hurt timing along functional critical paths IN[0] SCAN_IN OUT[0] SCAN_OUT B D IN[1] OUT[1] E C A F IN[0] SCAN_IN OUT[0] SCAN_OUT A C IN[1] OUT[1] E F B D
- 76. Placement Based Scan Chain Routing 2/28/2024 © Ahmed Abdelazeem. All rights reserved 76 Default Scan Ordering Placement-Based Ordering
- 77. What’s the Solution for Scan Chains? 2/28/2024 © Ahmed Abdelazeem. All rights reserved 77 ❑ Disconnect the scan chains prior to placement to allow Astro to focus on the functional critical paths ◦ Chains are ‘annotated’ first to capture the FF “grouping” IN[0] SCAN_IN OUT[0] SCAN_OUT B D IN[1] OUT[1] E C A F IN[0] SCAN_IN OUT[0] SCAN_OUT B D IN[1] OUT[1] E C A F ❑ Scan chains will be reconnected after CTS ⚫ Same grouping of FFs ⚫ Different ordering: based on placement, to minimize routing resources
- 78. SCANDEF Reordering 2/28/2024 © Ahmed Abdelazeem. All rights reserved 78 ❑ IC CompilerII can reorder scan cells within each scan chain based on the content of each scan chain as defined in a SCANDEF file ❑ Lockup latches or multiplexers break up scan chains further into reordering buckets ◦ These buckets are called chains in the SCANDEF SI SO Reordering bucket 1 Reordering bucket 2 Reordering bucket 3 Lockup Latch MUX
- 79. Partitioning with SCANDEF 2/28/2024 © Ahmed Abdelazeem. All rights reserved 79 ❑ To extend flexibility, SCANDEF also supports reordering within partitions, across multiple buckets ❑ A PARTITION is a group of “SCANDEF chains” that may exchange flip-flops during reordering PARTITION 1 PARTITION 2 SCANDEF Chain 1 SCANDEF Chain 2 SCANDEF Chain 3 Lockup Latch MUX SI SO SCANDEF Chain 4 SCANDEF Chain 5 SCANDEF Chain 6 Lockup Latch MUX SI SO
- 80. SCANDEF generated with DFTC 2/28/2024 © Ahmed Abdelazeem. All rights reserved 80 DESIGN my_design ; SCANCHAINS 2 ; - 1 + START PIN test_si1 + FLOATING A ( IN SI ) ( OUT Q ) B ( IN SI ) ( OUT Q ) C ( IN SI ) ( OUT Q ) D ( IN SI ) ( OUT Q ) + PARTITION CLK_45_45 + STOP PIN test_so1 - 2 + START PIN test_si2 + FLOATING E ( IN SI ) ( OUT Q ) F ( IN SI ) ( OUT Q ) G ( IN SI ) ( OUT Q ) H ( IN SI ) ( OUT Q ) + PARTITION CLK_45_45 + STOP PIN test_so2 Design name Number of chain stubs in the design PARTITION keyword in SCANDEF. Flipflops can be swapped between two partitions with the same name “FLOATING” indicates that these flipflops can be reordered
- 81. Alpha-Numeric Ordering 2/28/2024 © Ahmed Abdelazeem. All rights reserved 81 chain-order DC Scan Chain 1 ABCD Scan Chain 2 EFGH test_si1 test_si2 test_so2 test_so1 A C G H clk E B D F
- 82. Reordering Within Scan-Chain 2/28/2024 © Ahmed Abdelazeem. All rights reserved 82 chain-order DC Netlist SCANDEF w/o PARTITION Scan Chain 1 ABCD ACBD Scan Chain 2 EFGH EGHF test_si1 test_si2 test_so2 test_so1 A C G H clk E B D F
- 83. Reordering Across Scan-Chains 2/28/2024 © Ahmed Abdelazeem. All rights reserved 83 chain-order DC Netlist SCANDEF w/o PARTITION SCANDEF with PARTITION Scan Chain 1 ABCD ACBD ACGH Scan Chain 2 EFGH EGHF EBDF test_si1 test_si2 test_so2 test_so1 A C G H clk E B D F
- 84. Appendix-A Physical Synthesis 2/28/2024 © Ahmed Abdelazeem. All rights reserved 84
- 85. Problems ❑ Achieving Timing Closure ❑ Scaling the Design Process for Multi-Million Gate Chips 2/28/2024 © Ahmed Abdelazeem. All rights reserved 85
- 86. Timing Critical Designs What’s not working? ❑ Synthesis ➢ WLMs are statistical ➢ Constraints are estimated I. set_input_delay, II. set_output_delay, III. set_load, IV. set_driving_cell, V. set_clock_skew, etc 2/28/2024 © Ahmed Abdelazeem. All rights reserved 86
- 87. Timing Critical Designs What’s not working? ❑ Place/Route ➢ Estimates for wire delays are off! • Nets with the same fanout have very different delays in the placed design ➢ ECO’s are required • Timing closure becomes a moving target 2/28/2024 © Ahmed Abdelazeem. All rights reserved 87
- 88. Unifying Synthesis & Placement ❑ Front-end timing is becoming unreliable ➢ With traditional flows, all nets have the same fanout have the same estimated interconnect delay during front-end design 2/28/2024 © Ahmed Abdelazeem. All rights reserved 88
- 89. Unifying Synthesis & Placement is the Best Technical Solution 1. Front-end timing is becoming unreliable 2. Placement can change timing dramatically • After placement, it is obvious that nets with the same fanout will not have the same interconnect delay 2/28/2024 © Ahmed Abdelazeem. All rights reserved 89
- 90. Unifying Synthesis & Placement is the Best Technical Solution 1. Front-end timing is becoming unreliable 2. Placement can change timing dramatically 3. Detailed routing has only a minor effect • when good global routing is done to model interconnect 2/28/2024 © Ahmed Abdelazeem. All rights reserved 90
- 91. Placement is Key! 2/28/2024 © Ahmed Abdelazeem. All rights reserved 91
- 92. One Pass Timing Closure ❑ No WLM used ❑ Placement Based Delay ❑ Individual Net Load estimated ❑ Macro Cell Placement honored ❑ Layout Data considered ❑ Consistent Timing Model 2/28/2024 © Ahmed Abdelazeem. All rights reserved 92
- 93. Timing Calculations ❑ Calculations use pin-to-pin “intelligent” Steiner Routing ❑ Each net is calculated individually ❑ No wire load models are used 2/28/2024 © Ahmed Abdelazeem. All rights reserved 93
- 94. Main References ❑ Ron Rutenbar “From Logic to Layout” ❑ Synopsys University Courseware ❑ Synopsys Documentation ❑ IDESA ❑ Cadence Documentation 2/28/2024 © Ahmed Abdelazeem. All rights reserved 94
- 95. 2/28/2024 © Ahmed Abdelazeem. All rights reserved 95 Thank You ☺