TeamStation AI System Report LATAM IT Salaries 2024
Computer basics
1. COMPUTER BASICS
Computer Basics introduces general computer use and terminology. It describes the basic hardware
components of a PC and introduces basic skills for using software programs in a windows
environment. This course will address hardware and peripheral components of the computer and how to
use them correctly.
After completing Computer Basics the user should be able to:
Describe the basic components of the computer.
Describe hardware and software.
Identify peripheral devices.
Identify input and output devices.
Start the computer, run programs and shut down the computer.
Control program windows and menus.
A computer is an electronic device that has the ability to store, retrieve, and process data, and can be
programmed with instructions that it remembers. The physical parts that make up a computer (the
central processing unit, input, output, and memory) are called hardware. Programs that tell a computer
what to do are called software. A set of instructions that perform a particular task is called a program,
software program, or software. Peripherals are any hardware device connected to a computer, any
part of the computer outside the CPU and working memory. Some examples of peripherals are
keyboards, the mouse, monitors, printers, scanners, disk and tape drives, microphones, speakers,
joysticks, plotters, and cameras.
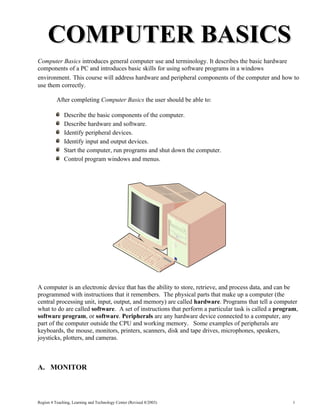
A. MONITOR
Region 4 Teaching, Learning and Technology Center (Revised 8/2003) 1
2. The computer monitor is an output device that displays input on a screen and is very similar to a
television monitor. When the computer wants to display something, it
calculates how it needs to change the color and brightness of the different
pixels, and changes the values in the video memory.
▪ Controls for the monitor are located on the monitor itself. The
monitor has an ON/OFF Button/Switch (which powers only the
monitor) and an indicator light (green or amber).
▪ A green indicator light denotes that the monitor is on.
▪ An amber light indicates that the computer is in “sleep” mode. Software in newer computers
automatically shuts the monitor down when the computer is shut down--the monitor is put in
a “sleep” mode and the indicator light turns amber. When the monitor light is amber, if the
computer is booted up, the monitor will automatically come on when you move the mouse or
press any key on the keyboard.
▪ No indicator light indicates that the monitor is off. If you turn your monitor off with the
switch, there will be no indicator light. When you boot up your computer, you will have to
turn the monitor on by pressing the ON/OFF switch.
Monitor Resolution refers to the number of dots on the screen or pixels. It is expressed as a pair of numbers that give the
number of dots on a line (horizontal) and the number of lines (vertical). Four resolutions commonly used today:
▪ 640 x 480 PIXELS (VGA) (SVGA) -- images are larger for visually impaired students.
▪ 800 x 600 PIXELS (SVGA) – most web sites are designed to be viewed at this setting.
▪ 1024 x 768 PIXELS (SVGA)
▪ 1280 x 1024 PIXELS (SVGA)-- images are smaller, but more information can be displayed.
The smaller the pixels, the clearer and sharper the picture appears on the monitor. Most monitors come with a .28 dot pitch.
This is the standard for monitors. Do not buy a monitor if the dot pitch is more than .28. The smaller the dot pitch, the better
the monitor.
2. COMPUTER
The computer is a machine that processes data according to a set of instructions that are stored internally
either temporarily or permanently. The computer has either external or internal peripherals attached to
it. The picture below displays two internal devices—the floppy disk drive and CD ROM drive.
6 FLOPPY DISK
DRIVE
D
7 CD ROM
D
DRIVE
D
5
DISKETTE
DRIVE
ACCESS
1 2 3 4 I
INDICATOR
POWER POWER RESET HARD DISK
SWITCH INDICATOR BUTTON DRIVE ACCESS
I
INDICATOR
1. POWER SWITCH -- Turns the computer on and off. Whenever the computer is turned off,
always wait at least 60 seconds before turning it back on again.
Region 4 Teaching, Learning and Technology Center (Revised 8/2003) 2
3. 2. POWER INDICATOR -- Located in the center of the power switch. A green light indicates
the computer is on.
3. RESET BUTTON -- Allows you to reboot (restart) your system without having to power
down the entire computer. Rebooting the system in this manner reduces stress on the system
components. This button is used ONLY when the computer has “frozen” and will not accept
any commands.
4. HARD DISK DRIVE ACCESS INDICATOR -- Turns green when the computer is
accessing your hard drive, either retrieving or storing information.
5. DISKETTE DRIVE INDICATOR -- Turns green when the computer is accessing your
floppy disk drive, either retrieving or storing information. If this light is green, you should
NEVER attempt to eject the floppy disk.
6. FLOPPY DISK DRIVE -- Storage device that holds, reads and writes to floppy disks,
usually called Drive A.
7. CD-DRIVE -- Player or reader that reads data from a CD ROM disk.
C. INTERNAL COMPONENTS OF A COMPUTER
Motherboard
Sometimes called the system board or main board, the
motherboard is the main circuit board of a PC. The
Region 4 Teaching, Learning and Technology Center (Revised 8/2003) 3
4. motherboard is the central nervous system and circulatory system, plus much more, all rolled into one.
The motherboard typically contains the processor (or CPU), BIOS (basic input/output system), memory,
mass storage interfaces, serial and parallel ports, expansion slots, and all the controllers required to
communicate with standard peripheral devices, such as the display screen, mouse, keyboard and disk
drive. Collectively, some of the chips which reside on the motherboard are known as the motherboard's
chipset.
Chipset
The chipset controls the system and its capabilities. All components communicate with the processor
through the chipset - it is the hub of all data transfer. The chipset uses the DMA controller and the bus
controller to organize the steady flow of data that it controls. The chipset is a series of chips attached
directly to the motherboard, and is usually second in size only to the processor. Chipsets are integrated
(soldered onto the motherboard) and are not upgradable without a new motherboard.
BIOS (Basic Input Output System)
An integral part of the PC, the BIOS is the program a microprocessor uses to get the computer started
after you turn it on. It also manages the data flow between the computer's operating system and attached
peripheral devices.
CPU (Central Processing Unit)
The CPU is the computer's control center. Think of it as the brain that does all
the thinking (computation). It reads instructions from your software and tells
your computer what to do. The actual CPU is about 1.5 inches square, yet it
is the most critical part of the computer.
The speed at which the CPU processes information internally is
measured in MegaHertz (MHz) and GigaHertz (GHz). 1 GHz is equal to
1,000 MHz. Generally, processors with higher MHz or GHz enhance
your ability to run creative, entertainment, communication, and productivity
applications.
▪ MegaHertz -- One million cycles per second — used to measure the speed of a CPU chip.
ROM (Read Only Memory)
A type of memory chip that does not lose information, even when the power is turned off. Once data is
programmed into the ROM chip, its contents cannot be altered. For example, ROM BIOS chips are used
to store information for starting up your computer.
RAM (Random Access Memory)
Available for storing data and programs currently being processed. RAM is erased automatically when
the power is turned off. Can be accessed without touching preceding bytes.
▪ DIMM (Dual Inline Memory Module), a device that adds memory to a computer
▪ RDRAM (Rambus Dynamic Random Access Memory)
Developed by Rambus Corporation, the narrow, high-performance channel also offers
performance and capacity scalability through the use of multiple channels in parallel.
Capable of providing up to 1.6 GB/sec bandwidth per channel. RDRAM is able to load a
new stream of data before the previous stream has completed, resulting in less waiting time
and therefore faster access speeds.
▪ SDRAM (Synchronous Dynamic Random Access Memory).
Region 4 Teaching, Learning and Technology Center (Revised 8/2003) 4
5. SDRAM synchronizes itself with the processors bus and is capable of running at 133 MHz.
SDRAM enables a system to run applications and temporarily store documents that are being
worked on.
▪ SIMM (Single In-Line Memory Module)
A narrow circuit board that contains RAM (also called DRAM)
memory chips. The more RAM chips you add to the computer, the
faster it operates and the more programs you can run at the same
time. Depending on the computer, SIMMs may need to be
installed in multiples of two or four.
Byte -- Bytes are used to measure both computer memory (RAM) and the storage capacity of
floppy disks, CD-ROM drives, and hard drives. BYTE One character. A character can be a
number, letter or symbol.
Note: A byte consists of 8 bits.
▪ KILOBYTE (K) Approximately one thousand characters, or one page of double spaced
text.
▪ MEGABYTE (MB) Approximately one million characters, or one novel.
▪ GIGABYTE (GB) Approximately one billion characters, or one thousand novels.
Cache
Cache (pronounced cash) is a block of high speed memory where data is copied when it is retrieved
from the RAM. This storage of key instructions enables a performance improvement in the processor.
Intel processors incorporate level 1 (L1) and level 2 (L2) caches.
There are two groups of extremely fast memory chips that
allow the computer to operate faster:
(1) Internal cache (L1) is built into the CPU, and
(2) External cache (L2) resides on the motherboard. The
L2 cache is an area of high-speed memory that
improves performance by reducing the average
memory access time. L2 cache is also called SRAM.
Both L1 and L2 store data recently used by the CPU. When
the CPU needs data, it first checks the fastest source — L1. If
the data is not there, the CPU checks the next-fastest source
— L2. If the data still cannot be found, a time-consuming search of the slower RAM is required.
D. BACK PANEL AND
CABLES
The ports that connect the peripherals to the
computer are located on the back panel of
the computer. Newer computers have ports
Region 4 Teaching, Learning and Technology Center (Revised 8/2003) 5
6. that are color-coded with their appropriate cables. Speaker cables plug into headphone jacks on the back
panel and are also color-coded. The back panel may have small icons on the ports showing the correct
cables (example --monitor for monitor cable). It is important that all cables are inserted completely and
securely in their port (pins screwed in all the way) or the peripheral will not function properly. Once all
peripherals have been connected to the computer, it may be useful to label each cable and it's appropriate
port. When the computer is stored for the summer it will be very easy to reconnect cables in the fall.
Two successful methods used to code cables and ports include colored dots using nail polish (red mouse
cable, red dot on mouse port, pink printer cable, pink dot on printer port, etc.) and numbering cables and
ports (1 & 1, 2 & 2, etc.).
When attaching or removing cables from the computer it is important to be very careful. The cables are
connected with "pins" that can easily be bent or broken. Don't try to remove cables by "wiggling" from
side to side. Pull cables directly out to avoid damaging the pins.
The following figure is a diagram of the ports on the back of the computer. Included are pictures of the
cable connectors for different peripherals attached to the computer.
3. Parallel Port
1. Mouse Port
6. Video Port
2. Keyboard
4. USB 5. Serial Port
Mouse Cable & Ports Keyboard Cable & Ports Printer Cable
SCSI (Small Computer System Interface). A processor-independent standard for system-level
interfacing between a computer and intelligent devices including hard-drives, floppy disks, CD-ROM,
printer, scanners and many more.
USB (Universal Serial Bus) is a new technology theoretically capable of connecting a very large number
of external devices on a computer. USB give the PC user a no-hassle way to connect a new digital
joystick, a scanner, a set of digital speakers, a digital camera, or a PC telephone to their computer.
Region 4 Teaching, Learning and Technology Center (Revised 8/2003) 6
7. ▪ Adds the feature of "hot-swapping" so that you don't need to shut down and restart your PC to attach
or remove a peripheral. Just plug it in and go!
▪ To remove a USB device, single click the hardware button in the system tray, the “Remove
Hardware” window opens. Select
the device you wish to disconnect, click the “Stop” button then remove the device.
E. STORAGE DEVICES
When working on the computer, all work is entered into the computer's memory. In order to store your
work for future retrieval, you must “save” your work to a storage device before turning the computer
off. When your work is saved it creates a computer “file”. The most common storage devices are hard
disks and floppy disks. If you only save your work on the hard disk, you run the risk of losing your
data, either through viruses, which attack the hard disk, or to hard disk failure or crashes. It’s very
important to back up your important files onto other media, such as floppy disks.
1. Floppy Disk -- A removable disk that stores
information magnetically, also called a diskette.
You can use a floppy disk to exchange
information between computers, or to make a
backup of your files. Floppy disks are 3.5
inches in diameter and they are enclosed in a
rigid plastic shell. A “double-density” (DD)
diskette has a storage capacity of 740 KB while a
“high-density” (HD) diskette has a storage capacity of 1.44 MB.
To protect your floppy disks, keep them away from heat, drinks,
and magnets. Use a felt tip pen to label a disk and write on the
label before you attach it to the disk.
Every disk must be formatted with the operating system used by the computer in order to allow
storage of files. The operating system is the “language” of the program—the disk must be in the
same language as the computer in order to communicate. Examples of operating systems are
DOS, Windows, Macintosh OS, and Windows NT. When you purchase disks, be sure to
purchase them for the operating system you are using (IBM/PC Compatible or
Apple/Macintosh). Today, most floppy disks come already formatted. However, it is a good idea
to run scandisk on a disk before using as a means of checking the disk for bad sectors. See
Section M. for instructions on how to run scandisk on a floppy. Disks can be reused as long as
there are no bad sectors on the disk.
Disks are inserted into the disk drive with the metal part first, label up.
Region 4 Teaching, Learning and Technology Center (Revised 8/2003) 7
8. Every disk comes with a write-protect tab. The tab
Not Write
provides protection against erasing or replacing
Protected
information on a floppy disk. You can write-protect a
Write Protected 3.5 inch floppy disk by moving the plastic tab up to the
write-protected position (open hole). No information
can be altered on the disk when it is write-protected.
2. Hard drive-- The primary device that a computer
uses to store information. Most computers come
with one or two hard drives, called drive C and
drive D, located inside the computer case. The
terms hard drive and hard disk are used
interchangeably. Today's hard disks provide fast
retrieval and can hold several gigabytes of
information as compared to megabytes on floppy
disks.
The Read/Write Heads are energy converters:
they transform electrical signals to magnetic signals, and magnetic signals back to electrical ones
again. They are in essence tiny electromagnets that perform this conversion from electrical
information to magnetic and back again. There is normally one head for each surface used on
the drive.
If the heads contact the surface of the disk while it is at
operational speed, the result can be loss of data, damage to
the heads, damage to the surface of the disk, or all three.
This is usually called a head crash, two of the most
frightening words to any computer user. :^) The most
common causes of head crashes are contamination getting
stuck in the thin gap between the head and the disk, and shock applied
to the hard disk while it is in operation.
3. Zip disks -- Zip disks store 100 - 250 MB of data (depending on the type of drive purchased)
and cost about $11 to $19 each. A special 3.5" removable disk drive is needed to retrieve the
information from the computer and write to the zip disk. An external zip drive can be moved
from one computer to another. Due to the large storage capability of zip disks and mobility of
the drives, they are gaining popularity as storage and backup mediums.
Region 4 Teaching, Learning and Technology Center (Revised 8/2003) 8
9. 4. CD-ROMS—Compact disks can store approximately 650-800 MB of data or 74-80 minutes of
music. Most software programs today are shipped on CD-ROMs instead of floppy disks. All
computers today come with CD-ROM drives that are part of the computer’s multimedia
configuration. They are connected to a sound card, which provides the computer with stereo
speaker capabilities, allowing for musical CD-ROMs to also be played on your computer. These
drives are read only and cannot be used for recording data.
◙ Only retrieve data that’s pre-recorded by the manufacturer. Like a musical CD-ROM, the
information is pressed on one side (the side opposite the label).
◙ CD-ROM’s are inserted into the CD-ROM drive with the label side up.
◙ Pressing the button opens and closes the drive.
◙ Handling and storage of CD-ROM’s are the same as musical CD-ROM’s and
floppy disks.
◙ Avoid putting fingers on the information side. Hold the CD-ROM by the
edges when handling. Protect CD-ROM’s by making sure the data side does not get
scratched and by providing proper storage (store them in the case they came in).
5. Read/Write CD-ROMS—CD-ROM drives that write, rewrite and record data. Two types of
CD-ROM disks are used in these drives: CD-Recordable (CD-R) and CD-Read/Write (CD-
R/W). CD-R/W’s can only be “read” by CD Read/Write drives, while CD-R disks can be read
by most CD-ROM drives. You can download CD-RW UDF Reader software from
www.zdnet.com (click on the Downloads tab) or http://downloads-
zdnet.com.com/2001-20-0.html .
CD/DVD-ROM (internal)
Open/Close button
CD-Writer (internal)
Open/Close button
Zip 100mb Drive
Headphone Power Light
Jack
6. Cartridge tapes—These are magnetic tapes similar to cassette tapes used as a
storage and backup device. Backup and retrieval of stored information is
slower with tapes because the information is stored sequentially. The
computer must search in sequential order to find the desired information,
rather than by sectors. The advantage of tape cassettes is that they can be
purchased with large storage capacities (1 – 4 GB’s) allowing the entire
contents of the hard drive to easily fit on one tape.
7. USB/Flash Drive (Jump/Thumb Drive) - is a plug-and-play portable storage device that uses
flash memory and is lightweight enough to attach to a key chain. A keychain drive can be used in
Region 4 Teaching, Learning and Technology Center (Revised 8/2003) 9
10. place of a floppy disk, Zip drive disk, or CD. When the user plugs the device into their USB port,
the computer's operating system recognizes the device as a removable drive. Unlike most
removable drives, a keychain drive does not require rebooting after it's attached, does not require
batteries or an external power supply, and is not platform dependent. Several keychain drive
manufacturers offer additional features such as password protection, and downloadable drivers
that allow the keychain drive to be compatible with older systems that do not have USB ports.
Keychain drives are available in capacities ranging from 8 MB to 2 gigabytes, depending on
manufacturer, in a corresponding range of prices.
F. INPUT DEVICES
1. Mouse – The mouse is a pointing device attached to the computer that controls the movement of
the cursor on the screen. It allows the user to execute commands using point & click and click &
drag techniques. As the user moves the mouse across the pad, the cursor moves across the
screen. The mouse should always be used with a mouse pad to provide a smooth surface for
mouse movement and to help keep the mouse from damage. If you "run out of room" on the
pad, simply pick up the mouse and move it to the opposite edge and continue movement.
The PC mouse has two buttons (left and right) and newer mice have a scroll wheel between the
two. Mouse commands are executed by "clicking". The term “click” refers to the left mouse
button.
The phrase to "click" means to select (a screen object) by moving the mouse pointer to the
object's position and clicking a mouse button by pressing it down once, and them immediately
releasing it.
▪ Executing commands (i.e. opening a folder, opening a file, opening a
program) requires a double click, meaning that you must click the left mouse
button twice in rapid succession. There is a timed rhythm to double clicking and
the mouse must NOT move between clicks.
▪ Shift Click refers to clicking the mouse button while holding the Shift key
down.
▪ Click and Drag is also used more generally to refer to any operation in which the left mouse
button is held down while the mouse is moved. Placing the mouse arrow on an object and
holding down the left mouse button while moving it, the object can by moved to a new
location by “dragging”.
▪ Some newer mice also include a scroll wheel for scrolling through long documents.
▪ Right Click refers to clicking the right mouse button which reveals a context menu, because
it changes based on the status of the item you clicked -- the type of file, for example. The
context menu may display actions such as Open, New, Print, Copy, Paste, Delete, Send To,
Create Shortcut and Properties (to see an item's settings, and so on) all dependent upon where
you right click, on a file or on a blank space in a window.
Need to practice your mouse skills?
Region 4 Teaching, Learning and Technology Center (Revised 8/2003) 10
11. Basic Mouse Skills by Grey Olltwit (free): http://www.adders.org/freeware/gomouse.html
Mouse Practice: http://www.lawrencegoetz.com/programs/mousepractice/
Mouse Aerobics! http://www.ckls.org/~crippel/computerlab/tutorials/mouse/page1.html
Practice Using the Mouse Playing Games: http://www.vc.cc.tx.us/courses/orie0100/mouse.html
Mouse Practice: http://www.burlco.lib.nj.us/Classes/cns/
Connect the Dots: Provides practice clicking the mouse
http://www.lizardpoint.com/fun/java/dinodots/dino1.html
New User Tutorial on Using the Mouse: http://www.northville.lib.mi.us/tech/tutor/holding.htm
2. Keyboard -- The computer receives most of its input from the user via the keyboard that is
very similar to the typewriter keyboard. The keyboard is connected by a cable to the keyboard port
on the back of the computer. There are extra keys on the computer's keyboard that are not found on
a normal typewriter. Following is an explanation of the function of these keys. The exact manner in
which the keys function depends on the software program.
BACKSPACE KEY-- Deletes the character just to the left of the cursor (or insertion point) and
moves the cursor to that position.
DELETE KEY-- Sometimes labeled Del, deletes the character at the current cursor position or
to the right of the insertion point, or deletes the selected object, but does not move the cursor.
ARROW KEYS -- four arrow keys for moving the cursor or insertion point right, left, up, or
down. Moving the arrow keys does not delete any characters on the screen.
CAPS LOCK KEY -- A toggle key that, when activated, causes all alphabetic characters to be
uppercase.
HOME -- moves the cursor to the top left corner of the screen or to the beginning of the file,
but it can have other meanings depending on which program is running.
END -- moves the cursor to the end of the line, the end of the page, or the end of the file
depending where the cursor is located on the page and on which program is running.
Region 4 Teaching, Learning and Technology Center (Revised 8/2003) 11
12. ENTER -- Used to enter commands or to move the cursor to the beginning of the next line.
Sometimes labeled Return instead of Enter.
RETURN KEY -- Another name for the Enter key.
ESC -- Short for Escape, this key is used to send special codes to devices and to exit (or escape)
from programs and tasks.
FUNCTION KEYS -- Special keys labeled F1 to Fx, x being the number of function keys on
the keyboard. These keys have different meanings depending on which program is running.
CTRL KEY -- Short for Control, this key is used in conjunction with other keys to produce
control characters. The meaning of each control character depends on which program is
running.
ALT KEY -- Short for Alternate, this key is like a second Control key
PAGE UP and PAGE DOWN -- moves the cursor up or down a set number of lines usually
one page or screen at a time. Often abbreviated PgUp and PgDn.
NUMERIC KEYPAD -- A separate set of keys on some keyboards that contain the numbers 0
through 9 and a decimal point arranged as on an adding machine. Numeric keypads make it
easier to enter large amounts of numeric data. For the keypad to function as numbers, the NUM
LOCK must be on (Num Lock light is green).
INSERT -- Changes between insert mode and overstrike mode in word processing programs. In
insert mode, all characters typed are placed at the cursor position (or to the right of the insertion
point). With each new insertion, characters to the right of the cursor are pushed to the right of
the insertion point to make room for the new characters. If insert mode is turned off, typing then
overwrites existing characters instead of inserting the new ones before the old ones. This is
often called overwrite mode. Most PC keyboards have an Ins or Insert key that lets you switch
back and forth between insert and overwrite modes.
NOTE: If the keyboard freezes restarting by pressing the Reset button will not correct the conflict; you
MUST shut down. Use your mouse to save work prior to shutting down then press the Power button on
the desktop/tower.
G. KEYSTROKES TO KNOW
1. Enter--pressing this key is the same as left clicking the mouse button.
2. Ctrl + Esc or Windows Logo Key--pressing these two keys, Ctrl + Esc, simultaneously, or
pressing the Windows Logo Key, will bring up the Start menu. Use the arrow keys to navigate the
Start menu, especially to shut down.
3. Shift + Alt + Spacebar--when a window is in the “Restore” mode, it may sometimes shift on
the screen so that you cannot locate the buttons on the title bar to close, minimize or maximize the
window. Pressing these three keys will open a window, with a choice of “Maximize”. Arrow down
and select Maximize and the window will open to a full screen with the buttons showing.
Region 4 Teaching, Learning and Technology Center (Revised 8/2003) 12
13. 4. Ctrl + Alt + Delete--whenever the computer “locks up” (freezes) and the mouse or keyboard
will not work, pressing these three keys simultaneously will usually open the Close Program dialog
box which contains a list box of applications that are running:
Highlight the program that is “not responding”
and may be causing the problem and choose
“End Task.” A second dialog box may open
allowing you to rethink this decision, click “End
Task” to close the program—if you have not
saved all data entered since the last save will be
lost.
NOTE: If pressing these keys, Ctrl + Alt +
Delete, does not bring up the previous window,
then pressing them again will, usually, shut the
computer down.
5. F1—Displays Help information for the active object or the window as a whole.
6. F2—Rename a selected item. A bold rectangle appears around the title creating a text box and
the title is highlighted. Type the new name and press Enter. Press ESC to cancel.
7. F3—Opens the Find All Files dialog box.
8. Alt + F4—Closes the active application window. Once all open windows are closed, pressing
these keys again will open the “Shut Down Windows” dialog box.
9. Print Screen—Copies an image of the screen to the Windows Clipboard.
10. Alt + Print Screen—Copies an image of the active window to the Windows Clipboard.
11. Windows Logo Key + M—Minimizes all open windows. The keyboard focus goes to the least
recently selected icon on the desktop.
Need to learn how to keyboard?
Typing Test: Practice keyboarding skills at http://javascript.internet.com/games/typing-test.html
Senslang Touch Typing 1.0 is a “Free” program that can be downloaded at www.zdnet.com, click on the
Downloads tab then enter “keyboarding” in the search box.
H. OUTPUT DEVICES
Output devices are computer devices that display or output information. The monitor is a common
example of an output device. Other output devices are:
▪ Printers—take information from the CPU and transfer it to paper, provides a hard copy.
There are a number of different printer technologies available: Dot Matrix, Ink Jet, Laser.
Region 4 Teaching, Learning and Technology Center (Revised 8/2003) 13
14. ▪ Plotters—produces high-quality line drawing graphic output (used for blueprints).
▪ Video projector, Scan Converter or LCD overhead projector—projects the image onto a wall
screen for greater view by large groups.
▪ Speaker(s)—provides output of sound or speech.
I. OVERALL COMPUTER CARE
Taking proper care of the computer is essential in keeping it working properly. The following is a list of
"dos" and "don'ts" for computer care.
1. Cover the computer when not in use to keep dust away from it. An old sheet is an excellent
cover for your computers. Plastic dust covers are not recommended as they retain heat and do not
allow for the computer to cool down properly, forming moisture. Moisture can damage the internal
components of the computer.
2. Position the computers away from air-conditioner vents, heater vents and chalkboards.
3. Keep all food and drinks away from the computer.
4. Never place foreign objects into the computer or its drives.
5. Plug all computer components into a surge protector.
6. Keep all magnets away from the computer or disks. Magnets will erase all data!
J. CARE OF INDIVIDUAL COMPONENTS
1. System Case -- The system case should be cleaned annually to prevent excessive buildup of
dust. The best way to clean the outside of the case is just to wipe it with a damp cloth (don't spray
liquids right on the case). The inside can be cleaned either by blasting with compressed air or using a
small vacuum with a PC cleaning attachment. Check Positioning: Make sure the case hasn't over
time been pushed into a place where it shouldn't be. For example, some desktop machines tend in
time to be pushed back to the very back of the desk where they might cause the power supply fan to
be blocked by a wall. There should always be air space behind the computer so the fan can cool the
computer.
2. Power Supply Fan -- The power supply's chief enemy is overheating, and this is usually caused
by excessive dust and dirt coating the components and clogging the power supply fan. The power
supply fan should be inspected, approximately quarterly, to make sure that it is providing good
ventilation and that it is not gummed up with dirt. Either using a vacuum cleaner with a small tip
attachment can clean it or blowing it out with an air duster (remove case cover and blow out
otherwise simply spreading the dust inside the case which can cause other problems).
3. Monitor -- The monitor screen should be cleaned weekly since dust accumulates more quickly
on the surface of a monitor than elsewhere because of the static charge generated by many monitors.
The best way to clean the screen is just to wipe it with a slightly damp, soft cloth; companies will try
to sell you fancy wipes but they are not generally necessary (and some can leave annoying
smudges). Once a year, it is a good idea to clean the dust off the outside of the case. Doing this helps
keep the monitor looking good and improves cooling. Make sure that the monitor's cooling vents are
never blocked off. The monitor should always be turned off if it will not be in use for one or two
hours.
Region 4 Teaching, Learning and Technology Center (Revised 8/2003) 14
15. 4. Keyboard -- Keep Food and Drink Away: The number one enemy of keyboards is not dust, but
in fact food and drink. Check the Cable and Connector: Make sure that the keyboard cable is not
caught on anything or pinched between desk drawers, etc., to prevent damage. There should be slack
in the cable as well; if the keyboard cable is too tight this can damage the cable, connector, or worst
of all, the plug on the motherboard where the keyboard connects to it.
5. Mouse -- Clean the Mouse Regularly: It should be cleaned on a monthly basis. This includes
cleaning the mouse ball, and also the rollers on the inside of the unit. If the ball becomes dirty then it
doesn't roll properly, and the cursor won't move smoothly. Check the Cable and Connector: Make
sure that the mouse cable is not caught on anything on the workplace to prevent damage. There
should be slack in the cable as well.
K. SHUTDOWN
To shut down your computer, click the Start button, click Shut Down, and then click Shut Down The
Computer (Shortcut: Press the Windows Logo Key, then the U key and then the S key). It is
imperative that you shut down the computer properly. Failure to do so could cause damage or loss of
data.
If the computer "freezes", it may be necessary to restart (also known as "reboot") the computer using
alternate means. Pressing the "Control" "Alt" and "Delete" keys at the same time is an alternate way of
rebooting the computer. A window will appear (see #4 under Keystrokes to Know) showing all
programs currently open with the one currently in use highlighted. At the bottom of the window will be
three tabs. Click on the one that says “End Task”. If you are lucky, the program will close and you can
continue as normal.
However, many times, even this will not work. If using "Control" "Alt" and "Delete" will not restart
your computer, you need to reboot your computer by pressing the reset button in front of your computer.
M. RUNNING SCANDISK (Win 98)
Before using, floppy disks should be checked to be sure they contain no bad sectors. Bad sectors can
result in data loss. Run scandisk to check a disk for bad sectors.
1. Make sure the write protect tab on the right side of the disk is closed. Insert the disk (metal
side first) into the disk drive.
2. Place cursor on Start Button, go to Run. Type the word scandisk (all one word) in the box
and click the OK button. The following window will open:
Region 4 Teaching, Learning and Technology Center (Revised 8/2003) 15
16. 3. Highlight the first icon [3 ½ Floppy (A:)]. Under the “Type of test” section click the radio
button next to “Thorough”. Make sure there is a check mark on Automatically fix errors.
Click Start button.
4. This window will open when
scandisk is complete. Check the
first line--if it found errors, throw
the disk away. Check the third
line--if there is a number, throw the
disk away.
Error-Checking (Win XP)
1. Insert the 3-1/2 floppy diskette into the drive.
2. Double-click “My Computer.”
3. Right click on the 3-1/2 Floppy (A:) drive icon, a pop-up menu appears. Click on Properties.
Region 4 Teaching, Learning and Technology Center (Revised 8/2003) 16
17. 4. The “3-1/2 Floppy (A:) Properties” window opens. Click on the “Tools” tab.
Region 4 Teaching, Learning and Technology Center (Revised 8/2003) 17
18. 5. Click the “Check Now…” button in the “Error-checking” section. You will see the following
window:
6. Click the Start button. The following window opens when the scan is completed. Click OK.
References:
Lafayette Parish School System Instructional Technology Department (www.lft.k12.la.us/handouts)
Dell (www.dell.com)
Intel (www.intel.com)
MaranGraphics (http://www.maran.com/dictionary/)
PCGuide (http://www.pcguide.com)
Region 4 Teaching, Learning and Technology Center (Revised 8/2003) 18