SlideShare a Scribd company logo
1 of 9
Download to read offline
Brenda Hoddinott
   O-03 INTERMEDIATE: CARICATURES


In this lesson, you first sketch the proportions of a caricature of a female adult named Kay within
a grid of twenty-four squares. You then use hatching to add shading to the background, face,
hair, ears, and clothing. Skills include using a grid to help sketch accurate proportions, and
identifying and rendering values according to a dominant light source.
This cartoon is an example of a unique style of caricature, affectionately referred to as
Gigglecature, a word you will probably not find in any dictionary. The goal is to draw the face of
a person as a cartoon that could be transformed into a puppet, doll, or stuffed toy.
This project includes the following sections:
    UNDERSTANDING THE ART OF CARICATURE: When discriminately
     exaggerated, five crucial spaces on a face serve as guidelines for rendering a caricature
     that looks like the person you’re drawing.
    SKETCHING PROPORTIONS WITH A GRID: You use a simple grid with 30
     squares to establish accurate proportions. If you prefer to draw freehand without a grid,
     simply ignore all references to the grid.
    ADDING SHADING WITH LINES: Curved lines are used for shading the hair.
     Hatching graduations comprised of straight lines are used for shading the background,
     clothing, face, nose and ears. Three different grades of pencils, HB, 2B and 4B, create a
     full range of values.

Suggested drawing supplies include good quality white paper, various graphite pencils, kneaded
and vinyl erasers, and a pencil sharpener.


                        9 PAGES – 16 ILLUSTRATIONS
     Recommended for intermediate level artists with well developed basic skills, as well as
          students of home schooling, academic and recreational fine art educators
    Published by Hoddinott Fine Art Publishers, Halifax, NS, Canada, 2003 (Revised 2008)
-2-


UNDERSTANDING THE ART OF                                                                                                                    ARTSPEAK
CARICATURE                                                                                                                                  Caricature is a cartoon that
You may have seen caricatures of politicians, celebrities, and                                                                              exaggerates a person’s
other famous people in various magazines and newspapers.                                                                                    distinctive and unique facial
They are obviously a cartoon, yet they look like the person on                                                                              features, often capturing less
which they are based. How is this accomplished (you may                                                                                     attractive characteristics.
ask)?                                                                                                                                       Proportion is the relationship
                                                                                                                                            in size of one component of a
Strong drawing skills and a good knowledge of facial anatomy
                                                                                                                                            drawing to another or others.
are important elements for rendering a successful caricature. In
a realistic portrait, accurately drawing the proportions of five                                                                            Shape refers to the outward
crucial spaces on a face enhances a recognizable likeness to                                                                                outline of a form.
your subject. Even when discriminately exaggerated, these                                                                                   Sketch (noun) is a simple
same five spaces serve as guidelines for rendering a caricature                                                                             drawing that captures the
that looks like the person you’re drawing.                                                                                                  integral aspects of a subject
                                                                                                                                            quickly and efficiently; (verb)
For example, in reality a few of John’s facial distances (and                                                                               refers to the process of
characteristics) wander outside generic guidelines. To see what                                                                             rendering a sketch.
I chose to exaggerate, compare the photo of John in Figure 301
to the caricature in Figure 302 and identify the following five
crucial distances on each:                                                                                                                  TO LEARN MORE
      The vertical distance from the hairline down to the                                                                                   To get a sense of what are
      eyebrows (John’s is about average).                                                                                                   considered average facial
      The horizontal distance between the eyes, from one inside                                                                             distances, refer to P-12
      corner to the other (John’s eyes are large and far apart;                                                                             Intermediate: Adult Facial
      hence, a great feature to exaggerate).                                                                                                Proportions.
      The width of the face
      from the outside edge                                                            Figure 301                                                          Figure 302
      of one cheekbone to
      the outside edge of
      the other (the widest
      part of John’s face is
      another distance to
      exaggerate).
      The vertical distance
      from the bottom of
      the nose to the top of
      the upper lip (as an
      aside, this is
      considered the most
      important distance on
      the face).
      The length from the
      edge of the bottom lip
      to the bottom of the
      chin.


Copyright to all articles, images, text, projects, lessons and exercises within this document belong to Brenda Hoddinott and may not be reproduced or used for any commercial purposes whatsoever
                                         without the written permission of Brenda Hoddinott. E-mail brenda@drawspace.com Web site http://www.drawspace.com
-3-


SKETCHING PROPORTIONS WITH A GRID
In this section, you use a grid to establish the accurate proportions of a caricature of a lady
named Kay. The actual size of my drawing is 5 by 6 inches with 1 inch squares. However, you
may prefer to use a larger grid (for example, 10 by 12 inches with 2” squares).
Remember to press very lightly with your pencil because some lines will need to be lightened or
erased. If you prefer to draw freehand without a grid, simply ignore all references to the grid.

1)       Use a ruler to draw a rectangle and divide it                                                                                             Figure 303
         into 30 squares (Figure 303).
         Draw your lines very lightly, preferably with
         your HB mechanical pencil. You will need to
         erase these lines later. In reality, my sketch is so
         faint that it’s barely visible. However, it’s been
         made darker in a computer program, so you can
         see the lines.

2)       Start from the left and number the vertical
         squares along the top and bottom with
         numbers 1 to 5.

3)       Letter the horizontal squares down both
         longer sides with letters A to F.

                                       Figure 304


                                                                                                                  4)          Lightly sketch the perimeter of
                                                                                                                              the forehead and the hair.
                                                                                                                              Refer to Figure 304. No matter
                                                                                                                              how careful you are accidents
                                                                                                                              still happen. If you draw some
                                                                                                                              outlines in the wrong grid
                                                                                                                              squares, simply erase them,
                                                                                                                              redraw the grid lines, and keep
                                                                                                                              on going!

                                                                                                                  5)          Sketch the perimeter of the
                                                                                                                              face.

                                                                                                                  6)          Add the eyes, eyebrows and the
                                                                                                                              lower section of the ears.
                                                                                                                              Take note that the eyes and
                                                                                                                              eyebrows are approximately at
                                                                                                                              the midway point on the face, the
                                                                                                                              same proportions as in realistic
                                                                                                                              portraiture.


Copyright to all articles, images, text, projects, lessons and exercises within this document belong to Brenda Hoddinott and may not be reproduced or used for any commercial purposes whatsoever
                                         without the written permission of Brenda Hoddinott. E-mail brenda@drawspace.com Web site http://www.drawspace.com
-4-


7)       Lightly sketch her nose and                                                                                                        Figure 305
         mouth, and the rest of her hair on
         the top and sides.
         Refer to Figure 305.
8)       Outline her neck and clothing.
         Refer to Figure 306.

                                   Figure 306


                                                                                                                                        Figure 307


9)       Before you continue, check that
         everything is in the correct
         place, and change anything
         you’re not happy with.
         Check the relationships of lines
         and spaces to one another, and to
         the sides of each grid square.

10) Erase the grid lines and then
    redraw the sections of the sketch
    that were erased in the process.
         Use an edge of your vinyl eraser to carefully
         erase grid lines. Then, use your kneaded
         eraser to gently pat the surface of the paper,
         to pick up any remaining eraser crumbs.


Copyright to all articles, images, text, projects, lessons and exercises within this document belong to Brenda Hoddinott and may not be reproduced or used for any commercial purposes whatsoever
                                         without the written permission of Brenda Hoddinott. E-mail brenda@drawspace.com Web site http://www.drawspace.com
-5-


ADDING SHADING WITH LINES                                                                                                                                  ARTSPEAK
Curved lines are used for shading the hair. Hatching graduations
                                                                                                                                                           Light source refers
comprised of straight lines are used for shading the background,                                                                                           to the direction from
clothing, face, nose and ears. Three different grades of pencils, HB, 2B                                                                                   which a dominant
and 4B, create a full range of values. The hatching lines in Figure 308                                                                                    light originates. The
are drawn very closely together to look like light, medium, and dark                                                                                       placement of this
values.                                                                                                                                                    light source affects
                                                                                                                                                           every aspect of a
                                                         Figure 308                                                                                        drawing. The light
                                                                                                                                                           source tells you
                                                                                                                                                           where to draw all the
                                                                                                                                                           light values and
                                                                                                                                                           shadows.
                                                                                                                                                           Hatching is a series
                                                                                                                                                           of lines (called a set)
  (LIGHT - HB PENCIL)                           (MEDIUM - 2B PENCIL)                             (DARK - 4B PENCIL)
                                                                                                                                                           drawn closely
                                                                                                                                                           together to give the
11) With a freshly sharpened HB pencil, draw curved lines                                                                                                  illusion of values.
    through the hair.                                                                                                                                      Values are the
         These lines give the illusion of form to the hair.                                                                                                different shades of
                                                                                                                                                           gray created when
                                          Figure 309                                The light source in this                                               you draw by varying
                                                                                    drawing is from the upper                                              both the density of
                                                                                    right; hence, the shading is                                           the shading lines,
                                                                                    darker on the left.                                                    and the pressure
                                                                                                                                                           used in holding
                                                                                                                                                           various pencils.

                                                                                                       12) Add shading to the eyes and
                                                                                                           eyebrows.
                                                                                                                  Refer to Figure 309. Short curved lines
                                                                                                                  are used for shading the eyebrows.
                                                                                                                   Before you begin shading the eyes,
                                                                                                                   outline the pupils and highlights in
                                                                                                                   each iris. Take note that the shading on
                                                                                                                   the iris of each eye is darker on the
                                                                                                                   side where the highlight is drawn.

                                                                                                                                 Figure 310


Copyright to all articles, images, text, projects, lessons and exercises within this document belong to Brenda Hoddinott and may not be reproduced or used for any commercial purposes whatsoever
                                         without the written permission of Brenda Hoddinott. E-mail brenda@drawspace.com Web site http://www.drawspace.com
-6-


                                                                                           TIP
        Always place a piece of clean paper under your hand as you draw. Each time you work on a new
        section, move your paper so it’s always under your hand. This prevents you from smudging your
                           drawing, and protects the paper from the oils in your skin.

                                                                                                                         Figure 311
13) Add shading to the
    ears.
         Note how this shading
         creates the illusion of
         the ear being under
         the hair and set
         further back than the
         edge of the face.

14) Add shading to her
    nose.


15) Complete the
    shading of her face.                                                                                             Figure 312

         To lessen the likelihood of
         accidental smudging, begin
         in the upper left and work
         your way downward toward
         the lower right (if you’re
         left handed begin at the
         upper right).
         Don’t miss the
         cast shadows on
         her forehead from
         her bangs, and on
         the left side of her
         cheek created by
         her nose.
         The shading
         around and
         between her eyes
         is lighter on the
         side of the face
         closer to the light
         source.
         The lips are shaded with only
         values; in real life lips are not
         outlined with dark lines.


Copyright to all articles, images, text, projects, lessons and exercises within this document belong to Brenda Hoddinott and may not be reproduced or used for any commercial purposes whatsoever
                                         without the written permission of Brenda Hoddinott. E-mail brenda@drawspace.com Web site http://www.drawspace.com
-7-


16) Beginning in the                                                                                                 Figure 313
    upper sections,
    add shading to
    the background.

17) Add shading to
    her neck and
    clothing.
         Refer to Figures
         314 and 315.
         When you are
         done, step back
         from your
         drawing and have
         a look at the
         overall values
         (Refer to Figure
         316).
18) Add final
    touches to any
    sections of
    shading that you
    are not happy
    with.


                        Figure 314


                                                                                 You can make some areas lighter by patting the lines
                                                                                 with your kneaded eraser shaped to a wedge.
                                                                                 You make sections darker by simply drawing more
                                                                                 hatching lines in between others. For example, you can
                                                                                 use a 2B pencil to add more hatching lines to the
                                                                                 medium and dark values.

                                                                                                                  Figure 315


Copyright to all articles, images, text, projects, lessons and exercises within this document belong to Brenda Hoddinott and may not be reproduced or used for any commercial purposes whatsoever
                                         without the written permission of Brenda Hoddinott. E-mail brenda@drawspace.com Web site http://www.drawspace.com
-8-


                                                                                                              Figure 316

Sign your name,
write today’s
date on the back
of your drawing,
and put a smile
on your face!
This
Gigglecature is
based on the
face of an artist
friend, Kay
Wilson, and in
addition to
accentuating her
hair and
features; I have
also tried to add
a kind, gentle
nature to her
facial
expression.


CHALLENGE
Draw a caricature of someone you know, such as one your family members or a friend, either
from life or a photo! Choose a good photo or find a patient model. If you work from life, be
prepared for a few giggles! A brief overview of the process is as follows:
      1. Observe the overall shape of the head and face, and exaggerate it as you draw.
      2. Lightly sketch the location of each individual feature. Constantly refer to your model for
         unique or unusual aspects of their features that you can exaggerate in your drawing
         (Remember this person may draw your caricature someday, so be nice!) For example, if
         the eyes are far apart, draw them even farther apart. If his or her eyebrows are heavy,
         thick and dark, draw them heavier, thicker, and darker! If he or she has a big chin or nose,
         draw it larger! If the hair is thin, make it thinner and if it’s thick, draw it thicker!
      3. Continue adjusting and changing until you are happy with your drawing.


Copyright to all articles, images, text, projects, lessons and exercises within this document belong to Brenda Hoddinott and may not be reproduced or used for any commercial purposes whatsoever
                                         without the written permission of Brenda Hoddinott. E-mail brenda@drawspace.com Web site http://www.drawspace.com
-9-


BRENDA HODDINOTT - BIOGRAPHY
As a self-educated teacher, visual artist, portraitist, forensic artist, and illustrator, Brenda
Hoddinott utilizes diverse art media including graphite, technical pen, colored pencil, chalk
pastel, charcoal, conté crayon, and oil paints.

                    My philosophy on teaching art is to focus primarily on the enjoyment
                   aspects while gently introducing the technical and academic. Hence, in
                    creating a passion for the subject matter, the quest for knowledge also
                                              becomes enjoyable.
                                                                              >Brenda Hoddinott<


Born in St. John’s, Newfoundland, Brenda grew up in the small town of Corner Brook. She
developed strong technical competencies with a personal commitment to self directed learning,
and the aid of assorted “Learn to Draw” books. During Brenda’s twenty-five year career as a
self-educated civilian forensic artist, numerous criminal investigation departments have
employed Brenda’s skills, including Royal Canadian Mounted Police and municipal police
departments. In 1992, Brenda was honored with a commendation from the Royal Canadian
Mounted Police, and in 1994, she was awarded a Certificate of Membership from “Forensic
Artists International”.
Her home-based art career included graphic design, and teaching recreational drawing and
painting classes. As supervisor of her community’s recreational art department, Brenda hired and
trained teachers, and designed curriculum for several children’s art programs. In 1998, Brenda
chose to end her eighteen-year career as an art educator in order to devote more time to writing,
drawing, painting, and developing her websites.
Drawspace http://www.drawspace.com incorporates her unique style and innovative approach to
curriculum development. This site offers downloadable and printable drawing classes for
students of all abilities from the age of eight through adult. Students of all ages, levels and
abilities have praised the simple step-by-step instructional approach. This site is respected as a
resource for fine art educators, home schooling programs, and educational facilities throughout
the world.


LEARN-TO-DRAW BOOKS BY BRENDA HODDINOTT
   Drawing for Dummies: Wiley Publishing, Inc., New, York, NY, this 336 page book is
    available on various websites and in major bookstores internationally.
   The Complete Idiot’s Guide to Drawing People: Winner of the Alpha-Penguin Book of
    the Year Award 2004, Alpha - Pearson Education – Macmillan, Indianapolis, IN, this 360
    page book is available on various websites and in major bookstores internationally.


Copyright to all articles, images, text, projects, lessons and exercises within this document belong to Brenda Hoddinott and may not be reproduced or used for any commercial purposes whatsoever
                                         without the written permission of Brenda Hoddinott. E-mail brenda@drawspace.com Web site http://www.drawspace.com

More Related Content

What's hot

Front Cover Research 3
Front Cover Research 3Front Cover Research 3
Front Cover Research 3JosetteHo
 
Music magizines content research and anylasis final on blog 07
Music magizines content research and anylasis final on blog 07Music magizines content research and anylasis final on blog 07
Music magizines content research and anylasis final on blog 0707scott
 
Existing product research (front cover)
Existing product research (front cover)Existing product research (front cover)
Existing product research (front cover)alextownsley
 
Kristin Cooke Portfolio
Kristin Cooke PortfolioKristin Cooke Portfolio
Kristin Cooke Portfoliokristincooke
 

What's hot (7)

Front Cover Research 3
Front Cover Research 3Front Cover Research 3
Front Cover Research 3
 
Britney
BritneyBritney
Britney
 
Vibe magazine
Vibe magazineVibe magazine
Vibe magazine
 
Music magizines content research and anylasis final on blog 07
Music magizines content research and anylasis final on blog 07Music magizines content research and anylasis final on blog 07
Music magizines content research and anylasis final on blog 07
 
Existing product research (front cover)
Existing product research (front cover)Existing product research (front cover)
Existing product research (front cover)
 
Textures
TexturesTextures
Textures
 
Kristin Cooke Portfolio
Kristin Cooke PortfolioKristin Cooke Portfolio
Kristin Cooke Portfolio
 

Viewers also liked

Viewers also liked (8)

Old navy
Old navyOld navy
Old navy
 
practica la caricatura
practica la caricaturapractica la caricatura
practica la caricatura
 
O01
O01O01
O01
 
caricatura
caricaturacaricatura
caricatura
 
Leçon 103 - Énoncé et pratique
Leçon 103 - Énoncé et pratiqueLeçon 103 - Énoncé et pratique
Leçon 103 - Énoncé et pratique
 
caricatura
caricaturacaricatura
caricatura
 
Zocalos
ZocalosZocalos
Zocalos
 
O02
O02O02
O02
 

Similar to practica la caricatura

practica la caricatura
practica la caricaturapractica la caricatura
practica la caricaturaluzdelluvia
 
practica la caricatura
practica la caricaturapractica la caricatura
practica la caricaturaluzdelluvia
 
Teaching with visual symbols
Teaching with visual symbolsTeaching with visual symbols
Teaching with visual symbolsAgustinRezel
 
#6 character design
#6 character design#6 character design
#6 character designkkirschbaum
 
The Gestalt of Slides
The Gestalt of SlidesThe Gestalt of Slides
The Gestalt of SlidesGlenna Shaw
 

Similar to practica la caricatura (9)

caricatura
caricaturacaricatura
caricatura
 
practica la caricatura
practica la caricaturapractica la caricatura
practica la caricatura
 
practica la caricatura
practica la caricaturapractica la caricatura
practica la caricatura
 
O01
O01O01
O01
 
Drawing faces
Drawing facesDrawing faces
Drawing faces
 
Teaching with visual symbols
Teaching with visual symbolsTeaching with visual symbols
Teaching with visual symbols
 
Lesson 13
Lesson 13Lesson 13
Lesson 13
 
#6 character design
#6 character design#6 character design
#6 character design
 
The Gestalt of Slides
The Gestalt of SlidesThe Gestalt of Slides
The Gestalt of Slides
 

Recently uploaded

ENGLISH 7_Q4_LESSON 2_ Employing a Variety of Strategies for Effective Interp...
ENGLISH 7_Q4_LESSON 2_ Employing a Variety of Strategies for Effective Interp...ENGLISH 7_Q4_LESSON 2_ Employing a Variety of Strategies for Effective Interp...
ENGLISH 7_Q4_LESSON 2_ Employing a Variety of Strategies for Effective Interp...JhezDiaz1
 
How to Add Barcode on PDF Report in Odoo 17
How to Add Barcode on PDF Report in Odoo 17How to Add Barcode on PDF Report in Odoo 17
How to Add Barcode on PDF Report in Odoo 17Celine George
 
Choosing the Right CBSE School A Comprehensive Guide for Parents
Choosing the Right CBSE School A Comprehensive Guide for ParentsChoosing the Right CBSE School A Comprehensive Guide for Parents
Choosing the Right CBSE School A Comprehensive Guide for Parentsnavabharathschool99
 
Incoming and Outgoing Shipments in 3 STEPS Using Odoo 17
Incoming and Outgoing Shipments in 3 STEPS Using Odoo 17Incoming and Outgoing Shipments in 3 STEPS Using Odoo 17
Incoming and Outgoing Shipments in 3 STEPS Using Odoo 17Celine George
 
What is Model Inheritance in Odoo 17 ERP
What is Model Inheritance in Odoo 17 ERPWhat is Model Inheritance in Odoo 17 ERP
What is Model Inheritance in Odoo 17 ERPCeline George
 
Inclusivity Essentials_ Creating Accessible Websites for Nonprofits .pdf
Inclusivity Essentials_ Creating Accessible Websites for Nonprofits .pdfInclusivity Essentials_ Creating Accessible Websites for Nonprofits .pdf
Inclusivity Essentials_ Creating Accessible Websites for Nonprofits .pdfTechSoup
 
Food processing presentation for bsc agriculture hons
Food processing presentation for bsc agriculture honsFood processing presentation for bsc agriculture hons
Food processing presentation for bsc agriculture honsManeerUddin
 
ENG 5 Q4 WEEk 1 DAY 1 Restate sentences heard in one’s own words. Use appropr...
ENG 5 Q4 WEEk 1 DAY 1 Restate sentences heard in one’s own words. Use appropr...ENG 5 Q4 WEEk 1 DAY 1 Restate sentences heard in one’s own words. Use appropr...
ENG 5 Q4 WEEk 1 DAY 1 Restate sentences heard in one’s own words. Use appropr...JojoEDelaCruz
 
Barangay Council for the Protection of Children (BCPC) Orientation.pptx
Barangay Council for the Protection of Children (BCPC) Orientation.pptxBarangay Council for the Protection of Children (BCPC) Orientation.pptx
Barangay Council for the Protection of Children (BCPC) Orientation.pptxCarlos105
 
Earth Day Presentation wow hello nice great
Earth Day Presentation wow hello nice greatEarth Day Presentation wow hello nice great
Earth Day Presentation wow hello nice greatYousafMalik24
 
Integumentary System SMP B. Pharm Sem I.ppt
Integumentary System SMP B. Pharm Sem I.pptIntegumentary System SMP B. Pharm Sem I.ppt
Integumentary System SMP B. Pharm Sem I.pptshraddhaparab530
 
AUDIENCE THEORY -CULTIVATION THEORY - GERBNER.pptx
AUDIENCE THEORY -CULTIVATION THEORY -  GERBNER.pptxAUDIENCE THEORY -CULTIVATION THEORY -  GERBNER.pptx
AUDIENCE THEORY -CULTIVATION THEORY - GERBNER.pptxiammrhaywood
 
Difference Between Search & Browse Methods in Odoo 17
Difference Between Search & Browse Methods in Odoo 17Difference Between Search & Browse Methods in Odoo 17
Difference Between Search & Browse Methods in Odoo 17Celine George
 
ANG SEKTOR NG agrikultura.pptx QUARTER 4
ANG SEKTOR NG agrikultura.pptx QUARTER 4ANG SEKTOR NG agrikultura.pptx QUARTER 4
ANG SEKTOR NG agrikultura.pptx QUARTER 4MiaBumagat1
 
How to do quick user assign in kanban in Odoo 17 ERP
How to do quick user assign in kanban in Odoo 17 ERPHow to do quick user assign in kanban in Odoo 17 ERP
How to do quick user assign in kanban in Odoo 17 ERPCeline George
 
Q4-PPT-Music9_Lesson-1-Romantic-Opera.pptx
Q4-PPT-Music9_Lesson-1-Romantic-Opera.pptxQ4-PPT-Music9_Lesson-1-Romantic-Opera.pptx
Q4-PPT-Music9_Lesson-1-Romantic-Opera.pptxlancelewisportillo
 
Grade 9 Quarter 4 Dll Grade 9 Quarter 4 DLL.pdf
Grade 9 Quarter 4 Dll Grade 9 Quarter 4 DLL.pdfGrade 9 Quarter 4 Dll Grade 9 Quarter 4 DLL.pdf
Grade 9 Quarter 4 Dll Grade 9 Quarter 4 DLL.pdfJemuel Francisco
 
4.18.24 Movement Legacies, Reflection, and Review.pptx
4.18.24 Movement Legacies, Reflection, and Review.pptx4.18.24 Movement Legacies, Reflection, and Review.pptx
4.18.24 Movement Legacies, Reflection, and Review.pptxmary850239
 

Recently uploaded (20)

ENGLISH 7_Q4_LESSON 2_ Employing a Variety of Strategies for Effective Interp...
ENGLISH 7_Q4_LESSON 2_ Employing a Variety of Strategies for Effective Interp...ENGLISH 7_Q4_LESSON 2_ Employing a Variety of Strategies for Effective Interp...
ENGLISH 7_Q4_LESSON 2_ Employing a Variety of Strategies for Effective Interp...
 
How to Add Barcode on PDF Report in Odoo 17
How to Add Barcode on PDF Report in Odoo 17How to Add Barcode on PDF Report in Odoo 17
How to Add Barcode on PDF Report in Odoo 17
 
Choosing the Right CBSE School A Comprehensive Guide for Parents
Choosing the Right CBSE School A Comprehensive Guide for ParentsChoosing the Right CBSE School A Comprehensive Guide for Parents
Choosing the Right CBSE School A Comprehensive Guide for Parents
 
LEFT_ON_C'N_ PRELIMS_EL_DORADO_2024.pptx
LEFT_ON_C'N_ PRELIMS_EL_DORADO_2024.pptxLEFT_ON_C'N_ PRELIMS_EL_DORADO_2024.pptx
LEFT_ON_C'N_ PRELIMS_EL_DORADO_2024.pptx
 
Incoming and Outgoing Shipments in 3 STEPS Using Odoo 17
Incoming and Outgoing Shipments in 3 STEPS Using Odoo 17Incoming and Outgoing Shipments in 3 STEPS Using Odoo 17
Incoming and Outgoing Shipments in 3 STEPS Using Odoo 17
 
What is Model Inheritance in Odoo 17 ERP
What is Model Inheritance in Odoo 17 ERPWhat is Model Inheritance in Odoo 17 ERP
What is Model Inheritance in Odoo 17 ERP
 
Inclusivity Essentials_ Creating Accessible Websites for Nonprofits .pdf
Inclusivity Essentials_ Creating Accessible Websites for Nonprofits .pdfInclusivity Essentials_ Creating Accessible Websites for Nonprofits .pdf
Inclusivity Essentials_ Creating Accessible Websites for Nonprofits .pdf
 
Food processing presentation for bsc agriculture hons
Food processing presentation for bsc agriculture honsFood processing presentation for bsc agriculture hons
Food processing presentation for bsc agriculture hons
 
ENG 5 Q4 WEEk 1 DAY 1 Restate sentences heard in one’s own words. Use appropr...
ENG 5 Q4 WEEk 1 DAY 1 Restate sentences heard in one’s own words. Use appropr...ENG 5 Q4 WEEk 1 DAY 1 Restate sentences heard in one’s own words. Use appropr...
ENG 5 Q4 WEEk 1 DAY 1 Restate sentences heard in one’s own words. Use appropr...
 
Barangay Council for the Protection of Children (BCPC) Orientation.pptx
Barangay Council for the Protection of Children (BCPC) Orientation.pptxBarangay Council for the Protection of Children (BCPC) Orientation.pptx
Barangay Council for the Protection of Children (BCPC) Orientation.pptx
 
Earth Day Presentation wow hello nice great
Earth Day Presentation wow hello nice greatEarth Day Presentation wow hello nice great
Earth Day Presentation wow hello nice great
 
Raw materials used in Herbal Cosmetics.pptx
Raw materials used in Herbal Cosmetics.pptxRaw materials used in Herbal Cosmetics.pptx
Raw materials used in Herbal Cosmetics.pptx
 
Integumentary System SMP B. Pharm Sem I.ppt
Integumentary System SMP B. Pharm Sem I.pptIntegumentary System SMP B. Pharm Sem I.ppt
Integumentary System SMP B. Pharm Sem I.ppt
 
AUDIENCE THEORY -CULTIVATION THEORY - GERBNER.pptx
AUDIENCE THEORY -CULTIVATION THEORY -  GERBNER.pptxAUDIENCE THEORY -CULTIVATION THEORY -  GERBNER.pptx
AUDIENCE THEORY -CULTIVATION THEORY - GERBNER.pptx
 
Difference Between Search & Browse Methods in Odoo 17
Difference Between Search & Browse Methods in Odoo 17Difference Between Search & Browse Methods in Odoo 17
Difference Between Search & Browse Methods in Odoo 17
 
ANG SEKTOR NG agrikultura.pptx QUARTER 4
ANG SEKTOR NG agrikultura.pptx QUARTER 4ANG SEKTOR NG agrikultura.pptx QUARTER 4
ANG SEKTOR NG agrikultura.pptx QUARTER 4
 
How to do quick user assign in kanban in Odoo 17 ERP
How to do quick user assign in kanban in Odoo 17 ERPHow to do quick user assign in kanban in Odoo 17 ERP
How to do quick user assign in kanban in Odoo 17 ERP
 
Q4-PPT-Music9_Lesson-1-Romantic-Opera.pptx
Q4-PPT-Music9_Lesson-1-Romantic-Opera.pptxQ4-PPT-Music9_Lesson-1-Romantic-Opera.pptx
Q4-PPT-Music9_Lesson-1-Romantic-Opera.pptx
 
Grade 9 Quarter 4 Dll Grade 9 Quarter 4 DLL.pdf
Grade 9 Quarter 4 Dll Grade 9 Quarter 4 DLL.pdfGrade 9 Quarter 4 Dll Grade 9 Quarter 4 DLL.pdf
Grade 9 Quarter 4 Dll Grade 9 Quarter 4 DLL.pdf
 
4.18.24 Movement Legacies, Reflection, and Review.pptx
4.18.24 Movement Legacies, Reflection, and Review.pptx4.18.24 Movement Legacies, Reflection, and Review.pptx
4.18.24 Movement Legacies, Reflection, and Review.pptx
 

practica la caricatura

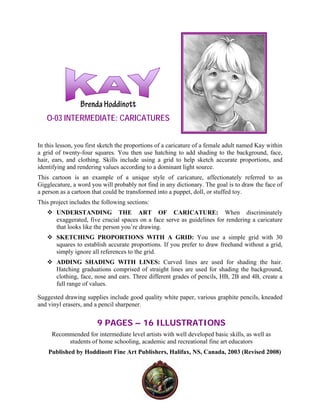
  • 1. Brenda Hoddinott O-03 INTERMEDIATE: CARICATURES In this lesson, you first sketch the proportions of a caricature of a female adult named Kay within a grid of twenty-four squares. You then use hatching to add shading to the background, face, hair, ears, and clothing. Skills include using a grid to help sketch accurate proportions, and identifying and rendering values according to a dominant light source. This cartoon is an example of a unique style of caricature, affectionately referred to as Gigglecature, a word you will probably not find in any dictionary. The goal is to draw the face of a person as a cartoon that could be transformed into a puppet, doll, or stuffed toy. This project includes the following sections:  UNDERSTANDING THE ART OF CARICATURE: When discriminately exaggerated, five crucial spaces on a face serve as guidelines for rendering a caricature that looks like the person you’re drawing.  SKETCHING PROPORTIONS WITH A GRID: You use a simple grid with 30 squares to establish accurate proportions. If you prefer to draw freehand without a grid, simply ignore all references to the grid.  ADDING SHADING WITH LINES: Curved lines are used for shading the hair. Hatching graduations comprised of straight lines are used for shading the background, clothing, face, nose and ears. Three different grades of pencils, HB, 2B and 4B, create a full range of values. Suggested drawing supplies include good quality white paper, various graphite pencils, kneaded and vinyl erasers, and a pencil sharpener. 9 PAGES – 16 ILLUSTRATIONS Recommended for intermediate level artists with well developed basic skills, as well as students of home schooling, academic and recreational fine art educators Published by Hoddinott Fine Art Publishers, Halifax, NS, Canada, 2003 (Revised 2008)
  • 2. -2- UNDERSTANDING THE ART OF ARTSPEAK CARICATURE Caricature is a cartoon that You may have seen caricatures of politicians, celebrities, and exaggerates a person’s other famous people in various magazines and newspapers. distinctive and unique facial They are obviously a cartoon, yet they look like the person on features, often capturing less which they are based. How is this accomplished (you may attractive characteristics. ask)? Proportion is the relationship in size of one component of a Strong drawing skills and a good knowledge of facial anatomy drawing to another or others. are important elements for rendering a successful caricature. In a realistic portrait, accurately drawing the proportions of five Shape refers to the outward crucial spaces on a face enhances a recognizable likeness to outline of a form. your subject. Even when discriminately exaggerated, these Sketch (noun) is a simple same five spaces serve as guidelines for rendering a caricature drawing that captures the that looks like the person you’re drawing. integral aspects of a subject quickly and efficiently; (verb) For example, in reality a few of John’s facial distances (and refers to the process of characteristics) wander outside generic guidelines. To see what rendering a sketch. I chose to exaggerate, compare the photo of John in Figure 301 to the caricature in Figure 302 and identify the following five crucial distances on each: TO LEARN MORE The vertical distance from the hairline down to the To get a sense of what are eyebrows (John’s is about average). considered average facial The horizontal distance between the eyes, from one inside distances, refer to P-12 corner to the other (John’s eyes are large and far apart; Intermediate: Adult Facial hence, a great feature to exaggerate). Proportions. The width of the face from the outside edge Figure 301 Figure 302 of one cheekbone to the outside edge of the other (the widest part of John’s face is another distance to exaggerate). The vertical distance from the bottom of the nose to the top of the upper lip (as an aside, this is considered the most important distance on the face). The length from the edge of the bottom lip to the bottom of the chin. Copyright to all articles, images, text, projects, lessons and exercises within this document belong to Brenda Hoddinott and may not be reproduced or used for any commercial purposes whatsoever without the written permission of Brenda Hoddinott. E-mail brenda@drawspace.com Web site http://www.drawspace.com
  • 3. -3- SKETCHING PROPORTIONS WITH A GRID In this section, you use a grid to establish the accurate proportions of a caricature of a lady named Kay. The actual size of my drawing is 5 by 6 inches with 1 inch squares. However, you may prefer to use a larger grid (for example, 10 by 12 inches with 2” squares). Remember to press very lightly with your pencil because some lines will need to be lightened or erased. If you prefer to draw freehand without a grid, simply ignore all references to the grid. 1) Use a ruler to draw a rectangle and divide it Figure 303 into 30 squares (Figure 303). Draw your lines very lightly, preferably with your HB mechanical pencil. You will need to erase these lines later. In reality, my sketch is so faint that it’s barely visible. However, it’s been made darker in a computer program, so you can see the lines. 2) Start from the left and number the vertical squares along the top and bottom with numbers 1 to 5. 3) Letter the horizontal squares down both longer sides with letters A to F. Figure 304 4) Lightly sketch the perimeter of the forehead and the hair. Refer to Figure 304. No matter how careful you are accidents still happen. If you draw some outlines in the wrong grid squares, simply erase them, redraw the grid lines, and keep on going! 5) Sketch the perimeter of the face. 6) Add the eyes, eyebrows and the lower section of the ears. Take note that the eyes and eyebrows are approximately at the midway point on the face, the same proportions as in realistic portraiture. Copyright to all articles, images, text, projects, lessons and exercises within this document belong to Brenda Hoddinott and may not be reproduced or used for any commercial purposes whatsoever without the written permission of Brenda Hoddinott. E-mail brenda@drawspace.com Web site http://www.drawspace.com
  • 4. -4- 7) Lightly sketch her nose and Figure 305 mouth, and the rest of her hair on the top and sides. Refer to Figure 305. 8) Outline her neck and clothing. Refer to Figure 306. Figure 306 Figure 307 9) Before you continue, check that everything is in the correct place, and change anything you’re not happy with. Check the relationships of lines and spaces to one another, and to the sides of each grid square. 10) Erase the grid lines and then redraw the sections of the sketch that were erased in the process. Use an edge of your vinyl eraser to carefully erase grid lines. Then, use your kneaded eraser to gently pat the surface of the paper, to pick up any remaining eraser crumbs. Copyright to all articles, images, text, projects, lessons and exercises within this document belong to Brenda Hoddinott and may not be reproduced or used for any commercial purposes whatsoever without the written permission of Brenda Hoddinott. E-mail brenda@drawspace.com Web site http://www.drawspace.com
  • 5. -5- ADDING SHADING WITH LINES ARTSPEAK Curved lines are used for shading the hair. Hatching graduations Light source refers comprised of straight lines are used for shading the background, to the direction from clothing, face, nose and ears. Three different grades of pencils, HB, 2B which a dominant and 4B, create a full range of values. The hatching lines in Figure 308 light originates. The are drawn very closely together to look like light, medium, and dark placement of this values. light source affects every aspect of a Figure 308 drawing. The light source tells you where to draw all the light values and shadows. Hatching is a series of lines (called a set) (LIGHT - HB PENCIL) (MEDIUM - 2B PENCIL) (DARK - 4B PENCIL) drawn closely together to give the 11) With a freshly sharpened HB pencil, draw curved lines illusion of values. through the hair. Values are the These lines give the illusion of form to the hair. different shades of gray created when Figure 309 The light source in this you draw by varying drawing is from the upper both the density of right; hence, the shading is the shading lines, darker on the left. and the pressure used in holding various pencils. 12) Add shading to the eyes and eyebrows. Refer to Figure 309. Short curved lines are used for shading the eyebrows. Before you begin shading the eyes, outline the pupils and highlights in each iris. Take note that the shading on the iris of each eye is darker on the side where the highlight is drawn. Figure 310 Copyright to all articles, images, text, projects, lessons and exercises within this document belong to Brenda Hoddinott and may not be reproduced or used for any commercial purposes whatsoever without the written permission of Brenda Hoddinott. E-mail brenda@drawspace.com Web site http://www.drawspace.com
  • 6. -6- TIP Always place a piece of clean paper under your hand as you draw. Each time you work on a new section, move your paper so it’s always under your hand. This prevents you from smudging your drawing, and protects the paper from the oils in your skin. Figure 311 13) Add shading to the ears. Note how this shading creates the illusion of the ear being under the hair and set further back than the edge of the face. 14) Add shading to her nose. 15) Complete the shading of her face. Figure 312 To lessen the likelihood of accidental smudging, begin in the upper left and work your way downward toward the lower right (if you’re left handed begin at the upper right). Don’t miss the cast shadows on her forehead from her bangs, and on the left side of her cheek created by her nose. The shading around and between her eyes is lighter on the side of the face closer to the light source. The lips are shaded with only values; in real life lips are not outlined with dark lines. Copyright to all articles, images, text, projects, lessons and exercises within this document belong to Brenda Hoddinott and may not be reproduced or used for any commercial purposes whatsoever without the written permission of Brenda Hoddinott. E-mail brenda@drawspace.com Web site http://www.drawspace.com
  • 7. -7- 16) Beginning in the Figure 313 upper sections, add shading to the background. 17) Add shading to her neck and clothing. Refer to Figures 314 and 315. When you are done, step back from your drawing and have a look at the overall values (Refer to Figure 316). 18) Add final touches to any sections of shading that you are not happy with. Figure 314 You can make some areas lighter by patting the lines with your kneaded eraser shaped to a wedge. You make sections darker by simply drawing more hatching lines in between others. For example, you can use a 2B pencil to add more hatching lines to the medium and dark values. Figure 315 Copyright to all articles, images, text, projects, lessons and exercises within this document belong to Brenda Hoddinott and may not be reproduced or used for any commercial purposes whatsoever without the written permission of Brenda Hoddinott. E-mail brenda@drawspace.com Web site http://www.drawspace.com
  • 8. -8- Figure 316 Sign your name, write today’s date on the back of your drawing, and put a smile on your face! This Gigglecature is based on the face of an artist friend, Kay Wilson, and in addition to accentuating her hair and features; I have also tried to add a kind, gentle nature to her facial expression. CHALLENGE Draw a caricature of someone you know, such as one your family members or a friend, either from life or a photo! Choose a good photo or find a patient model. If you work from life, be prepared for a few giggles! A brief overview of the process is as follows: 1. Observe the overall shape of the head and face, and exaggerate it as you draw. 2. Lightly sketch the location of each individual feature. Constantly refer to your model for unique or unusual aspects of their features that you can exaggerate in your drawing (Remember this person may draw your caricature someday, so be nice!) For example, if the eyes are far apart, draw them even farther apart. If his or her eyebrows are heavy, thick and dark, draw them heavier, thicker, and darker! If he or she has a big chin or nose, draw it larger! If the hair is thin, make it thinner and if it’s thick, draw it thicker! 3. Continue adjusting and changing until you are happy with your drawing. Copyright to all articles, images, text, projects, lessons and exercises within this document belong to Brenda Hoddinott and may not be reproduced or used for any commercial purposes whatsoever without the written permission of Brenda Hoddinott. E-mail brenda@drawspace.com Web site http://www.drawspace.com
  • 9. -9- BRENDA HODDINOTT - BIOGRAPHY As a self-educated teacher, visual artist, portraitist, forensic artist, and illustrator, Brenda Hoddinott utilizes diverse art media including graphite, technical pen, colored pencil, chalk pastel, charcoal, conté crayon, and oil paints. My philosophy on teaching art is to focus primarily on the enjoyment aspects while gently introducing the technical and academic. Hence, in creating a passion for the subject matter, the quest for knowledge also becomes enjoyable. >Brenda Hoddinott< Born in St. John’s, Newfoundland, Brenda grew up in the small town of Corner Brook. She developed strong technical competencies with a personal commitment to self directed learning, and the aid of assorted “Learn to Draw” books. During Brenda’s twenty-five year career as a self-educated civilian forensic artist, numerous criminal investigation departments have employed Brenda’s skills, including Royal Canadian Mounted Police and municipal police departments. In 1992, Brenda was honored with a commendation from the Royal Canadian Mounted Police, and in 1994, she was awarded a Certificate of Membership from “Forensic Artists International”. Her home-based art career included graphic design, and teaching recreational drawing and painting classes. As supervisor of her community’s recreational art department, Brenda hired and trained teachers, and designed curriculum for several children’s art programs. In 1998, Brenda chose to end her eighteen-year career as an art educator in order to devote more time to writing, drawing, painting, and developing her websites. Drawspace http://www.drawspace.com incorporates her unique style and innovative approach to curriculum development. This site offers downloadable and printable drawing classes for students of all abilities from the age of eight through adult. Students of all ages, levels and abilities have praised the simple step-by-step instructional approach. This site is respected as a resource for fine art educators, home schooling programs, and educational facilities throughout the world. LEARN-TO-DRAW BOOKS BY BRENDA HODDINOTT  Drawing for Dummies: Wiley Publishing, Inc., New, York, NY, this 336 page book is available on various websites and in major bookstores internationally.  The Complete Idiot’s Guide to Drawing People: Winner of the Alpha-Penguin Book of the Year Award 2004, Alpha - Pearson Education – Macmillan, Indianapolis, IN, this 360 page book is available on various websites and in major bookstores internationally. Copyright to all articles, images, text, projects, lessons and exercises within this document belong to Brenda Hoddinott and may not be reproduced or used for any commercial purposes whatsoever without the written permission of Brenda Hoddinott. E-mail brenda@drawspace.com Web site http://www.drawspace.com