SlideShare a Scribd company logo
1 of 15
Download to read offline
How to Construct and Care for Your Hydro Harvest Garden 
Hydro Harvest Farms 
www.hydroharvestfarms.com 
john@hydroharvestfarms.com 
1101 Shell Point Rd E 
Ruskin FL 33570 
Order gardens on-line 
Or email
Materials List Provided with Gardens (unless otherwise noted) 
Hydroponic System from Hydro Harvest Materials List & Assembly Instructions Materials (per tower) • 1 – ½ inch conduit pipe 20 inches long, • 1 steel plate (if towers will be positioned on a patio or deck) (optional) • 1—3/4 inch conduit 5 feet long. (Not provided if shipped, available at any home center’s electrical dept.) • 2 Square (shape may vary) Plates (Com Pots only) • 1 large ground pot • 1 –20” length of 1 inch PVC pipe (1 1/4 in. for Style Line garden) 4 vertical pots per tower • Growing medium: coconut core/perlite or vermiculite and perlite • 1 nutrient pair for up to 3 towers. *** AUTOMATIC UNITS ONLY*** • 1 nutrient line (white with blue nutrient line) • 1 yellow punch tool • 1 black capillary line per tower • Wire straps to secure capillary lines (1 per tower) • 1 poly figure 8 • 1 Greenback Poly Connector Valve • 1 pump w’ I/2 in.male adapter • 1 digital timer • 1 – PVC Feeding T’s per tower
Garden Parts 1 
Media and Nutrients 
Pots and Stands 
•Coco Coir (mix with Perlite) or 
•Perlite and Vermiculite (mix shown) 
•Nutrients (pair) 
•Bottom Box 
•Tower Vertical Pots (Com. Pots Shown) 
•PVC Pipe (20”) 
•Metal Poles (20 in. and 5 ft.) 
•Plates (square or other shape) 
White and Blue Poly Nutrient Line
Garden Parts 2 
Tank and Ground Cloth, (available for purchase at farm) 
Tubing and Connectors for Automation (included in kit) 
•Yellow Punch tool 
•Black Capillary line 
•Poly Figure 8 
•Zip tie 
•Greenback Poly Valve 
•Pump w/ male adapter 
•Digital Timer
Mix the media 50/50. Whether it is Vermiculite and Perlite or CoCo Coir and Perlite. You can use your reservoir to do this. Coco coir should be submerged in water (weigh down) until you can break it apart and then mix with perlite. 
Ground Cover (highly recommend, available at additional cost)) should be spread out taunt and attached to ground with provided clips. Patio Plates are available for hard surfaces. 
Prepare Media and Ground Cloth
Place nutrient tank where you plan. Place 1st ground pot 4-6 inches away from tank. Each ground pot should be 4-6 inches apart also. Or 32-36 in. pole to pole. 
Twist the ½ in. short metal pole into the hole in ground pot and twist to break through ground cloth (if using). Remove ground pot and tap pole in ground 2/3 way down. 
Determining Layout and Spacing
Use a wood block or something else to protect the tapped end from getting misshapen. Replace ground pot and repeat for each tower, space accordingly. 
Take ¾” metal pole (5 ft long one) and slide onto the short metal pole. Slide through ground pot into position. Repeat for each tower. 
Erecting Poles
Place the square plastic plate( shape may vary) over each metal pole and slide down into ground pots. Slide PVC Pipe over poles to rest on plate. You can vary length of PVC pole, depending on what you need. 
Add second square plastic plate (shape may vary)on top of PVC pipe. Then slide first vertical pot on top of each tower. Fill each vertical pot with media as you add each pot. Hint keep media damp! Fill ground pots with remaining media. 
Assembling Towers
Cut two holes in lid of reservoir. One for electric cord and one for nutrient line. If you have a drill a 1 in hole saw bit works great. Electric hole will require two overlapping holes. Make sure holes are not too big., the less light the better. 
Thread nutrient line through hole in lid of reservoir and attach to pump and place pump in bottom of reservoir. Feed pump electric cord through other hole. 
Automatic System Reservoir
Place PVC “T” on top of each tower. Thread the white and blue nutrient line through PVC “T’s”. 
( this demo shows no media in pots, but there should be at this point). 
One end of nutrient line goes to pump, the other end is crimped off with figure eight piece. Pass line though figure 8, bend line and pass through other hole on figure 8. 
Automatic System Instructions
Cut the nutrient line just above reservoir lid, using small knife and install greenback poly valve. This is used to start and stop flow of nutrients dispensed, manually. 
Use the yellow punch tool to punch a hole in the Nutrient line about 5” on the upstream side of the PVC “T”. The side closest to the Nutrient tank. 
Automatic System Feeding
Take black capillary line and slip one end into each punched hole. HINT: Push far enough in to touch the other side of tube then pull back a little bit. Make sure all capillary lines are the same length. 
Attach the other end of capillary line to bottom of PVC “T” (not pole) and secure with Tape or Electric Wire Strapping (zip tie). 
Feeding Lines
Fill Reservoir with only water. Place a cup at the last tower under capillary line. Adjust flow with the poly valve till you get 1 cup of water a minute. 4 minutes will dispense a quart. Tip- use plain water first 3-4 days to make sure your pump and timer is calibrated properly, then add nutrients. 
Plug the timer into an outlet in a dry area such as your garage , shed or patio. Then plug a grounded electrical cord from the timer to the pump. Keep the timer as dry as possible Set timer, mix nutrients and keep system tip top instructions on next page. 
Fill Tank, Test Pump and Set Timer
HOW TO SET TIMER 
HOW TO MIX NUTRIENTS 
HOW TO CLEAN MEDIA AND SYSTEM PARTS 
HOW TO CLEAN YOUR PUMP AND FILTER 
Other Useful Instructions
Come Visit the Farm! 
We have: 
Free Classes 
•Tours 
•Events 
•U-Pick 
•School Gardens 
•No GMO’s 
•No Chemical Sprays 
•Lots of great food! 
•www.hydroharvestfarms.com

More Related Content

Similar to Hydro Harvest Farms Garden Instructions

The Plastic Still
The Plastic StillThe Plastic Still
The Plastic StillHall
 
Biodigestores revised
Biodigestores revisedBiodigestores revised
Biodigestores revisedPgs Salinas
 
GeothermalHeatPump-DeerCrossingStillwaterOK first Four years revised Jun 26-2014
GeothermalHeatPump-DeerCrossingStillwaterOK first Four years revised Jun 26-2014GeothermalHeatPump-DeerCrossingStillwaterOK first Four years revised Jun 26-2014
GeothermalHeatPump-DeerCrossingStillwaterOK first Four years revised Jun 26-2014Gerald McClain
 
Sanotary installation
Sanotary installationSanotary installation
Sanotary installationRajiva Gupta
 
Laying, jointing and testing of pipes
Laying, jointing and testing of pipesLaying, jointing and testing of pipes
Laying, jointing and testing of pipessathyan s
 
Compendium In Hydraulic Ram-Pumps
Compendium In Hydraulic Ram-PumpsCompendium In Hydraulic Ram-Pumps
Compendium In Hydraulic Ram-PumpsFatin62c
 
B service catalog
B service catalogB service catalog
B service catalogPei Di
 
how to Install garbage disposal
how to Install garbage disposalhow to Install garbage disposal
how to Install garbage disposalSabrina Luo
 
Fit a bath and wash basin
Fit a bath and wash basinFit a bath and wash basin
Fit a bath and wash basinZulaiha Amaria
 
Install an electric shower
Install an electric showerInstall an electric shower
Install an electric showerZulaiha Amaria
 
Pipes, fittings-fixtures and appliance
Pipes, fittings-fixtures and appliancePipes, fittings-fixtures and appliance
Pipes, fittings-fixtures and applianceHarsha Singh
 
Uganda; Dream Drip Kits Bucket Kit, Locally Assembled Drip Irrigation Systems
Uganda;  Dream Drip Kits Bucket Kit, Locally Assembled Drip Irrigation SystemsUganda;  Dream Drip Kits Bucket Kit, Locally Assembled Drip Irrigation Systems
Uganda; Dream Drip Kits Bucket Kit, Locally Assembled Drip Irrigation SystemsD2Z
 
TRIC Trenchless LA building & safety
TRIC Trenchless LA building & safetyTRIC Trenchless LA building & safety
TRIC Trenchless LA building & safetyMEL3360
 

Similar to Hydro Harvest Farms Garden Instructions (20)

The Plastic Still
The Plastic StillThe Plastic Still
The Plastic Still
 
Biodigestores revised
Biodigestores revisedBiodigestores revised
Biodigestores revised
 
GeothermalHeatPump-DeerCrossingStillwaterOK first Four years revised Jun 26-2014
GeothermalHeatPump-DeerCrossingStillwaterOK first Four years revised Jun 26-2014GeothermalHeatPump-DeerCrossingStillwaterOK first Four years revised Jun 26-2014
GeothermalHeatPump-DeerCrossingStillwaterOK first Four years revised Jun 26-2014
 
Sanotary installation
Sanotary installationSanotary installation
Sanotary installation
 
Laying, jointing and testing of pipes
Laying, jointing and testing of pipesLaying, jointing and testing of pipes
Laying, jointing and testing of pipes
 
Compendium In Hydraulic Ram-Pumps
Compendium In Hydraulic Ram-PumpsCompendium In Hydraulic Ram-Pumps
Compendium In Hydraulic Ram-Pumps
 
B service catalog
B service catalogB service catalog
B service catalog
 
ACH 121 Lecture 10 (Utilities)
ACH 121 Lecture 10 (Utilities)ACH 121 Lecture 10 (Utilities)
ACH 121 Lecture 10 (Utilities)
 
Making a Self Watering Container for Drought Gardening
Making a Self Watering Container for Drought GardeningMaking a Self Watering Container for Drought Gardening
Making a Self Watering Container for Drought Gardening
 
Modular growth
Modular growthModular growth
Modular growth
 
how to Install garbage disposal
how to Install garbage disposalhow to Install garbage disposal
how to Install garbage disposal
 
Fit a bath and wash basin
Fit a bath and wash basinFit a bath and wash basin
Fit a bath and wash basin
 
Install an electric shower
Install an electric showerInstall an electric shower
Install an electric shower
 
Pipes, fittings-fixtures and appliance
Pipes, fittings-fixtures and appliancePipes, fittings-fixtures and appliance
Pipes, fittings-fixtures and appliance
 
Uganda; Dream Drip Kits Bucket Kit, Locally Assembled Drip Irrigation Systems
Uganda;  Dream Drip Kits Bucket Kit, Locally Assembled Drip Irrigation SystemsUganda;  Dream Drip Kits Bucket Kit, Locally Assembled Drip Irrigation Systems
Uganda; Dream Drip Kits Bucket Kit, Locally Assembled Drip Irrigation Systems
 
2004 0824 Mt
2004 0824 Mt2004 0824 Mt
2004 0824 Mt
 
60 Plumbing Terms Homeowners Should Know
60 Plumbing Terms Homeowners Should Know60 Plumbing Terms Homeowners Should Know
60 Plumbing Terms Homeowners Should Know
 
Auto pot brochure latest
Auto pot brochure latestAuto pot brochure latest
Auto pot brochure latest
 
Rain Director Install LQ
Rain Director Install LQRain Director Install LQ
Rain Director Install LQ
 
TRIC Trenchless LA building & safety
TRIC Trenchless LA building & safetyTRIC Trenchless LA building & safety
TRIC Trenchless LA building & safety
 

Recently uploaded

Call Girls In Dwarka Sub City ☎️7838079806 ✅ 💯Call Girls In Delhi
Call Girls In Dwarka Sub City  ☎️7838079806 ✅ 💯Call Girls In DelhiCall Girls In Dwarka Sub City  ☎️7838079806 ✅ 💯Call Girls In Delhi
Call Girls In Dwarka Sub City ☎️7838079806 ✅ 💯Call Girls In DelhiSoniyaSingh
 
E J Waggoner against Kellogg's Pantheism 8.pptx
E J Waggoner against Kellogg's Pantheism 8.pptxE J Waggoner against Kellogg's Pantheism 8.pptx
E J Waggoner against Kellogg's Pantheism 8.pptxJackieSparrow3
 
南新罕布什尔大学毕业证学位证成绩单-学历认证
南新罕布什尔大学毕业证学位证成绩单-学历认证南新罕布什尔大学毕业证学位证成绩单-学历认证
南新罕布什尔大学毕业证学位证成绩单-学历认证kbdhl05e
 
(No.1)↠Young Call Girls in Sikanderpur (Gurgaon) ꧁❤ 9711911712 ❤꧂ Escorts
(No.1)↠Young Call Girls in Sikanderpur (Gurgaon) ꧁❤ 9711911712 ❤꧂ Escorts(No.1)↠Young Call Girls in Sikanderpur (Gurgaon) ꧁❤ 9711911712 ❤꧂ Escorts
(No.1)↠Young Call Girls in Sikanderpur (Gurgaon) ꧁❤ 9711911712 ❤꧂ EscortsDelhi Escorts Service
 
(南达科他州立大学毕业证学位证成绩单-永久存档)
(南达科他州立大学毕业证学位证成绩单-永久存档)(南达科他州立大学毕业证学位证成绩单-永久存档)
(南达科他州立大学毕业证学位证成绩单-永久存档)oannq
 
Authentic No 1 Amil Baba In Pakistan Amil Baba In Faisalabad Amil Baba In Kar...
Authentic No 1 Amil Baba In Pakistan Amil Baba In Faisalabad Amil Baba In Kar...Authentic No 1 Amil Baba In Pakistan Amil Baba In Faisalabad Amil Baba In Kar...
Authentic No 1 Amil Baba In Pakistan Amil Baba In Faisalabad Amil Baba In Kar...Authentic No 1 Amil Baba In Pakistan
 
办理西悉尼大学毕业证成绩单、制作假文凭
办理西悉尼大学毕业证成绩单、制作假文凭办理西悉尼大学毕业证成绩单、制作假文凭
办理西悉尼大学毕业证成绩单、制作假文凭o8wvnojp
 
Inspiring Through Words Power of Inspiration.pptx
Inspiring Through Words Power of Inspiration.pptxInspiring Through Words Power of Inspiration.pptx
Inspiring Through Words Power of Inspiration.pptxShubham Rawat
 
Call Girls In Karkardooma 83770 87607 Just-Dial Escorts Service 24X7 Avilable
Call Girls In Karkardooma 83770 87607 Just-Dial Escorts Service 24X7 AvilableCall Girls In Karkardooma 83770 87607 Just-Dial Escorts Service 24X7 Avilable
Call Girls In Karkardooma 83770 87607 Just-Dial Escorts Service 24X7 Avilabledollysharma2066
 
Call Girls in Govindpuri Delhi 💯Call Us 🔝8264348440🔝
Call Girls in Govindpuri Delhi 💯Call Us 🔝8264348440🔝Call Girls in Govindpuri Delhi 💯Call Us 🔝8264348440🔝
Call Girls in Govindpuri Delhi 💯Call Us 🔝8264348440🔝soniya singh
 
西伦敦大学毕业证学位证成绩单-怎么样做
西伦敦大学毕业证学位证成绩单-怎么样做西伦敦大学毕业证学位证成绩单-怎么样做
西伦敦大学毕业证学位证成绩单-怎么样做j5bzwet6
 

Recently uploaded (12)

Call Girls In Dwarka Sub City ☎️7838079806 ✅ 💯Call Girls In Delhi
Call Girls In Dwarka Sub City  ☎️7838079806 ✅ 💯Call Girls In DelhiCall Girls In Dwarka Sub City  ☎️7838079806 ✅ 💯Call Girls In Delhi
Call Girls In Dwarka Sub City ☎️7838079806 ✅ 💯Call Girls In Delhi
 
E J Waggoner against Kellogg's Pantheism 8.pptx
E J Waggoner against Kellogg's Pantheism 8.pptxE J Waggoner against Kellogg's Pantheism 8.pptx
E J Waggoner against Kellogg's Pantheism 8.pptx
 
Model Call Girl in Lado Sarai Delhi reach out to us at 🔝9953056974🔝
Model Call Girl in Lado Sarai Delhi reach out to us at 🔝9953056974🔝Model Call Girl in Lado Sarai Delhi reach out to us at 🔝9953056974🔝
Model Call Girl in Lado Sarai Delhi reach out to us at 🔝9953056974🔝
 
南新罕布什尔大学毕业证学位证成绩单-学历认证
南新罕布什尔大学毕业证学位证成绩单-学历认证南新罕布什尔大学毕业证学位证成绩单-学历认证
南新罕布什尔大学毕业证学位证成绩单-学历认证
 
(No.1)↠Young Call Girls in Sikanderpur (Gurgaon) ꧁❤ 9711911712 ❤꧂ Escorts
(No.1)↠Young Call Girls in Sikanderpur (Gurgaon) ꧁❤ 9711911712 ❤꧂ Escorts(No.1)↠Young Call Girls in Sikanderpur (Gurgaon) ꧁❤ 9711911712 ❤꧂ Escorts
(No.1)↠Young Call Girls in Sikanderpur (Gurgaon) ꧁❤ 9711911712 ❤꧂ Escorts
 
(南达科他州立大学毕业证学位证成绩单-永久存档)
(南达科他州立大学毕业证学位证成绩单-永久存档)(南达科他州立大学毕业证学位证成绩单-永久存档)
(南达科他州立大学毕业证学位证成绩单-永久存档)
 
Authentic No 1 Amil Baba In Pakistan Amil Baba In Faisalabad Amil Baba In Kar...
Authentic No 1 Amil Baba In Pakistan Amil Baba In Faisalabad Amil Baba In Kar...Authentic No 1 Amil Baba In Pakistan Amil Baba In Faisalabad Amil Baba In Kar...
Authentic No 1 Amil Baba In Pakistan Amil Baba In Faisalabad Amil Baba In Kar...
 
办理西悉尼大学毕业证成绩单、制作假文凭
办理西悉尼大学毕业证成绩单、制作假文凭办理西悉尼大学毕业证成绩单、制作假文凭
办理西悉尼大学毕业证成绩单、制作假文凭
 
Inspiring Through Words Power of Inspiration.pptx
Inspiring Through Words Power of Inspiration.pptxInspiring Through Words Power of Inspiration.pptx
Inspiring Through Words Power of Inspiration.pptx
 
Call Girls In Karkardooma 83770 87607 Just-Dial Escorts Service 24X7 Avilable
Call Girls In Karkardooma 83770 87607 Just-Dial Escorts Service 24X7 AvilableCall Girls In Karkardooma 83770 87607 Just-Dial Escorts Service 24X7 Avilable
Call Girls In Karkardooma 83770 87607 Just-Dial Escorts Service 24X7 Avilable
 
Call Girls in Govindpuri Delhi 💯Call Us 🔝8264348440🔝
Call Girls in Govindpuri Delhi 💯Call Us 🔝8264348440🔝Call Girls in Govindpuri Delhi 💯Call Us 🔝8264348440🔝
Call Girls in Govindpuri Delhi 💯Call Us 🔝8264348440🔝
 
西伦敦大学毕业证学位证成绩单-怎么样做
西伦敦大学毕业证学位证成绩单-怎么样做西伦敦大学毕业证学位证成绩单-怎么样做
西伦敦大学毕业证学位证成绩单-怎么样做
 

Hydro Harvest Farms Garden Instructions

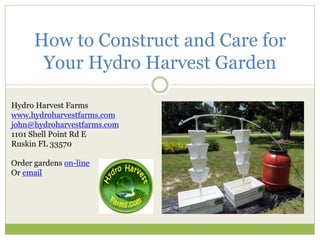
  • 1. How to Construct and Care for Your Hydro Harvest Garden Hydro Harvest Farms www.hydroharvestfarms.com john@hydroharvestfarms.com 1101 Shell Point Rd E Ruskin FL 33570 Order gardens on-line Or email
  • 2. Materials List Provided with Gardens (unless otherwise noted) Hydroponic System from Hydro Harvest Materials List & Assembly Instructions Materials (per tower) • 1 – ½ inch conduit pipe 20 inches long, • 1 steel plate (if towers will be positioned on a patio or deck) (optional) • 1—3/4 inch conduit 5 feet long. (Not provided if shipped, available at any home center’s electrical dept.) • 2 Square (shape may vary) Plates (Com Pots only) • 1 large ground pot • 1 –20” length of 1 inch PVC pipe (1 1/4 in. for Style Line garden) 4 vertical pots per tower • Growing medium: coconut core/perlite or vermiculite and perlite • 1 nutrient pair for up to 3 towers. *** AUTOMATIC UNITS ONLY*** • 1 nutrient line (white with blue nutrient line) • 1 yellow punch tool • 1 black capillary line per tower • Wire straps to secure capillary lines (1 per tower) • 1 poly figure 8 • 1 Greenback Poly Connector Valve • 1 pump w’ I/2 in.male adapter • 1 digital timer • 1 – PVC Feeding T’s per tower
  • 3. Garden Parts 1 Media and Nutrients Pots and Stands •Coco Coir (mix with Perlite) or •Perlite and Vermiculite (mix shown) •Nutrients (pair) •Bottom Box •Tower Vertical Pots (Com. Pots Shown) •PVC Pipe (20”) •Metal Poles (20 in. and 5 ft.) •Plates (square or other shape) White and Blue Poly Nutrient Line
  • 4. Garden Parts 2 Tank and Ground Cloth, (available for purchase at farm) Tubing and Connectors for Automation (included in kit) •Yellow Punch tool •Black Capillary line •Poly Figure 8 •Zip tie •Greenback Poly Valve •Pump w/ male adapter •Digital Timer
  • 5. Mix the media 50/50. Whether it is Vermiculite and Perlite or CoCo Coir and Perlite. You can use your reservoir to do this. Coco coir should be submerged in water (weigh down) until you can break it apart and then mix with perlite. Ground Cover (highly recommend, available at additional cost)) should be spread out taunt and attached to ground with provided clips. Patio Plates are available for hard surfaces. Prepare Media and Ground Cloth
  • 6. Place nutrient tank where you plan. Place 1st ground pot 4-6 inches away from tank. Each ground pot should be 4-6 inches apart also. Or 32-36 in. pole to pole. Twist the ½ in. short metal pole into the hole in ground pot and twist to break through ground cloth (if using). Remove ground pot and tap pole in ground 2/3 way down. Determining Layout and Spacing
  • 7. Use a wood block or something else to protect the tapped end from getting misshapen. Replace ground pot and repeat for each tower, space accordingly. Take ¾” metal pole (5 ft long one) and slide onto the short metal pole. Slide through ground pot into position. Repeat for each tower. Erecting Poles
  • 8. Place the square plastic plate( shape may vary) over each metal pole and slide down into ground pots. Slide PVC Pipe over poles to rest on plate. You can vary length of PVC pole, depending on what you need. Add second square plastic plate (shape may vary)on top of PVC pipe. Then slide first vertical pot on top of each tower. Fill each vertical pot with media as you add each pot. Hint keep media damp! Fill ground pots with remaining media. Assembling Towers
  • 9. Cut two holes in lid of reservoir. One for electric cord and one for nutrient line. If you have a drill a 1 in hole saw bit works great. Electric hole will require two overlapping holes. Make sure holes are not too big., the less light the better. Thread nutrient line through hole in lid of reservoir and attach to pump and place pump in bottom of reservoir. Feed pump electric cord through other hole. Automatic System Reservoir
  • 10. Place PVC “T” on top of each tower. Thread the white and blue nutrient line through PVC “T’s”. ( this demo shows no media in pots, but there should be at this point). One end of nutrient line goes to pump, the other end is crimped off with figure eight piece. Pass line though figure 8, bend line and pass through other hole on figure 8. Automatic System Instructions
  • 11. Cut the nutrient line just above reservoir lid, using small knife and install greenback poly valve. This is used to start and stop flow of nutrients dispensed, manually. Use the yellow punch tool to punch a hole in the Nutrient line about 5” on the upstream side of the PVC “T”. The side closest to the Nutrient tank. Automatic System Feeding
  • 12. Take black capillary line and slip one end into each punched hole. HINT: Push far enough in to touch the other side of tube then pull back a little bit. Make sure all capillary lines are the same length. Attach the other end of capillary line to bottom of PVC “T” (not pole) and secure with Tape or Electric Wire Strapping (zip tie). Feeding Lines
  • 13. Fill Reservoir with only water. Place a cup at the last tower under capillary line. Adjust flow with the poly valve till you get 1 cup of water a minute. 4 minutes will dispense a quart. Tip- use plain water first 3-4 days to make sure your pump and timer is calibrated properly, then add nutrients. Plug the timer into an outlet in a dry area such as your garage , shed or patio. Then plug a grounded electrical cord from the timer to the pump. Keep the timer as dry as possible Set timer, mix nutrients and keep system tip top instructions on next page. Fill Tank, Test Pump and Set Timer
  • 14. HOW TO SET TIMER HOW TO MIX NUTRIENTS HOW TO CLEAN MEDIA AND SYSTEM PARTS HOW TO CLEAN YOUR PUMP AND FILTER Other Useful Instructions
  • 15. Come Visit the Farm! We have: Free Classes •Tours •Events •U-Pick •School Gardens •No GMO’s •No Chemical Sprays •Lots of great food! •www.hydroharvestfarms.com