
Recommended
More Related Content
What's hot
What's hot (20)
Similar to Push-Pull Workout: Achieve Balanced Strength and Muscle
Similar to Push-Pull Workout: Achieve Balanced Strength and Muscle (20)
Recently uploaded
Recently uploaded (20)
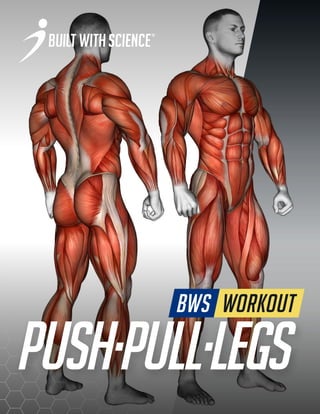
Push-Pull Workout: Achieve Balanced Strength and Muscle
- 2. @jeremyethier 2 Table of contents THE PUSH PULL LEGS ROUTINE overview 3 THE PUSH WORKOUT 4 THE pull WORKOUT 5 THE LEGS WORKOUT 6 push Exercise1:INCLINEBARBELLBENCHPRESS 8 Exercise2:STANDINGDUMBBELLSHOULDERPRESS 9 Exercise3:FLATDUMBBELLPRESS 10 Shortcut Your Transformation! 11 Exercise4:DUMBBELLLATERALRAISES 12 Exercise5:SEATEDDECLINECABLEFLIESW/SUPINATION 13 Exercise6:INCLINEDUMBBELLOVERHEADEXTENSIONS 14 pull Exercise1(optionA):pull-ups 16 Exercise1(optionb):KNEELINGLATPULLDOWNS 17 Exercise2:BARBELLROW 18 Exercise3:REVERSEGRIPLATPULLDOWNS 19 EXERCISE4:CHESTSUPPORTEDREARDELTROW 20 Exercise5:NARROWGRIPBARBELLCURL 21 Exercise6:kneelingfacepulls 22 Exercise7:LYINGFACEPULLS 23 legs Exercise1(optionA):BACKSQUAT 25 Exercise1(optionb):FRONTSQUAT 26 Exercise2:BARBELLHIPTHRUST 27 Exercise3(beginner):splitsquats 28 EXERCISE3(advanced):bulgariansplitsquat 29 Exercise4:GLUTEHAMRAISE 30 ADDITIONAL COMMENTS 31 DISCLAIMER 32 push·pull·legs workout
- 3. @jeremyethier 3 THE PUSH PULL LEGS ROUTINE overview This push pull legs routine consists of 6 training days per week. The exact days don’t matter for your workouts, but the key is to get at least one rest day in between each consecutive 3 workouts. Abs and calves exercises can be thrown into the main workouts as well, or performed on rest days. 4 WEEKS CALENDAR EXAMPLE MONDAY TUESDAY WEDNESDAY THURSDAY FRIDAY SATURDAY SUNDAY Push Pull Legs Rest Push Pull Legs MONDAY TUESDAY WEDNESDAY THURSDAY FRIDAY SATURDAY SUNDAY Rest Push Pull Legs Rest Push Pull MONDAY TUESDAY WEDNESDAY THURSDAY FRIDAY SATURDAY SUNDAY Legs Rest Push Pull Legs Rest Push MONDAY TUESDAY WEDNESDAY THURSDAY FRIDAY SATURDAY SUNDAY Pull Legs Rest Push Pull Legs Rest push·pull·legs workout
- 4. @jeremyethier 4 THE PUSH WORKOUT Beginner/novice lifters should stay on the lower end of the volume requirements whereas more experienced lifters can opt for the higher recommendation of sets for some/all of the exercises. Step by step instructions for each exercise on pages 8 to 14. Exercise Sets Reps Rest (minutes) Incline Barbell Bench Press 3-4 6-8 2-3 Standing Dumbbell Shoulder Press 3-4 10-15 2-3 Paused Flat Dumbbell Press 3-4 8-12 2-3 Lean-Away Dumbbell Lateral Raise 2-3 per arm 10-15 1 between arms Seated Decline Cable Flies W/ Supination 2-3 10-15 1.5-2 Incline Dumbbell Overhead Extensions 2-3 10-15 1.5-2 push·pull·legs workout
- 5. @jeremyethier 5 THE pull WORKOUT Beginner/novice lifters should stay on the lower end of the volume requirements whereas more experienced lifters can opt for the higher recommendation of sets for some/all of the exercises. Exercise Sets Reps Rest (minutes) Pull-Ups OR Kneeling Lat Pulldowns 3-4 6-10 OR 10-15 2-2.5 Barbell Row 3-4 10-15 2-2.5 Reverse Grip Lat Pulldowns 3-4 8-12 2 Chest Supported Rear Delt Row 3-4 10-15 2 Narrow Grip Barbell Curl 2-3 8-12 1.5-2 Kneeling Face Pulls 2 10-15 1.5 Lying Face Pulls 2 10-15 1.5 Step by step instructions for each exercise on pages 16 to 23. push·pull·legs workout
- 6. @jeremyethier 6 THE LEGS WORKOUT Beginner/novice lifters should stay on the lower end of the volume requirements whereas more experienced lifters can opt for the higher recommendation of sets for some/all of the exercises. Exercise Sets Reps Rest (minutes) Back Squats OR Front Squats 3-4 6-10 2-3 Barbell Hip Thrust 3-4 12-15 2-3 Split Squats (beginner) OR Bulgarian Split Squats (advanced) 4 each leg 8-12 1 min between each leg Glute Ham Raise 3-4 10-15 2 Step by step instructions for each exercise on pages 25 to 30. push·pull·legs workout
- 8. @jeremyethier 8 Exercise 1: INCLINE BARBELL BENCH PRESS STEP 1 (BENCH ANGLE) Setup an incline bench so that it’s at roughly a 30-degree angle (generally two notches up from the bottom). But I would suggest trying out various angles to see which best activates your upper chest. For shoulder-dominant pressers, you might even find that a very low incline of 15-degree angle (one notch up) activates your chest better. Stick your chest up, retract your shoulder-blades, then unrack the bar. STEP 2 (DESCEND) Lower the bar to your upper chest region while slightly tucking your elbows and keeping your forearms vertical and directly under your wrists. Make sure to use full range of motion such that the bar physically touches your chest at the bottom. If you experience shoulder pain at this point however, then you can stop the rep earlier. STEP 3 (PRESS) Press back up to the starting position while keeping your shoulder-blades remain retracted and tight and your chest up and out. Keep your elbows slightly tucked as you press, and press up until your arms lockout. push workout
- 9. @jeremyethier 9 Exercise 2: STANDING DUMBBELL SHOULDER PRESS STEP 1 (SETUP) Standing with your feet shoulder width apart, take a dumbbell in each hand. Raise the dumbbells to head height, with the elbows tucked very slightly forward rather than completely flared out to the sides. This will be your starting position. STEP 2 (PRESS) Extend through the elbows to raise the weight overhead. As you do so, contract your abs and your glutes and keep them contracted throughout the press. This will prevent your lower back from arching as you press. Avoid using momentum or leg drive to help you lift the weight up. At the top position, your arms, head, hips, and feet should form one straight line. STEP 3 (DESCEND) Slowly lower the weight back to the starting position with the dumbbells roughly at the level of your head before pressing up again for another rep. push workout
- 10. @jeremyethier 10 Exercise 3: FLAT DUMBBELL PRESS STEPS 1 & 2 (SET UP) Using your thighs to push the dumbbells up, kick up one dumbbell at a time so that you can get them into the starting position. Stick your chest up towards the ceiling and pinch your shoulder blades together as if you were squeezing a pencil between them. This will create some space between your back and the bench. You need to actively maintain this position throughout the lift. STEP 3 (PRESS) Press up by thinking about “squeezing your biceps together” to better activate your chest. Ensure your shoulder-blades remain retracted and tight. Keep your elbows slightly tucked as you press, and press up until the dumbbells almost touch. STEP 4 (DESCENT) Slowly lower the weight until the end of the dumbbells just about touch your chest. At the bottom position, your hands should be directly above your elbows. Make sure your shoulderblades are retracted and tight before performing another rep. push workout
- 11. @jeremyethier 11 Shortcut Your Transformation! That’s exactly what my #BuiltWithScience programs are designed to do. We show you step by step with our software how much your specific body should be eating to see the best results, and then pair this with an optimized workout plan designed for you to pack on lean muscle as fast as possible (and without the fat!). It’s how thousands of our members like Nurgazy are seeing amazing results and breaking through plateaus in such a short amount of time. To join the family and get started today, click the button below to discover which of our programs would be best suited for you and where your body is currently at. LOOKING FOR MORE SCIENCE-DRIVEN WORKOUTS TO ADD TO YOUR ROUTINE? ACCESS MORE SCIENCE-BASED WORKOUTS AND NUTRITION PLAN TO LOSE FAT AND BUILD MUSCLE IN THE MOST EFFECTIVE WAY POSSIBLE. push·pull·legs workout CLICK HERE TO DISCOVER THE BEST PROGRAM FOR YOU!
- 12. @jeremyethier 12 Exercise 4: DUMBBELL LATERAL RAISES STEP 1 (SET UP) Grab a dumbbell in one hand and with your other arm hold onto a fixture such that you can use it to lean-away slightly from it as you perform the movement. STEP 2 (PULL) Raise the dumbbell out to your side in the scapular plane (which isn’t directly out to your side, but slightly forward) until it reaches about shoulder-height. Your arms should be just slightly bent at the elbow as you raise. And as you raise, think about raising the weight “out” as much as possible opposed to thinking about raising the weight “up”. Avoid using excessive momentum to swing the weight up. STEP 3 (DESCENT) Control the weight back down to the starting position and repeat for the desired number of repetitions. push workout
- 13. @jeremyethier 13 Exercise 5: SEATED DECLINE CABLE FLIES W/ SUPINATION STEP 1 (SET UP) Setup a high inclined bench in between a cable system. Move the handles up such that they are above the level of your shoulders when you’re seated. Grab the handles, retract your shoulder blades, and stick your chest up to prepare for your first rep. STEP 2 (FLY) Perform a high to low fly motion by bringing the cables down and in. As you do so, supinate your wrists by rotating your palms upwards towards the end of each rep and focus on driving your elbows in as if you were trying to touch them together at the end of each rep. Your shoulder blades should remain retracted back as you perform the fly and your chest should remain up and out. Your arms should also remain just slightly bent during each rep. At the end position, avoid “caving in” by letting your shoulders round forward especially at the end position. You should feel a strong contraction in the lower/outer part of your chest when executed properly. STEP 3 (RETURN) Control the cables back to the starting position and repeat for another rep. Your arms should be slightly bent throughout each rep. push workout
- 14. @jeremyethier 14 Exercise 6: INCLINE DUMBBELL OVERHEAD EXTENSIONS STEP 1 Set up an incline bench to around 45 degrees. Lay your back on the bench with the dumbbells directly overhead. STEP 2 While keeping your elbows locked, lower the dumbbells back behind your body as far as it will go. STEP 3 Press the weight back up to the starting position by using your triceps while keeping your elbow locked in position. Repeat. push workout
- 16. @jeremyethier 16 Exercise 1 (option A): pull-ups STEP 1 (SET UP) Grab the pull-up bar with an overhand grip slightly wider than shoulder-width – I’d suggest using a “thumb-less grip” as it usually helps better activate the back. Next, depress your upper traps and keep them this way as you pull. STEP 2 (PULL) Pull yourself up by pulling your elbows down to the floor, you want to think about pulling with your elbows as opposed to pulling with your hands. It’s preferred to keep your feet straight down throughout the pull-up, but if your pull-up bar doesn’t allow this then it’s perfectly fine to cross your feet over and bend your knees. STEP 3 (TOP POSITION) You want to pull such that at least your eyes reach over the bar – and at this point, you want to ensure that your shoulders are not rounding forward (internally rotating) and are instead retracted back. STEP 4 (DESCENT) Lower your body in a controlled manner until your arms are straight, and then repeat for another rep. As soon as you’re able to perform 8 or more bodyweight pull-ups in one set, I’d suggest adding a little bit of weight by either using a weight belt or holding a dumbbell between your feet then continue adding more weight overtime. pull workout
- 17. @jeremyethier 17 Exercise 1 (option b): KNEELING LAT PULLDOWNS STEP 1 (SETUP) Attach a lat pulldown handle to a cable system. Grab it with an overhand grip slightly wider than shoulder-width, then kneel on the ground. STEP 2 (PULL) Engage your core before pulling, and then by using your lats pull the weight down until the bar reaches under your chin. Think about pulling down with the elbows and trying to “tuck your elbows into your back pockets” to best engage the lats. STEP 3 (RETURN) Return back to the starting position by slowly controlling the weight back up. pull workout
- 18. @jeremyethier 18 Exercise 2: BARBELL ROW STEP 1 (SETUP) Grab a barbell with an overhand grip slightly wider than shoulder width apart. Push your hips back while bending your knees until your body is at roughly a 45 degree angle. Your back should be neutral as opposed to rounded. STEP 2 (PULL) Engage your core, and then pull the weight by driving your elbows back behind you until the bar touches your upper abdominal area. Squeeze your shoulder blades together as you pull. STEP 3 (DESCENT) Slowly lower the weight back to the starting position and fully extend the arms before proceeding for the next rep. Avoid using momentum to swing the weight up. Instead, each rep should be controlled. pull workout
- 19. @jeremyethier 19 Exercise 3: REVERSE GRIP LAT PULLDOWNS STEP 1 (SETUP) Grab the bar with an underhand grip at roughly shoulder-width apart. Bring your upper traps down by bringing your shoulders down and away from the ears. You also want to maintain a very slight lean back in your upper body as you proceed to perform each rep. STEP 2 (PULL) Pull the bar down by bringing your elbows behind your body. Your elbows should stay close to your sides and you should pull until the bar reaches just below your chin. STEP 3 (DESCENT) Control the weight back to the starting position before repeating for another rep. Avoid using momentum to move the weight for you. pull workout
- 20. @jeremyethier 20 EXERCISE 4: CHEST SUPPORTED REAR DELT ROW STEP 1 (SETUP) Setup an inclined bench to roughly a 30 degree angle (usually 2 notches up from the bottom position). Lay on the bench with your chest positioned towards the top of the bench and your legs extended with your feet flat on the floor for support. Grab a weighted bar infront of you with your arms hanging down, and use a wide grip that’s about 1.5x shoulder width. If you have difficulty setting up the bar in position, lift it up so that you can grab it by placing each end of the bar onto an elevated platform or weights. STEP 2 (PULL) Pull the weight up by driving your elbows up as far as you’re capable of, often the bench will limit the end range of motion for you. As you pull, your elbows shold be flared out to your sides to best activate the rear delts. Hold the top position briefly while engaging your rear delts STEP 3 (RETURN) Control the weight back to the starting position and then repeat for another rep. pull workout
- 21. @jeremyethier 21 Exercise 5: NARROW GRIP BARBELL CURL STEP 1 Grab a barbell or weighted bar with a narrow underhand grip that’s within shoulder-width. Keep your elbows pinned to your sides. STEP 2 Curl the weight up while keeping your elbows pinned to your sides. As you curl, think about raising the weight with your pinkies to best engage the outer head of your biceps. STEP 3 Control the weight back down to the bottom position until your arms are fully extended before proceeding for another rep. pull workout
- 22. @jeremyethier 22 STEP 1 (SET UP) Set up a cable system so that the notch is a couple notches below from the very top. Grab the rope with an overhand grip, then get down on one knee. Relax your upper traps by bringing your shoulders down and away from your ears. You want to maintain this throughout each rep. STEP 2 (PULL) Pull the rope towards your face while keeping your elbows high. Think about pulling with your elbows and squeezing your shoulder-blades together, and as you pull, you want to externally rotate your shoulder such that your knuckles are facing the ceiling. STEP 2 (PULL) You can see what I mean here at this angle, the end position is as if you were holding a “biceps flexing pose”. This helps further target the rotator cuff. STEP 3 (ECCENTRIC) Control the weight back to the starting position and then repeat for another rep. Ensure that you aren’t excessively arching or rounding your back during each rep. You should feel a strong contraction in the middle of your back. Exercise 6: kneeling face pulls pull workout
- 23. @jeremyethier 23 Exercise 7: LYING FACE PULLS STEP 1 (SETUP) Still using the rope, raise the cable system up to the highest position. Grab the rope with an overhand grip, then lay down on your back in front of the cable system with your arms straight, knees bent and feet flat on the floor. STEP 2 (PULL) Pull the rope by pulling your elbows towards you until they touch the ground. Your elbows should be at about shoulder height. STEP 3 (ECCENTRIC) Control the weight back to the starting position and then repeat for another rep. You should feel this mainly in the back of your shoulder (rear delts). pull workout
- 25. @jeremyethier 25 Exercise 1 (option A): BACK SQUAT STEP 1 (PLACEMENT) Grab the bar with an overhand grip slightly wider than shoulder-width. Place the bar on your upper-back (traps) by dipping under the bar. Raise your chest up and retract your shoulder blades. STEP 2 (UNRACK) Unrack the bar, take 3 steps back, then adjust your footing. Your feet should be shoulder-width apart or a little wider. You can point your toes out slightly if this is more comfortable. But play around with foot positioning to find what’s comfortable for you. STEP 3 (DESCENT) Take a deep breath in and hold it. You want to use this breath to brace your core (think about contracting your abs how you would if someone were to punch your stomach). Move your hips back while bending your knees to squat down. Squat down until your thighs are at least parallel to the ground. If you have the mobility to do so, then you can go further below parallel. STEP 4 (ASCENT) Squat back up by pushing through your heels. Keep your knees in line with your toes by thinking about “spreading the floor apart” with your feet. Avoid creeping up on your toes or collapsing your knees inward. Keep your lower back neutral and your chest up. You can exhale as you press up, or keep your breath held and then exhale at the top position. Then repeat for more reps. legs workout
- 26. @jeremyethier 26 Exercise 1 (option b): FRONT SQUAT STEP 1 (PLACEMENT) You have a couple options as for placement of the bar for the front squat. You can place the bar on the front delts and crossover your hands OR stick both elbows forward and keep your wrists under the bar if your wrist mobility allows for this. Whichever is most comfortable for you, as long as your elbows remain high at shoulder-level as you perform the squat. STEP 2 (UNRACK) Unrack the bar, take 3 steps back, then adjust your footing. Your feet should be shoulder-width apart or a little wider. You can point your toes out slightly if this is more comfortable. But play around with foot positioning to find what’s comfortable for you. STEP 3 (DESCENT) Move your hips back while bending your knees to squat down. Squat down until your thighs are at least parallel to the ground. If you have the mobility to do so, then you can go further below parallel. STEP 4 (ASCENT) Squat back up by pushing through your mid-foot. Keep your knees inline with your toes by thinking about “spreading the floor apart” with your feet. Avoid creeping up on your toes or collapsing your knees inward. Keep your lower back neutral and your chest up. You can exhale as you press up, or keep your breath held and then exhale at the top position. Then repeat for more reps. legs workout
- 27. @jeremyethier 27 Exercise 2: BARBELL HIP THRUST STEP 1 (SETUP) Get into the starting position by placing your shoulderblades on the bench and feet about shoulder width apart and toes slightly pointed outwards. Roll the weighted barbell over your hips into the start position. STEP 2 (THRUST) Drive you hips towards the ceiling. You want your shoulder blades to stay on the bench and your feet positioned so that your shins are vertical when in the top position. Avoid arching your lower back and instead push your hips forward into posterior pelvic tilt by contracting your glutes. At the top position, your back and butt should be inline and your chin should be tucked. STEP 3 & 4 (DESCENT) Lower back down by dropping your hips until your butt almost touches the floor, then repeat for another rep (step 4). Again, avoid any arching of the lower back and keep your glutes engaged. legs workout
- 28. @jeremyethier 28 Exercise 3 (beginner): split squats STEP 1 (SETUP) Grab a pair of dumbbells. Take one step forward and plant your feet here. The farther your step, the more your glutes will be targeted. The closer your step, the more your quadriceps will be targeted. Choose what you’d like to focus on more. STEP 2 (DESCENT) Descend by bending your back knee until it almost touches the ground. Keep your back toes in contact with the floor just for balance, but keep most of the pressure in your front foot. STEP 3 (ASCENT) Push up by pressing against the floor with your front foot. Avoid using too much assistance from your back leg/foot. Keep your spine neutral as you do so (avoid excessively arching or rounding the lower back). legs workout
- 29. @jeremyethier 29 EXERCISE 3 (advanced): bulgarian split squat STEP 1 (SETUP) Grab a dumbbell in each hand and place your back foot on the top of a bench or any elevated platform. Your front foot can then be positioned based on what you want to target. Take a shorter step forward if you want to target the quads more, or a longer step forward if you want to target the glutes more. STEP 2 (DESCENT) After you get your set up right, bend your front knee until your thigh is at least parallel with the ground. STEP 3 (ASCENT) Push back up through your front foot. Your heel shouldn’t raise off the floor and you want to keep your head, back, and hips aligned throughout each rep. Your upper body can lean forward slightly. Repeat for more reps. STEP 4 (CONTRALATERAL) Once you are able to balance well with the normal version, perform 2 of the 4 sets by holding onto just one (heavier) dumbbell in the opposite hand as your front leg. This will help better target the important glute medius muscle. legs workout
- 30. @jeremyethier 30 Exercise 4: GLUTE HAM RAISE STEP 1 (SETUP) Set up the foot plate such that your feet can lay flat and your knees are positioned just behind the pad when in the starting position. The closer to the “thigh pad” you adjust the foot plate, the harder the exercise will be. So if you’re having a hard time, move the foot plate further away to lessen the lever during the movement. STEP 2 (DESCENT) Brace your core (“tighten” your abs) and slowly lower your body in a controlled fashion by contracting your hamstrings and glutes. Your knees should gradually straighten while keeping your head, back, and hips inline. Descend either to parallel to the ground or slightly below (depending on what you’re capable of). STEP 3 (ASCENT) Ascend by contracting contracting your hamstrings and glutes by bending at the knees while keeping your upper body in a straight line, and then repeat for more reps. Your upper body should move as one unit. Avoid excessive arching or rounding of the back – a little bit is fine. If you’re feeling it more in your lower back, then it’s an indication that your hamstrings/glutes are weak and you should regress the exercise either by adjusting the footplate or starting with an alternative. legs workout
- 31. @jeremyethier 31 ADDITIONAL COMMENTS I hope this PDF is useful for you! I put in a lot of effort into providing this routine for you free of charge. All I ask in return is that you show your support for my work and connecting with me on my social media platforms where I share more informative content on a regular basis: ENJOY! website youtube tiktok instagram facebook push·pull·legs workout @JEREMYETHIER BUILTWITHSCIENCE.COM youtube.com/jeremyethier tiktok.com/@jeremyethier @JEREMYETHIERfit
- 32. @jeremyethier 32 DISCLAIMER The content provided in this PDF is for informa- tional and educational purposes only. Jeremy Ethier is not a medical doctor, psychologist, thera- pist, nutritionist, or registered dietitian. The con- tents of this document should not be construed as medical, psychological, dietary, nutritional, or healthcare advice of any kind. The contents of this document are not intended to diagnose, treat, cure, or prevent any health conditions, nor are they intended to replace a physician, dieti- tian, nutritionist, or other qualified healthcare professional’s advice. You should always consult your physician, dietitian, or other qualified health- care professional on any matters regarding your health, engagement in physical activity, and/or diet before starting any fitness program or meal plan to determine if it is suitable for your needs. This is especially important if you (or your family members) have a history of high blood pressure or heart disease, if you have ever experienced chest pain while exercising, or if you have experienced chest pain in the past month when not engaged in physical activity. You should also consult your physician, dietitian, or other qualified healthcare professional before starting any fitness program, meal plan, or dietary regimen if you smoke, have high cholesterol, are obese, or have a bone or joint problem that could be made worse by a change in physical activity or diet. Do not start or continue any fitness program, meal plan, or dietary regimen if your physician, dietitian, or health care provid- er advises against it. If you experience faintness, dizziness, pain, shortness of breath or any other form of discomfort at any time while exercising or while following any meal plan/dietary regimen, you should stop immediately. If you are in Cana- da and think you are having a medical or health emergency, call your health care provider, or 911, immediately. Please note the following: • any and all exercise that you do as a result of what you read in this PDF shall be performed solely at your own risk; • any and all meal plans that you follow or ad- here to as a result of what you read in this PDF shall be used solely at your own risk; and • any and all foods or beverages that you con- sume as a result of what you read in this PDF shall be consumed solely at your own risk. No part of this report may be reproduced or transmitted in any form whatsoever, electronic or mechanical, including photocopying, recording, or by any informational storage or retrieval system without the express written, dated, and signed permission from the author (Jeremy Ethier). All copyrights are reserved. Built With Science™ may not be copied or used for any purpose without express written consent. push·pull·legs workout