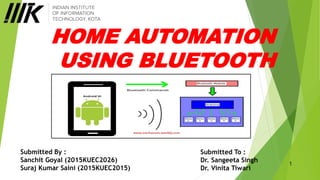
This document describes a home automation system using Bluetooth that allows controlling appliances via a smartphone. The system uses an Arduino Uno microcontroller connected to an HC-05 Bluetooth module and 4-channel relay board. An Android app sends control signals over Bluetooth to the Arduino, which triggers relays connected to devices. The system provides a low-cost way to remotely control electrical systems like lights and AC in the home.
2. INDEX
1. What is home automation?
2. Hardware Requirements
3. Hardware Description
4. Circuit Design
5. Working Process
6. Programming
7. Applications
8. Advantages
9. Disadvantages
10.Conclusion
11.Future Scope
2
3. What is Home Automation?
Home automation is basically introducing a degree of computerized or
automatic control to certain electrical and electronics system in a building.
Home automation system contains a remote mobile host controller and
several client module (home appliances).
The client modules communicate with host controllers through a wireless
device such as a Bluetooth enabled mobile phone, in this case, an android
based smart phone.
There is an increasing demand for smart homes, where appliances react
automatically to changing environmental conditions and can be easily
controlled through one common device.
3
4. Hardware Requirements
Arduino UNO
HC – 05 Bluetooth Module
12 V Relay X 4
Bread board
Connecting wires
12 V Power supply
Smartphone or tablet (Bluetooth enabled)
4
5. Hardware Description
Arduino UNO
Arduino UNO is a microcontroller
used to control different
components like Bluetooth
module and relay network.
5Fig. 1
6. Bluetooth Module
HC-05 is a Bluetooth Smart module targeted for
low-power sensors and accessories.
In the lowest power sleep mode it merely
consumes 500 nA .
Can be used with Bluetooth enabled phone and
the range of this module is approximately 10
meters.
As seen in the image, this Bluetooth module
has 6 pins for VCC (5V), GND, TX and RX.
6
Fig. 2
7. 4 – Channel Relay Board
A relay is an electrically operated switch.
Relays are used where it is necessary to control a circuit by a low-power
signal.
Relays protect electrical circuits from overload or faults.
7
Fig. 3
8. Circuit Design
The Bluetooth module has 4 – pins: VCC, TX, RX and GND. VCC
and GND are connected to 5V and ground from Arduino UNO.
The Bluetooth module works on 3.3V and it has an on-board 5V
to 3.3V regulator.
The TX and RX pins of the Bluetooth module is connected to RX
and TX pins of the Arduino.
However when connecting RX of Bluetooth to TX of Arduino,
we have to be careful as the pin can tolerate only 3.3V and the
voltage from TX or Arduino is 5V.
So, a voltage divider network consisting of 10K and 20K
resistors is used to reduce the voltage to 3.3V approximately.
Then we connect the digital I/O pins of the Arduino to input of
the relay board.
8
10. Working Process
When the power is turned on, the connection
LED on the Bluetooth module starts blinking.
Start the “Bluetooth Controller” app in the
smartphone and connect to the Bluetooth
module.
Now, in the app, we set different keys for
different loads and their corresponding value
that must be transmitted when that key is
pressed. The given image shows a set of keys
to control 3 loads and an additional key to
turn off all the loads.
We control the loads by pressing a key in the
smartphone, the Bluetooth module receives
the corresponding data and intern transmits
that data to Arduino. 10
11. Working(cont…)
It could be suitably used for home
automation in a cost-effective manner.
Operating over unlicensed, universally
available frequency of 2.4 GHz, it can link
digital devices within a range of 10 m
(expandable to 100 m, by increasing the
transmitted power) at the speed of 1
Mbps.
Remark : The system needs a continuous
power supply to be practical or else we might
not be able to control the appliances.
11Fig. 5
13. Applications
In homes, offices, institutions, etc. where appliances can be
controlled through one common device.
We can turn on or off appliances like television, air conditioner
etc., using a phone or tablet.
This can be further expanded to a smart home automation
system by including sensors like light sensors, temperature
sensors, etc.
Additionally, we can connect to internet and control the home
from remote location over internet and also monitor the safety.
13
15. ADVANTAGES
It is a robust and easy to use system.
It will save energy and money.
Provides Security.
Convenience and comfort.
Can be used by physically challenged and disabled people.
Complexity is less as only a single mobile is used to control
multiple devices.
15
16. DISADVANTAGES
Only works for limited range or short distance with in 5-10m
surroundings.
No feedback path.
Number of appliances which can be controlled through this
circuit are limited.
Circuit complexity increases as number of devices increase.
16
17. Conclusion
Home Automation is undeniably a resource which can make a
home environment automated. People can control their
electrical devices via these Home Automation devices and set
up controlling actions through Mobile.
The total cost of implementing this small project is
approximately Rs 2000.
Many startup’s are coming up in this field and companies are
investing billions of dollars to make this world a more
automated and secure place to live in.
This project has a tremendous potential in the future.
17