Kernel security Concepts
•
2 likes•737 views

Presentation made during Kernel Security Workshop organized by DSCI.

Recommended
More Related Content
What's hot
What's hot (20)
Similar to Kernel security Concepts
Similar to Kernel security Concepts (20)
Recently uploaded
Recently uploaded (20)
Kernel security Concepts
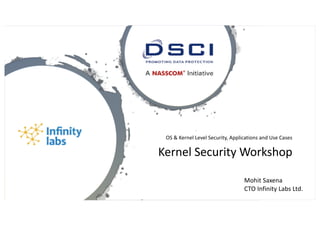
- 1. OS & Kernel Level Security, Applications and Use Cases Kernel Security Workshop Mohit Saxena CTO Infinity Labs Ltd.
- 2. Mohit Saxena CTO Infinity Labs Ltd • 18+ years of industry experience in Telecommunication, International Roaming, IP, CS Core, PS Core, Security Automation, Segment routing and NFV. • Implemented world’s First CDMA to GSM inter-standard roaming with MACH (Patented) • Mohit was a Principal Architect with Cisco & spent 8 years where he Architected network, Security and Automation Solutions for all major Service Providers in India and SAARC including Airtel, Jio, Vodafone, MTS, Aircel, TTSL, Tata communications, Idea, Ncell Nepal, Dialog and Mobitel in Srilanka, Dhiragu Maldives, Robi Bangladesh etc. • Mohit has been part of various Patents for Cisco and IETF RFC drafts. • A well known Industry figure with professional associations with IET UK, IEEE, IEI, APNIC Etc. • Mohit is a Research Scholar & hold a M.Tech from MIT
- 3. Agenda • OS Overview • Concept of Process, Interrupts & system calls • Process, Memory & IO Management • Multitasking & Multiprogramming OS • Kernel Architecture, Micro Kernel and Modules approach • DAC & LSM Concepts • SE Linux Architecture • Process, memory & IO Security • Linux Kernel Example • BSD Kernel Introduction • IPSEC Use case, SDWAN Live Demo • Make your own Firewall (Workshop based on Free BSD)
- 4. Why do we need an Operating System? Hardware (resource) CPU Memory Disk Input/ Output Write a program to sort n elements
- 5. What is an Operating System? (User’s view) – A program that acts as an intermediary between a user of a computer and the computer hardware – Defines an interface for the user to use services provided by the system – Creates an environment for the user
- 6. What is an Operating System? (User’s view) • Abstract Machine – Hides complex details of the underlying hardware – Provides common API to applications and services – Simplifies application writing • Command Interpreter – Part of a OS that understands and executes commands that are entered interactively by a human being or from a program – Shell
- 7. Why is abstraction important? • Without OSs and abstract interfaces, application writers must program all device access directly – load device command codes into device registers – understand physical characteristics of the devices • Applications suffer! – very complicated maintenance and upgrading – no portability
- 8. What Operating Systems Do (User’s view) • Depends on the point of view • Single user system • Users want convenience, ease of use • Don’t care about resource utilization
- 9. What Operating Systems Do (User’s view) Depends on the point of view • Shared computer such as mainframe must keep all users happy • Response time minimum – Keep all the users happy Shared CPU, memory
- 10. What Operating Systems Do (Systems view) •OS is a resource allocator •Manages all resources •Decides between conflicting requests for efficient and fair resource use •OS is a control program •Controls execution of programs to prevent errors and improper use of the computer
- 11. Concept of Process • Process – Program loaded in memory and in execution • Program is a passive entity • Process is an active entity 11
- 12. Types of Systems • Batch Systems – Multiple jobs, but only one job in memory at one time and executed (till completion) before the next one starts Operating system User program Jobs waiting
- 13. Types of Systems • Multiprogram Systems – Multiple jobs in memory, CPU is multiplexed between them – Single user cannot keep CPU and I/O devices busy at all times – When it has to wait (for I/O for example), OS switches to another job – Multiprogramming organizes jobs (code and data) so CPU always has one to execute – A subset of total jobs in system is kept in memory – One job selected and run via job scheduling • Effective resource utilization • Poor user experience
- 14. • Time-sharing Systems (multitasking) logical extension of multiprogramming in which CPU switches jobs so frequently that users can interact with each job while it is running, creating interactive computing – Response time should be < 1 second – Each user has at least one program executing in memory – If several jobs ready to run at the same time [ CPU scheduling Types of Systems Low Response time Low Response time
- 15. What Operating Systems Do (Systems view) •OS is a resource allocator •Manages all resources •Decides between conflicting requests for efficient and fair resource use •OS is a control program •Controls execution of programs to prevent errors and improper use of the computer
- 16. Manage resources CPU 1. Share the CPU with several users 2. Decide when to allocate CPU to which user (CPU scheduling) 3. Ensure fair user experience Job 1 Job 2 Job 3 1. Share memory with several different users 2. Should not overlap 3. Ensure protection Memory
- 17. Role of Operating system • Computer system can be divided into four components: – Hardware – provides basic computing resources • CPU, memory, I/O devices – Application programs – define the ways in which the system resources are used to solve the computing problems of the users • Word processors, compilers, web browsers, database systems, video games – Users • People, machines, other computers – Operating system • Controls and coordinates use of hardware among various applications and users
- 18. Four Components of a Computer System
- 19. Execution of OS Any difference in execution between user and OS program? User program invokes OS code by generating Interrupt, system call To perform some task reserved for OS Accessing I/O devices (read, write files) Until an interrupt comes, OS remains Idle Interrupt driven
- 20. What Operating Systems Do (Systems view) •Manages all resources •Decides between conflicting requests for efficient and fair resource use OS is a resource allocator •Controls execution of programs to prevent errors and improper use of the computer OS is a control program
- 21. Operating-System Operations •Must distinguish between the user level code and OS code •User mode and kernel mode •Mode bit provided by hardware •Provides ability to distinguish when system is running user code or kernel code •System call changes mode to kernel, return from call resets it to user
- 22. User Mode – Kernel Mode Switching System boot Hardware starts kernel mode Load Operating system Start user application Switch to User mode Whenever Trap or interrupt occurs, hardware switches to user to kernel mode
- 23. • Software error creates exception or trap • Division by zero, request for operating system service, setting timer • Restricts user process from executing privilege instruction Dual-mode operation allows OS to protect itself and other system components Privilege instructions • E.g. Segmentation fault!
- 24. Some instructions designated as privileged, only executable in kernel mode Privileged Instructions
- 25. Standard C Library Example C program invoking printf() library call, which calls write() system call
- 26. Resources Managed by OS •Physical •CPU, Memory, Disk, I/O Devices like keyboard, monitor, printer •Logical •Process, File, … •Hence we have •Process management •Memory management •File management •I/O management
- 27. Process Management • A process is a program in execution. Program is a passive entity, process is an active entity. • Process needs resources to accomplish its task • CPU time • Representation of process • Process has one program counter specifying location of next instruction to execute • Data structure (stores information of a process) • Many processes may be associated with the same program • Typically system has many processes • some user processes, • some operating system processes • Life cycle of a process • States • Arrival, Computation, I/O, I/O completion, termination
- 28. Process Management Activities • Creating and deleting both user and system processes • Suspending and resuming processes • Process scheduling • Providing mechanisms for process synchronization • Providing mechanisms for process communication • Providing mechanisms for deadlock handling The operating system is responsible for the following activities in connection with process management: P1 P2 R1 R2 R1 R2 P1 P2
- 29. Memory Management • All instructions and data in memory in order to execute – Translate the logical address to physical address • Process terminates => MMU declares that the memory space is available • Multiprogramming: Memory management manages several processes in memory – Optimizing CPU utilization and computer response to users • Ensure memory protection – Track illegal address • Memory management activities – Keeping track of which parts of memory are currently being used and by which process – Allocating and deallocating memory space as needed • Introduces Virtual memory – If the process size is bigger than the RAM size • Hardware support Process Memory Management Unit Logical address Physical addressCPU
- 30. File Management • OS provides uniform, logical view of information storage • Abstracts physical properties to logical storage unit - file • Each medium is controlled by device (i.e., disk drive, tape drive) • Varying properties include access speed, capacity, data- transfer rate, access method (sequential or random) • OS implements the abstract concept of file by managing mass storage media (disk etc) and devices that control them • Files usually organized into directories • Access control on most systems to determine who can access what • File-System management • Creating and deleting files and directories • Primitives to manipulate files and dirs • Mapping files onto secondary storage
- 31. Disk Management Usually disks used to store data that does not fit in main memory or data that must be kept for a “long” period of time • Most of the programs are stored on disk Proper management is of central importance Entire speed of computer operation depends on disk subsystem and its algorithms OS activities • Storage allocation (logical blocks) • Free-space management • Disk scheduling
- 32. I/O Subsystem • One purpose of OS is to hide peculiarities of hardware devices from the user • I/O subsystem responsible for – Memory management of I/O including buffering (storing data temporarily while it is being transferred), caching (storing parts of data in faster storage for performance) – General device-driver interface – Drivers for specific hardware devices I/O devices Device Drivers I/O subsystem (general interface)
- 33. OS design and structure • Large complex system – Designed carefully • if it is to function properly • Modified easily • Common approach – Partition the tasks into small components/modules – Each module must accomplish some specified task
- 34. UNIX • UNIX – consists of two separable parts – Systems programs – The kernel • Consists of everything below the system-call interface and above the physical hardware • Provides the file system, CPU scheduling, memory management, and other operating-system functions; a large number of functions for one level
- 35. Traditional UNIX System Structure Evolves over time
- 36. Monolithic OS Example • Application programs can directly access I/O routines • Makes the system vulnerable • No mode bit • Limitations in hardware • Intel 8088
- 37. What’s a Kernel? • AKA: executive, system monitor. • Controls and mediates access to hardware. • Implements and supports fundamental abstractions: – Processes, files, devices etc. • Schedules / allocates system resources: – Memory, CPU, disk, descriptors, etc. • Enforces security and protection. • Responds to user requests for service (system calls). • Etc…etc…
- 38. Kernel Design Goals • Performance: efficiency, speed. – Utilize resources to capacity with low overhead. • Stability: robustness, resilience. – Uptime, graceful degradation. • Capability: features, flexibility, compatibility. • Security, protection. – Protect users from each other & system from bad users. • Portability. • Extensibility.
- 39. Example “Core” Kernel Applications System Libraries (libc) System Call Interface Hardware Architecture-Dependent Code I/O Related Process Related Scheduler Memory Management IPC File Systems Networking Device Drivers Modules
- 40. Architectural Approaches • Monolithic. • Layered. • Modularized. • Micro-kernel. • Virtual machine.
- 41. Linux Source Tree Layout /usr/src/linuxDocumentation arch fs init kernel include ipc drivers net mmlib scripts alpha arm i386 ia64 m68k mips mips64 ppc s390 sh sparc sparc64 acorn atm block cdrom char dio fc4 i2c i2o ide ieee1394 isdn macintosh misc net … adfs affs autofs autofs4 bfs code cramfs devfs devpts efs ext2 fat hfs hpfs … asm-alpha asm-arm asm-generic asm-i386 asm-ia64 asm-m68k asm-mips asm-mips64 linux math-emu net pcmcia scsi video … adfs affs autofs autofs4 bfs code cramfs devfs devpts efs ext2 fat hfs hpfs … 802 appletalk atm ax25 bridge core decnet econet ethernet ipv4 ipv6 ipx irda khttpd lapb …
- 42. linux/drivers Largest amount of code in the kernel tree (~1.5M). device, bus, platform and general directories. drivers/char – n_tty.c is the default line discipline. drivers/block – elevator.c, genhd.c, linear.c, ll_rw_blk.c, raidN.c. drivers/net –specific drivers and general routines Space.c and net_init.c. drivers/scsi – scsi_*.c files are generic; sd.c (disk), sr.c (CD-ROM), st.c (tape), sg.c (generic). General: • cdrom, ide, isdn, parport, pcmcia, pnp, sound, telephony, video. Buses – fc4, i2c, nubus, pci, sbus, tc, usb. Platforms – acorn, macintosh, s390, sgi.
- 43. linux/fs Contains: • virtual filesystem (VFS) framework. • subdirectories for actual filesystems. vfs-related files: • exec.c, binfmt_*.c - files for mapping new process images. • devices.c, blk_dev.c – device registration, block device support. • super.c, filesystems.c. • inode.c, dcache.c, namei.c, buffer.c, file_table.c. • open.c, read_write.c, select.c, pipe.c, fifo.c. • fcntl.c, ioctl.c, locks.c, dquot.c, stat.c.
- 44. linux/include include/asm-*: • Architecture-dependent include subdirectories. include/linux: • Header info needed both by the kernel and user apps. • Usually linked to /usr/include/linux. • Kernel-only portions guarded by #ifdefs • #ifdef __KERNEL__ • /* kernel stuff */ • #endif Other directories: • math-emu, net, pcmcia, scsi, video.
- 45. linux/kernel • The core kernel code. • sched.c – “the main kernel file”: – scheduler, wait queues, timers, alarms, task queues. • Process control: – fork.c, exec.c, signal.c, exit.c etc… • Kernel module support: – kmod.c, ksyms.c, module.c. • Other operations: – time.c, resource.c, dma.c, softirq.c, itimer.c. – printk.c, info.c, panic.c, sysctl.c, sys.c.
- 46. Why secured Operating System? • Software threats and Internet: – Network connectivity: Network connectivity, in particular, the Internet increased software threats. – Active content: have capability of triggering actions automatically (PDF, MS Office, many others) – Mobile code: designed to be transported across a network for execution on remote hosts (JavaScript, ActiveX etc)
- 47. Why secured Operating System? • Insider Threats: Comes from local area network which represents even more serious risk (Gartner research has estimated that 70% of security incident costs are due to insider breaches) • Complex Software: Complex software may have defects that can be exploited by attackers.
- 48. Discretionary access control (DAC) • Prior to Linux kernel 2.6, DAC was the only security framework for Linux. • In a DAC model, security decisions are based solely on user identity and ownership of the objects. • No protection against malicious or flawed software. • Each user has complete discretion over his/her own objects.
- 49. DAC • Only two major categories of users: admin and other. • Too much privilege. • Unbounded privilege escalation
- 50. DAC: Details • Each process is associated with some credentials, which binds the process to a specific user or a specific group. • The use of credentials requires support both in the process data structure and in the resource being protected. uid,gid user and group real identifiers fuid, egid User and group effective identifiers fsuid,fsgid User and group effective identifiers for file access groups Supplemental group identifiers suid,sgid user and group saved identifiers
- 51. DAC: Details • uid=0 is root, gid=0 is root group. • If uid=0, kernel bypasses the permission checks. • When a process is created, it always inherit the credentials of its parent. • Effective credentials can be modified using system calls; setuid(), setresuid(), setfsuid() and setreuid()
- 52. Principle of least privilege Grant just the minimum possible privileges to permit a legitimate action: • Minimized privileged modules: Give a privilege to only the parts of the program needing it. • Minimize privileges granted • Minimize privileges’ time Programming Tips: • Break the program into separate parts so that only small and independent parts require special privileges. • If different parts must run concurrently, use processes; Threads share their security privileges
- 53. Linux Security Modules (LSM) Framework • Under guidance of Linus, a group was formed to create Linux Security Modules framework with following principles: – The Linux kernel still does its normal security checks. – When kernel needs to decide if access should be granted, it also asks a security module whether or not the action is okay. – An administrator should pick the security module he wants.
- 54. LSM Architecture • The LSM framework was designed so that almost all of its hooks would be restrictive • An authoritative hook makes the absolute final decision: if the hook says a request should be granted, then it's granted no matter what. • A restrictive hook can only add additional restrictions; it can't grant new permissions. • Authoritative model is more flexible. But it requires many radical changes to the Linux kernel.
- 55. LSM Architecture Operation DAC Policy files (policy database) LSM context Execute operation 0/ERR Primary Security Module 0/ERR User space Kernel space
- 56. LSM UML Diagram Before critical Action Security_ops- >action(defined in security.h)
- 57. LSM Architecture So, Five components added to kernel or modified: 1. An interface of security functions. 2. Inserts calls to security functions at various points within the kernel code. 3. Adding security fields to kernel object. 4. Providing functions to allow kernel modules to register and unregister themselves as security modules. 5. Move capabilities logic into an optional security module.
- 58. LSM Architecture: 1)Function interface • security.h file has security_operations structure which defines security functions as function pointers. • It defines a global variable: extern struct security_operations security_ops; • security.h defines a set of static functions that corresponds to a each security call. • For each static function x, it executes security_ops->x(). Thus, kernel calls x and x calls registered function pointer.
- 59. LSM Architecture: 2) kernel security calls • LSM inserts calls to security functions at critical points in the kernel code to perform access control. For example: – fork.c: Task Create – namei.c: Virtual File System Create • LSM inserts calls to security functions at critical points in the kernel code to manage the security fields. For example: – inode.c: security_inode_alloc – inode.c: security_inode_free – fork.c: security_task_alloc – fork.c: security_task_free
- 60. LSM Architecture: 3) security fields in kernel objects •security fields (void * security) added to various kernel objects. •The setting of security fields is handled by security modules. •These fields are used by security modules for labeling. task_struct Task (Process) linux_binprm Program Super_block File System inode Pipe, File, or Socket sk_buff Network buffer net_device Network device Kern_ipc_per m Semaphore, Shared Memory Segment, or Message Queue
- 61. LSM Architecture: 4) Module Registration • The primary security module must register itself using register_security function in security.c file. • It only register one module as primary module. • The decision of module stacking is left to primary module: – If the secondary module fails to register using register_security, it needs to call mod_reg_security – This function call the primary function to decide about stacking. int register_security(struct security_operations *ops) { if (verify(ops)) { printk(KERN_DEBUG "%s could not verify security_operations structure.n", __FUNCTION__); return -EINVAL; } if (security_ops != &dummy_security_ops) return -EAGAIN; security_ops = ops; return 0; }
- 62. LSM Architecture: 5) process capabilities • The name "capabilities" comes from the now defunct POSIX draft 1003.1e. • These capabilities are a partitioning of the all powerful root privilege. • A process has three sets of bitmaps called the inheritable(I), permitted(P), and effective(E) capabilities. • Each capability is implemented as a bit in each of these bitmaps which is either set or unset. • The kernel will check the appropriate bit in the effective set of the process for privileged operation.
- 63. Security Enhanced Linux (SELinux) Module • Developed by National Security Agency (NSA) • The most comprehensive implementation of LSM. • Most of SElinux became part of LSM framework. • SELinux is primary security module in Fedora distribution.
- 64. SELinux: Object Labeling • Important objects in the OS are labelled; Processes, files, inodes, superblocks etc. • Files persistently labelled via extended attributes. • Labels are called security contexts.
- 65. SELinux Architecture Policy files (policy database) SELinux Module Operation DAC LSM context Execute operation 0/ERR 0/ERR Security Server selinuxfs
- 66. SELinux Concepts •Identity: each user and process has a unique identity on the system. •Roles – Used to specify acceptable actions from a user. Each role has a set of privileges assigned to it
- 67. Kernel Modules • Modules can be compiled and dynamically linked into kernel address space. – Useful for device drivers that need not always be resident until needed. • Keeps core kernel “footprint” small. – Can be used to “extend” functionality of kernel too!
- 68. Example: “Hello, world!” #define MODULE #include <linux/module.h> int init_module(void) { printk(“<1>Hello, world!n”); return 0; } void cleanup_module(void) { printk(“<1>Goodbye cruel world Ln”); }
- 69. Using Modules • Module object file is installed in running kernel using insmod module_name. – Loads module into kernel address space and links unresolved symbols in module to symbol table of running kernel.
- 70. Infinity SD-WAN, IPSEC Module Use case Access a customized single pane-of-glass dashboard that integrates data from standard APIs. Multiple Access technologies and Local breakout Support, workflow integration. Integration Options with Other controllers, Containerized Software for CPE, headless architecture Fully Modelled and Support MANO Architecture which enhances Uptime Get real-time operational KPIs and statistics with system alerts and notifications which translated into business outcomes using Machine Learning
- 71. StorageNetwork Compute Service Catalogue Orchestration Engine 5) Flexible CPE – Zero Touch Provisioning CPE LTE vFWMPLS Programmable Network 2) Orchestration 4) Streaming Telemetry & Open APIs 3) Software Defined Services Portal 1) Self Service Infinity SD-WAN
- 72. ZTP Server DHCP Server DHCP Request DHCP Response – IP Address, Subnet, Gateway CPE Authentication IL CPE Success Failure Controller CPE Registration Handshake successes Control Plane Tunnel Established Configuration Push Configuration validation SD-WAN ZTP Flow
- 73. Secure Data Plane Tunnel - IPSEC Control Plane Tunnel Control Plane Tunnel Controller CPE 1 CPE 2 Configuration Engine Auth Service Analytics Engine Crypto Engine API Engine Presentation layer ZTP Server SD-WAN Architecture
- 74. SD-WAN- Demo
- 75. Build Your Own Firewall using FreeBSD Let’s Get Started! • First, we need to install VirtualBox • - Download VirtualBox here https://www.virtualbox.org/wiki/Downloads • Next we need to download FreeBSD • - Visit the official FreeBSD releases page (https://www.freebsd.org/where.html). The disk images are listed in order of release date, so the most recent release can be found at the top of the page. • For 32-bit machines, click on i386 - For 64- bit machines, click on amd64 •
- 76. Selecting Correct FreeBSD Image • After clicking the link, you will be redirected to a file directory containing multiple formats and versions of the FreeBSD installer. • For Virtual Machines, the format you are looking for is the file ending in disk.iso as highlighted above. Click this file and it will start downloading the installer.
- 77. Configuring VirtualBox • Run VirtualBox to start the initialization process. • Select the “New” button on the top left of the window to open the configuration window. Name your operating system as “FreeBSD”, then select FreeBSD from the dropdown menu as well as the version (32 or 64 bit). Type = BSD Choose the defaults options for disc setup until you reach the memory allocation section • Pick 2-4GB memory (as long as the slider does not move into the red) • Hardware drive Option – Recommend 100GB at least 20GB • Give the VM some extra processors if your machine can handle it (stay in the green)
- 78. Installing FreeBSD • After VirtualBox has been set up, boot FreeBSD by clicking the Start button • VirtualBox will start up a virtual machine and ask for a virtual optical disk file. This will be the .iso file that you downloaded through the FreeBSD website. Navigate to this file by clicking the small file symbol next to the drop- down menu. Once selected, the booting process will continue and the FreeBSD installer will start. • The next steps will be to configure FreeBSD. When in doubt, use the default options provided. The next few slides will guide you through this process. You can also follow the FreeBSD handbook’s installation guide https://www.freebsd.org/doc/handbook/usin g-bsdinstall.html to configure and set up your system.
- 79. bsdinstall Setup • After the first boot, users will be directed to the welcome menu. Arrow keys can be used to navigate through the options while the Enter key will be used to save the selection and move onto the next menu. To begin installation, select the first [ Install ] option. • This will enter bdsinstall, a program that allows users to install FreeBSD while offering multiple options for customization. For now, default options will be all that’s needed. The options are a great tool for more advanced users wanting a more personalized experience. • First, the installer will display a menu for keymap selection. Highlight the option to continue with the default keymap and press Enter to use the default keyboard layout. • The installer will then allow the user to set a hostname for the system. Type in a hostname that is unique for your network. Hit Enter again to save the new name. • After a hostname is selected and saved, the installer will prompt the user to select components to install. Stick with the default options and hit Enter to continue.
- 80. bsdinstall Setup Cont. • The installer will guide the user through the process of allocating disk space. This will allow FreeBSD to set up a partition scheme. • Choose the Auto (UFS) Guided Disk Setup • Confirm your selection • Use the Entire disk (ada0), this will make sure that all allocation disk space will be utilized. • Select GPT Partitions when prompted for a partition scheme. To navigate, use the arrow keys and Space to select the GPT option. • When prompted, complete the setup process and create the disk partition by selecting [ Finish ] and [ Commit ]. Once these changes have been saved and committed, bsdinstall will start the FreeBSD installation process. This may take a few minutes.
- 81. FreeBSD Post-Installation • While the FreeBSD installation process has been completed, there are a few more configuration options that need to be set before booting into the newly installed system. • First, the root password must be set. The root account is a superuser that has access to all files and commands. Characters that are typed during this section will not be displayed on the screen. Type the new root password and then a second time when prompted. • Next, FreeBSD will need to configure the network interfaces found on the computer. Select Enter to continue. The default options should be used. • Select [ Yes ] to configure IPv4 • Select [ Yes ] to use DHCP to configure • Select [ Yes ] to configure IPv6 • Select [ Yes ] to try SLAAC • At this point you will be directed to a menu with Resolver Configuration values, hit Enter to continue to the next step.
- 82. FreeBSD Post- Installation • The next menu is a large list of regions for time zone configuration. Use the arrow keys to navigate to the correct region and hit Enter. Next, navigate to the correct country or region. Finally, identify and choose the correct time zone. Select [ Yes] to confirm. • A menu to set the correct date will be next, while you can navigate through the menu to set date, choose [ Skip ] if the displayed date is already correct. [ Skip ] the next menu as the time zone was set up in the previous configuration menu. • The next two menus will be to configure what system services will be started when the system boots. All services are optional and for now select [ OK ] in both menus to continue with the default configuration. • The next step will be to add a user besides root. Because root has no limits and protection, it is recommended to log in to the system using a user account to limit the damage if a mistake is made (even a typo could be catastrophic).
- 83. FreeBSD Post- Installation • When prompted to create a user account select [ Yes ]. Bsdinstall will follow with a series of prompts to customize the account. Below is a quick summary of the information to input. For clarity, text in bold notates when the user should input text and not just use the default option: • Username – username used to log in. Username is case sensitive and should not contain spaces • Full name – The user’s full name • Uid – user ID (leave this blank) • Login group – The user’s group (leave blank) • Invite user into other groups? – Additional groups for the user. Type wheel here, which will give admin access. • Login Class – (leave blank) • Shell – (leave blank) • Home directory – The user’s home directory (leave blank) • Home directory permissions – Permissions on the user’s home directory (leave blank)
- 84. FreeBSD Post- Installation • Use password-based authentication? – Prompts user to input password at login (leave blank) • Use an empty password? – Option to use a blank password, though this is insecure (leave blank) • Use a random password? – Option for a randomized password (leave blank) • Enter password – The password for this user. Characters typed will not show on screen. • Enter password again – The password must be typed again for verification. • Lock out the account after creation? – Option to lock out use (leave blank) • User will be prompted to review the summary. If a mistake was made enter no and try again. If everything is correct, enter yes to finalize and create the new user. The menu will then ask if the user wants to create further user accounts, for now enter no. Final configuration: Use the arrow keys to navigate to Handbook and press Enter to install the FreeBSD Handbook. Select [ Ok ] to begin installation. Navigate to Exit and hit Enter to finalize changes. Select [ No ] when asked if further manual configuration is required and [ Reboot ] to complete the FreeBSD installation process.
- 85. Saving Your Configuration • - Once FreeBSD has been properly configured a window will appear asking if you would like to reboot to set the changes. Select “yes” and wait until the FreeBSD booting page appears again. Once this happens, close the virtual machine window and select “Power off the machine”. • - On the main VirtualBox application, click the section (on the lower right side of the window) that says “Storage.” A new window should appear showing the storage options. • - Under the main “Controller: IDE” there will be two options. One will be the hard disk that VirtualBox created for the system (it will have a square blue hard drive icon) and the other is the original FreeBSD download (with a light blue disk icon). Right click the sub-storage with the disk icon and select “Remove” from the drop- down menu. • - Select “OK” to save your changes and return to the main VirtualBox application. Click “Start” again and the FreeBSD virtual machine should now boot in its configured form. You now have FreeBSD installed on your machine!
- 86. Final Steps • In order to download packages you need to be logged into, or emulate the root user. • $ su • Install the VirtualBox guest addition packages: • $ pkg install emulators/virtualbox-ose-additions • Open the startup service configuration file located at /etc/rc.conf using the built in text editor ee: • $ ee /etc/rc.conf • To edit the file using ee, navigate using the arrow keys and type the text you need to enter. Once you are happy with your changes, press “<Esc> + <Enter>” and press “a” when given the option to save changes.) • Add these two lines to the bottom of the file and save your changes: • vboxguest_enable=“YES” • vboxservice_enable-=“YES”
- 87. Just a Few More Steps • Enter the following commands: • $ sysrc dbus_enable=YES • $ dbus-uuidgen > /etc/machine-id • $ pkg install -y sudo • $ visudo (we will use the vi editor this time to edit sudo ) • Within the sudo config type /wheel press Enter and uncomment the line below to allow all members of the wheel group to use sudo (in vi you can type the following to accomplish this task: j0xxZZ) ( pressing j moves down, 0 moves to the beginning of a line, x deletes one character, ZZ is saves and quits) • $ reboot (you can also type init 6 to reboot)
- 88. Set up Command History • As regular user run the following: • Enable command history in tcsh so you can have a record of the commands you’ve typed. This can be an extremely valuable tool that you’ll find yourself using a lot. Type history to see the command history • $ ee .tcshrc (add the following contents) • set history = 99999999 • set savehist = (99999999 merge) • set histfile = ~/.tcsh_history Save file •
- 94. Thank You