SlideShare a Scribd company logo
1 of 257
Download to read offline
Using CmapTools 
Create a Cmap 
Add a Concept 
Create a Proposition from One Concept 
Create a Proposition from Existing Concepts 
Save a Cmap 
Open a Cmap 
Create a Folder 
Drag in Resources 
Import Resources 
Add & Edit Links to Resources 
Manage Existing Resource Links 
Print the Cmap 
View Cmap as a Web Page 
How to Change the Language. 
Modify Linking Lines 
Change Colors 
Change Fonts & Sizes 
Add Arrows to Linking Lines 
Nested & Merged Nodes 
Change Backgrounds 
Create Custom Styles 
Link Propositions Between Cmaps 
Using Autolayout 
Export Cmap as an Image 
Export Cmap as a Web Page 
Send Cmap as an Email 
Search Places 
Search the Internet 
Find Text in a Cmap 
Using Spell Check 
Using the Dictionary & Thesaurus 
Validate & Fix Resource Links 
Collaborate Synchronously 
Permissions & Access Control 
Copy a Cmap to Places 
Add Annotations & Info 
Cmap List View 
Cmap Recorder 
Presentation Builder 
Suggestions 
Discussion Threads 
Choose a topic from the left to get help for CmapTools.
Knowledge Soups 
Compare Two Cmaps 
Keyboard Shortcuts
Using CmapTools 
The Views window is the organizational center of CmapTools. From here you can organize your Cmaps and Resources in folders, on your computer's hard drive and on remote servers that are shared with the Cmap community. 
TheViews window contains four main buttons on the left side of the window. Clicking on these buttons will show different locations of Cmaps and Resources in the right side of the window. When CmapTools starts, the Cmaps in My Computer location will be selected.
This location contains all of the Cmaps and Resources located on your local computer. 
You can create Cmaps here, and later move them to Shared Cmaps in Places at a later time.
Shared Cmaps are saved to remote Cmap Servers, and are easily viewable, and editable by other CmapTools users around the world. Cmaps saved here are also automatically generated as a web page for anyone with a web browser to see. This is the place to save your Cmaps if you want the rest of the Cmap world to see. 
The History button will show a log of Cmaps you've viewed or edited.
You can clear the history by clicking the Clear button, at the top right of the History list.
Cmaps and Resources can be added to your list of Favorites. The Favorites button will show the contents of this list.
You can add Cmaps and Resources to your Favorites list by selecting the file in the right side of the window, and then clicking Edit then Add to Favorites.
The bottom of the Views window contains two elements of functionality.
You can quickly delete things by simply dragging them onto the trash can. Beware, this will DELETE the item, you can not recover it once it is dragged to the trash can. 
The icons only check box will remove the words from the four main buttons (Favorites, History...) so that there is more room for the content to the right. Use this if you are familiar with the buttons, and don't need to be reminded of what they are.
Create a Cmap 
From the "Views - CmapTools" window: 
Select File, then New Cmap. (The keyboard shortcut Ctrl+n may also be used.) 
A new Cmap with the name "Untitled 1" will open.
From an open Cmap: 
Selecting File, then New Cmap will also open a new Cmap. (The keyboard shortcut Ctrl+n may also be used.)
Add a Concept 
From an open Cmap: 
Using the left mouse button, double-click anywhere on the Cmap. (You may instead right-click anywhere on the Cmap and select New Concept from the menu that appears.) A shape will appear with question marks inside of it. 
Type in a label to replace the question marks. Left-click on a white portion of the Cmap outside of the shape to set the label. The shape has now become a new concept.
Create a Proposition from One Concept 
From an open Cmap: 
Left-click on the concept you would like to make a new proposition from. 
Left-click and drag from the arrows at the top of the concept. As you continue to hold the mouse button down, notice that an arrow from the selected concept will follow around the mouse pointer. (Another way to make the arrow follow the mouse pointer is to left-click once on the concept arrows, then release the button before moving the mouse.)
If you chose to drag the mouse from the concept's arrows, drag the arrow some distance away from the concept and release the mouse. (If you left- clicked once on the concept's arrows, let the arrow follow your mouse pointer away from the concept and left-click again.) A new concept will be created, along with a rectangle that connects the two concepts.
Type in a label for the rectangle, then left-click on a white portion of the Cmap to set the label. A linking phrase for the new proposition has now been created.
Left-click on the new concept and type in a label. Left-click outside the concept to set the label. A new and complete proposition has been created. A proposition can have more elements than two concepts and a linking phrase. You may apply the methods described in this help section as well as Create a Proposition from Existing Concepts to add to your existing propositions.
Create a Proposition from Existing Concepts 
From an open Cmap: 
Starting with two or more concepts, left-click on a concept you would like to make a new proposition from. 
Left-click and drag from the arrows at the top of the concept. As you continue to hold the mouse button down, notice that an arrow from the selected concept will follow around the mouse pointer. (Another way to make the arrow follow the mouse pointer is to left-click once on the concept arrows, then release the button before moving the mouse.)
If you chose to drag the mouse from the concept's arrows, select another concept to drag the arrow over and release the mouse. (If you left-clicked once on the concept's arrows, let the arrow follow your mouse pointer over another concept you have selected, then left-click again.) A rectangle will appear with lines connecting to both concepts.
Type in a label for the rectangle, then left-click on a white portion of the Cmap to set the label. The rectangle will dissappear, leaving a linking phrase in it's place. The linking phrase completes the proposition. A proposition can have more elements than two concepts and a linking phrase. You may apply the methods described in this help section as well as Create a New Proposition from One Concept to add to your existing propositions.
Save a Cmap 
From an open Cmap: 
Select File, then either Save Cmap if you intend to save editing on an existing Cmap, or Save Cmap As to save a new Cmap. We will use Save Cmap As to demonstrate how to save a new Cmap. 
The "Save Cmap As" window will appear. Here, you can label your Cmap, give it a focus question, and assign keywords to it. The Author, Organization, and Email text fields are where you can add additional identifying information. These fields may be already filled with default values. The values are taken from Preferences... under Edit from the "Views - CmapTools" window.
The next image shows the "Save Cmap As" window filled with identifying information. At the top of the window, there is a computer button that lists the contents of the My Cmaps folder, and a globe button that lists the servers that are a part of Places. The computer and globe buttons give you the option of saving your Cmap locally, or saving it on a Cmap server that you have permission to use. For our example, we will left-click Save to save the
Cmap to My Cmaps. 
The "Saving Cmap" window will show the progress of the save request.
Switch to the "Views - CmapTools" window. The Cmap you saved will appear under the My Cmaps heading.
Open a Cmap 
From the "Views - CmapTools" window: 
Highlight the Cmap that you wish to open. Select File, then Open to have the Cmap open in another window. (Using the left mouse button and double-clicking the title (or icon) of a Cmap, or highlighting its title and pressing Enter, are alternate ways to open a Cmap.)
If a Cmap or folder is not highlighted, and either Open is selected from the File menu, or Enter is pressed, the current "View" will open in another window.
Create a Folder 
From the "Views - CmapTools" window: 
Click File, then New Folder...
You will now see the New Folder window in which you can enter the Folder Name (required), and other optional attributes for the folder. 
Click the OK button, and the new folder will be created in the Views window. This new folder will be placed in the currently selected directory in the Views window. If no directory is selected, it will be placed at the root of the current view.
Drag in Resources 
Desktop to Cmap Desktop to Views Views to Cmap 
From the desktop to an open Cmap: 
Resources can be added to concepts on a Cmap by dragging them from the desktop or an open folder. 
Once the resource is positioned above the concept and the mouse is released, the "Edit Resource Link" window will appear. If the resource is an image that you would like to set as the background for your Cmap, select the radio button labeled Set as Background. The Description and Keywords boxes allow you to add additional information about your resource. Click OK when you are finished editing the resource link.
Now when viewing the Cmap, a resource link group icon will appear attached to the concept. The resource link group icon appears with an image that is representative of the type of resources it links to. Each of these icons may list one or more resources of the same type. A concept may have up to 13 different icons attached to it, each icon representing a different type of resource.
Left-click the resource link group icon to reveal the title of the resource you have just linked to, then move the mouse over the resource's title. A box with the description of that resource will appear.
Left-click the resource title. CmapTools has an image viewer that will open for common image files. An external program will open for any graphic resource not supported by the image viewer. From the "Views - CmapTools" window: 
Resources can also be dragged into either "My Cmaps" or "Places" that you have permission to add files to.
After dragging the resource into the "Views - CmapTools" window, the "Edit Resource Properties" window appears. Click OK when you are finished editing properties for the resource.
From the "Views - CmapTools" window: 
Resources that you have access to from either "My Cmaps" or "Places" can be dragged into a Cmap.
After dragging the resource from the "Views - CmapTools" window over a concept in a Cmap, the "Adding Resource Links to..." window appears. Click OK to add the resource link to the selected concept on your Cmap.
Import Resources 
Single Resource Multiple Resources Internet Shortcuts 
From the "Views - CmapTools" window: 
To import a single resource, select File then Add Resource(s)... 
Using the "Add Resources" window, you can manually navigate through folders to add resources for use in Cmaps. To locate resources from the "My Cmaps" or "Places", left-click the corresponding button at the top of the window. When the "Add Resources" window is first opened, the contents on the desktop are shown. To return to the desktop view, you may left-click the "Desktop" button at any time. Once you have located a resource you would like to add to a Cmap in the future, highlight it and left-click the Add button. 
After left-clicking Add, the "Edit Resource Properties" window appears. Left-clicking the checkbox in this window
allows you create a resource shortcut, rather than copying the actual resource, to the "My Cmaps" folder. Left- click OK when you are finished editing the resource's properties. 
The added resource will now be listed in the "Views - CmapTools" window.
From the "Add Resources" window: 
To add multiple resources at the same time, left-click the plus sign next to Show Resource List. The "Add Resources" window will expand to indicate that more than one resource can now be added to the resource list. Hold down the Ctrl key while left-clicking the title of each resource. Left-click the Add to List button when you have selected the resources you would like to add from the current directory. 
Using the left mouse button to double-click the boxes under the Description and Keywords headings, you may edit the resource properties for more than one resource. To remove a resource from the list, left-click Remove. To make changes to the properties of an individual resource, highlight the resource and left-click the Edit... button. The "Edit Resource Properties" window will open, and any changes will appear in the "Add Resources" window after left-clicking OK. From the "Add Resources" window, left-click Add All to add resources you would like to use in future Cmaps.
The added resources will now be listed in the "Views - CmapTools" window.
From the "Views - Cmaptools" window: 
You can import internet shortcuts to "My Cmaps" or "Places" that you have permission to store files on. To create an internet shortcut link, begin by selecting Add Web Page... from the File menu. 
The "Add Web Page" window will appear where you can add information to an internet shortcut. Left-click OK to add the web page. 
From the "Views - CmapTools" window:
Now an internet shortcut icon will appear in the folder where you saved it.
Add & Edit Links to Resources 
From an open Cmap: 
To add a resource link, begin by left-clicking a concept you want to link with a resource. 
Select Edit then Add & Edit Links to Resources... from the menu bar. (You can also perform this action by right-clicking the selected concept, then left-clicking on Add & Edit Links to Resources... from the menu that appears. Pressing Ctrl+r while a concept is selected is a third option you may use.)
Using the "Editing Resource Links for [...]" window, you can manually navigate through folders to add resource links to concepts in Cmaps. The "Editing Resource Links for [...]" window is very similar to the "Add Resources" window (described in the help section Import Resources) because multiple resource links may be added and managed in one location. Once you have located the resources you want linked to the selected concept, highlight them and left-click Add to List.
Left-click the box under Description to add or change the description of the selected resource. Remove may be used to remove a resource link from the list. To make further changes to the resource link, highlight the resource and left-click the Edit... button. The "Edit Resource Link" window will open (described in the help section Drag in Resources). Any changes made in the "Edit Resource Link" window will appear in the "Edit Resource Links for [...]" window after left- clicking OK. Left-click the Update button when you are finished editing the selected concept's resource links.
Now when viewing the Cmap, a resource link group icon (described in the help section Drag in Resources) will appear attached to the concept. When the resource link group icon is left-clicked, it will reveal a selectable list of resources that have been added to the concept.
Manage Existing Resource Links 
Individual Resource Link Resource Link Group 
From an open Cmap: 
To manage an individual resource link, left-click on its resource link group icon (described in the help section Drag in Resources). After a list of resource links is revealed, right-click the title of a resource link to select it. (Instead of right-clicking the title of the resource link, you may highlight it and use one of the following keyboard shortcuts: Cut - Ctrl+x, Copy - Ctrl+c, Delete - Del, Edit - Ctrl+r) 
If you right-clicked the resource link's title, a menu will appear allowing you
to cut, copy, delete, or edit the resource link. Left-clicking Copy will copy the link so that you may paste it (see below) to additional concepts. Delete removes a resource link from the group. You may also edit the resource link using Add & Edit Links to Resources... (described in the help section Add & Edit Links to Resources). We will illustrate how to transfer a resource link from one concept to another using Cut. 
The icon that linked an image resource to the concept "Roots" has been removed because the resource link that was cut was the only one in the group. Right-click the concept that you want the resource to link to, then left-click the Paste menu item. Paste is also used to attach resource links that have been copied. (Another way to paste a resource link is to left-click
a concept, then press Ctrl+v) 
Now, the icon and the resource link have moved to a different concept.
From an open Cmap: 
An entire group of resource links can be managed by right-clicking a resource link group's icon. Instead of only affecting an individual resource link, a selection from the menu that appears will affect all links of the selected resource type.
Print the Cmap 
When printing a Cmap, it is best to first go to the Print Preview. 
From an open Cmap: 
Select File, then Print Preview... 
You will now see the Print Preview window. From here, you can choose your page orientation, and set how many pages the Cmap should be printed on, using the Page Layout dialogue.
Use the Page Setup button to set additional settings, specific to your printer. If you hit the OK button, the settings will be saved and you can print later, or you can hit the Print button to print immediately.
View Cmap as a Web Page 
Cmaps that are saved on CmapServers, are automatically saved with a version that can be viewed as a web page on any web browser. 
Once your Cmap is saved to a server, you will see an additional status bar at the bottom of the Cmap, indicating its web address, and showing a button that will allow you to view the web page. 
Click the 'View' button, and Cmap Tools will launch your default web browser, and go to the web page version of the Cmap you are viewing.
To share this web page with others, simply copy the web address from your web browser and email it as a link to the people you want to see the Cmap as a web page.
How to Change the Language 
NOTE! You will have to restart CmapTools when doing this. 
From the Views window: 
Click Edit, then Preferences... 
Language information appears near the bottom of the General tab.
Choose your language from the drop down menu, then restart CmapTools.
You will have to restart CmapTools when doing this.
Modify Linking Lines 
4pt Bezier 3pt Bezier Splines Vectors Add Control Points Thickness Style 
From an open Cmap: 
Modifying linking lines can be useful when adding new Cmap items onto propositions. You can apply the different techniques found in the help sections Create a New Proposition from One Concept and Create a Proposition from Existing Concepts to add concepts to existing propositions. One type of modified link, the curved link, can be used to complete the addition of a concept to a proposition. 
Left-click the arrows of an existing concept or linking phrase to have an
arrow follow the mouse pointer. 
Select a concept and connect the arrow to it. The linking line will appear positioned behind other objects that are not part of the link.
Right-click a linking line that you want to curve. Select Line... from the menu that appears.
The "Styles" window will open to the Line dialog. Left-click the button under the Shape heading to reveal the different curving options for your linking line. In our example, we'll use the Make 4pt Bezier. button so that we may fine tune our curve.
When you return to the Cmap, you'll notice a small white box in the middle of the line you have selected to curve. The small white box in the middle of the line actually consists of two boxes or points, one on top of the other. Using the left mouse button, drag one of the two overlapping points from the middle of the line out to a desired location on the Cmap.
Now drag the remaining middle point out to finish the curve.
When you have completed the adjustments of your curve, left-click on a white portion of the Cmap to set the curved link.
From the "Styles" window: 
To curve a linking line by using the corner of an adjustable triangle for reference, left-click the Make 3pt Bezier. button.
Using the left mouse button, drag the middle point of the line out to a desired location. When you have completed the adjustments of your curve, left-click on a white portion of the Cmap to set the curved link.
From the "Styles" window: 
The Make Splines. button allows you to curve from a middle point directly attached to the link.
Left-click and drag the middle point out to a desired location, then left-click on a white portion of the Cmap to set the curved link.
From the "Styles" window: 
The Make Vectors. button allows you to create angled links, or vectors, using straight lines.
Left-click and drag the middle point out to a desired location, then left-click on a white portion of the Cmap to set the vector link.
From an open Cmap: 
You may add additional control points to change the shape of a linking line. Right-click a linking line that you want to curve. Select Add Control Point from the menu that appears.
Adding additional control points to a link will give you more control over the link's shape.
You can curve links in different ways by adding additional control points, and by making use of Make Splines. from the Line dialog in the "Styles" window.
From the "Styles" window: 
The Line Thickness button allows you to modify how thick, or thin, you want a linking line to appear.
Now when viewing the Cmap, the thickness of the linking line you selected has changed.
From the "Styles" window: 
The Line Style button allows you to modify a linking line's appearance with the use of a solid pattern, or a combination pattern of dots and/or dashes.
Now when viewing the Cmap, the linking line you selected will appear in the line style you chose.
Change Colors 
Linking Lines Group of Items Single Concept Text Background 
From an open Cmap: 
All items of a Cmap, except the resource link group icon (described in the help section Drag in Resources), can change color. To change the color of a linking line, select the line by right-clicking it, then left-click Line... from the menu that appears. (Notice that a linking line may have a different shape than an actual line. More information on different types of linking lines can be found in the help section Modify Linking Lines.)
The "Styles" window will open to the Line dialog. Moving the mouse over the Color button makes a box appear that indicates what type of object will be affected when a color change is made. 
Left-clicking the Color button will reveal a palette of common colors that are selectable using the mouse. No Fill will change the color of an item (other than the background) to transparent. Left-click the More Colors... button to choose a particular color not shown in the palette.
The "Choose a Color" window opens to the Swatches dialog where you can pick a color from an expanded palette. The color currently chosen appears in the Preview panel. Selectable swatches of previously chosen colors are under the Recent: heading. Left-click the HSB tab at the top of the window to further explore your color options.
The HSB dialog opens, allowing you to select a color using Hue, Saturation, and Brightness values. Clicking either mouse button in the color square will select a color. You may also drag the slidebar with the mouse, specify numeric values in the text boxes, or use a combination of features in the HSB dialog to select a color. The HSB dialog shows corresponding RGB values. You may left-click the RGB tab to fine tune these values.
The RGB dialog allows you to select a color by adjusting the color's Red, Green, and Blue values. You may use the slidebars, text boxes, or a combination of features in the RGB dialog to select a color. After you have chosen a color, Left-click the OK button to observe the change in color of the Cmap item.
When you return to the Cmap, the item you selected will be in the color you chose. You may also want to change the color of other Cmap items to the selected color.
From an open Cmap: 
You can change the color of multiple Cmap items at the same time. A way to select multiple adjacent Cmap items is by clicking and holding the left mouse button to drag a selection rectangle over the items. By holding down Ctrl and left-clicking on items, more than one non-adjacent item may be selected. A combination of left-clicking and dragging rectangles, all while holding down the Ctrl key, can capture both adjacent and non- adjacent Cmap items into the selection. (Alternate ways of selecting Cmap items can be found in the help section Nested & Merged Nodes.)
A new menu appears when right-clicking on a group of selected Cmap items. Left-click on Format Style from the menu. A sub-menu will open where you can left-click an item type that best represents your multiple item selection. (If you only have linking lines selected, then Line... would best represent your selection. To change any other group of items, including groups that contain a variety of different Cmap items, select Object...)
The "Styles" window will open to either the Line or Object dialogs, depending on which sub-menu item you selected. After left-clicking the Color button, notice the Added Colors heading. Left-clicking a color will change the color of all items selected.
When you return to the Cmap, the group of items you selected will be in the color you chose.
From an open Cmap: 
To change the color of a single concept, select the concept by right- clicking it, then left-click Format Style. A sub-menu appears where you can left-click the Object... menu item.
The "Styles" window will open to the Object dialog. Moving the mouse over the Color button makes a box appear that indicates which portion of
the concept will be affected when a color change is made. 
Notice that when the Color button is left-clicked, an additional color appears selected under the Added Colors heading that you did not add. You may left-click the added color at any time to return to the default background color of a concept. You can make a color choice for the background of your concept with either the No Fill button, the palette of common colors, any Added Colors you may have, or left-click on More Colors...
When you return to the Cmap, the concept you selected will be in the color you chose.
From an open Cmap: 
To change text color, right-click a concept or linking phrase, then left-click Format Style. From the sub-menu, left-click the Font... menu item.
The "Styles" window will open to the Font dialog. Left-clicking the Text Color button will allow you to choose a color.
After you have made a color selection, return to the Cmap to view the selected text in the chosen color.
From an open Cmap: 
To change the background color of a Cmap, select a concept or linking phrase by right-clicking it, then left-click Format Style. From the sub- menu, left-click the Cmap... menu item.
The "Styles" window will open to the Cmap dialog. Left-clicking the Set Background Color button will allow you to choose a color.
After you have made a color selection, return to the Cmap to view the background in the color you chose.
Change Fonts & Sizes 
Font-Size-Style Margin Text Alignment Change Case 
From an open Cmap: 
To change text font and size, select any number of concepts and/or linking phrases. (The help sections Change Colors and Nested & Merged Nodes explain different methods of selecting Cmap items.) 
Right-click the selection, then left-click Format Style. A sub-menu appears where you can left-click the Font... menu item.
The "Styles" window will open to the Font dialog. You can change the Font Name and/or Font Point Size using the boxes found under the Font & Size heading.
You can emphasize your text using the Bold and/or Italic buttons located under the Style & Color heading. 
Now when viewing the Cmap, the changes made to font, size, and emphasis can be seen in the text items you selected. From an open Cmap: 
To change the size of a concept's border without changing the position of the text, begin by selecting the
concepts you wish to change. 
From the "Styles" window, Font dialog: 
You can insert a new positive integer in the text box under the Margin heading. 
Now when viewing the Cmap, the distance has changed between the text and the border of the concept.
From an open Cmap: 
It is possible for text to be positioned at any location inside the concept using a combination of CmapTools. For our example, we will begin by selecting a concept that has a background image (described in the help section Change Backgrounds).
From the "Styles" window, Font dialog: 
When using a concept with a background picture, the Margin should be set to 0 if you would like the text to be positioned adjacent to the edge of the concept's border. To move text a specific distance from the concept's border, you may incrementally increase the number in the margin box until the desired text position is achieved. Under the Text Alignment heading, you can choose from Left, Center, or Right justifications to horizontally align text inside of a concept. 
You can choose from the Top, Middle, or Bottom buttons to vertically align text inside of a concept. 
Now when viewing the Cmap, the text inside the concept you selected has changed positions. Notice that different combinations of horizontal and vertical alignments may be used to produce specific results.
From an open Cmap: 
You can modify the case of selected text in a Cmap. The Change Case sub-menu, located under Format from the Cmap's menu bar, has four case-modifying menu items to choose from.
The illustration below shows the effect that lowercase has on selected text. 
UPPERCASE converts all letters in the selection to uppercase. 
Sentence case can be used effectively by selecting concepts or linking phrases that are labeled using more than one word.
Title Case makes the first letter of each word in the selection capitalized.
Add Arrows to Linking Lines 
From an open Cmap: 
You can change the directional emphasis within propositions by using arrows. To change how arrows are used in propositions, begin by selecting the proposition(s). Right-click the selection, then left-click Line... from the Format Style sub-menu. (You may also modify the arrow behavior of specific lines by narrowing your selection to only those lines you want to change. The help section Change Colors explains different methods of selecting Cmap items, including linking lines.)
The first concept, that a proposition is created from, is initially treated by CmapTools as the root or parent. To have the linking phrase(s) from the parent concept point at all children concepts, left-click the button illustrated below under the heading Arrowheads.
Now when viewing the Cmap, selected linking lines will point from linking phrases to children concepts.
From the "Styles" window: 
When using the top-down approach for building propositions, you may want arrows to point to children concepts only when they are positioned vertically higher than the linking phrases they are connected to. To create these types of arrows, left-click the button illustrated below under Arrowheads.
Now when viewing the Cmap, selected linking lines will point only to children concepts that are vertically higher in relation to their connected linking phrases. Notice that the vertical position of the parent concept does not change how arrows are placed using this arrow feature.
From the "Styles" window: 
You can have arrows pointing from parent concepts to linking phrases, and from linking phrases to children concepts. To create these types of arrows, left- click the button illustrated below under Arrowheads.
Now when viewing the Cmap, selected linking lines will be pointing from parent concepts to linking phrases, and from linking phrases to children concepts.
From the "Styles" window: 
You can assure that no arrowheads appear on your linking lines. To make linking lines with no arrowheads, left-click the button illustrated below under Arrowheads.
Now when viewing the Cmap, no arrows will appear on the linking lines you selected.
From an open Cmap: 
The order in which concepts are created for propositions affects the direction that linking line arrows point. Propositions may not appear logical until the arrow direction is reversed. To reverse the direction that linking line arrows point, begin with a selection that includes these lines. Right-click the selection, then left-click Line... from the Format Style sub-menu. (Instead of using the right- click menu, you may choose Edit, then Reverse Connection Direction from the Cmap's menu bar.)
The "Styles" window will open to the Line dialog. Left-clicking the Reverse button (under the Connection Direction heading) will reverse the direction that arrows point.
Now when viewing the Cmap, selected propositions that were previously illogical (due to arrows pointing the wrong way) will now make more sense.
From the "Styles" window: 
Some conceptual relationships are conveyed clearer using non-standard means of visual communication. For example, a concept map may illustrate the symbiotic relationship that takes place within a system. Bi-directional arrows, between concepts that represent elements of the system, may be appropriate. To create these types of arrows for linking lines that you have selected, left-click the button illustrated below under Connection Direction.
Now when viewing the Cmap, arrowheads will appear on both ends of selected linking lines. (You can link concepts together without creating a linking phrase. Begin by holding down the shift key, then left-click and drag the arrows from the top of a concept. While still holding down the left mouse button and the shift key, release the mouse first, followed by the shift key, above another concept you want to link to.)
From the "Styles" window: 
You can change selected bi-directional arrows back to pointing in only one direction. To create arrows that point in only one direction, left-click the button illustrated below under Connection Direction.
Now when viewing the Cmap, the linking lines you selected now point in only one direction.
Nested & Merged Nodes 
Create Nested Nodes Remove from Parent Detach Children Merge Nodes 
From an open Cmap: 
You can provide more detail about a subject by putting Cmap items inside of a nested node. Nested nodes are useful when you want to add extra information, with quick accessibility, to an expandable concept. To create a nested node, begin by right-clicking a selection of Cmap items you want to include in the node. (You can select all Cmap items by pressing Ctrl+a) Left-click Nested Node, then left-click Create from the sub- menu.
Now, a newly-created nested node surrounds, or nests, the Cmap items you have selected. The nested node initially appears in its expanded mode with a set of arrows on the right. 
You can collapse a nested node to hide the information it contains. One method of collapsing a nested node is to right-click a clear portion of the node, then left-click Expand from the Nested Node sub-menu to release the checkmark. (You can return to expanded mode by applying the checkmark to the Expand sub-menu item. Also, another way to expand or collapse a nested node is to left-click the set of arrows on the right of the node.)
A nested node enters label mode once it is collapsed. In label mode, the nested node may be labeled just as a normal concept would.
Cmap items located inside nested nodes may be arranged just the same as if the items were located in their own Cmap. To reveal other Cmap items that may be covered up by an expanded nested node, return the node to its label mode. (To add existing Cmap items to a nested node, hold shift while dragging the selection of items into the node.)
After returning any expanded nested nodes to label mode, you can clearly view the main ideas of a Cmap.
From an open Cmap: 
You can remove one or more child Cmap items from a nested node. To detach a selection of child Cmap items from its nested node parent, right-click the selection, then left-click Remove from Parent from the Nested Node sub-menu.
Now the parent nested node is only attached to those child Cmap items that were not chosen for removal.
From an open Cmap: 
You can automatically remove all child Cmap items from their parent nested node. To detach all child Cmap items from their parent, right-click a clear portion of the node, then left-click Detach Children from the Nested Node sub-menu.
Now all contents in the nested node will be removed, and the nested node's label appears in a separate concept.
From an open Cmap: 
You can combine the contents of multiple nested nodes. To combine the contents of multiple nested nodes into one nested node, right-click a selection of nested nodes, then left-click Merge Nodes...
From the "Merging Options" window : 
You can decide in what way you want to merge Cmap items from selected nested nodes. Concepts and Linking Phrases are examples of Cmap items that may be merged. In the illustration below, only concepts are able to merge into a new nested node. Linking phrases were not inside the original selection of nested nodes to be merged, so they appear grayed out. Selecting the Only merge if node labels match option restricts merging of nested nodes to only those nodes that have the same label. Left-click to fill or clear the checkboxes, then left-click Ok to merge selected nested nodes.
Now when viewing the Cmap, the Cmap items from the selected nested nodes have merged into one nested node. The way that nested nodes merge depends on the initial contents and labels of the nested nodes selected, and on how options are set from the "Merging Options" window.
Change Backgrounds 
Change Cmap Background Change Concept Background 
From an open Cmap: 
You can make an image appear in the background of a Cmap. To give a Cmap a background image, right-click a clear portion of the Cmap, then left-click Add Background.
The "Choose Background" window will open so that you may locate an image file. Left-click OK to place the selected image into the background of the active Cmap. 
Now when viewing the Cmap, the background image selected appears as the Cmap's background.
From an open Cmap: 
You can make an image appear in the background of a concept. To give a concept a background image, right-click the concept, then left-click Object... from the Format Style sub-menu.
The "Styles" window will open to the Object dialog. To continue adding an image to the background of a concept, left-click Select or Change
Background. The "Choose Background" window will appear where you can browse for an image. Left-click OK from the "Choose Background" window to add the selected image to the background of a concept. 
Now when viewing the Cmap, the background image selected will appear as the concept's background.
Create Custom Styles 
From an Open Cmap: 
You can save the styling used in a Cmap by making a custom styles file. By saving the styling used in a Cmap to a file, the saved style information can be applied to any other Cmap. To begin making a custom style, select one or more Cmap items that contain styling you want to save. When you have finished selecting Cmap items, left-click the selection, then right-click Object... from the Format Style sub-menu.
The "Styles" window will open to the Object dialog. To give a name to the style used by the Cmap items you selected, left-click the arrow at the bottom portion of the "Styles" window.
The bottom portion of the "Styles" window, Named Styles will open to reveal a list of currently available styles. The Default style (as shown below) is initially set by the program. To add a new style that is taken from the current selection of Cmap items, left-click the New Style button at the bottom of the window.
The "New Style" window will open where you can name the new style. You can include any background styling such as background color, for example. Left-click OK to return to the "Styles" window.
Now, the style's name appears in the list under Named Styles. You can save the style as a separate file, in either My Cmaps or Places, so that it may be used in other Cmaps. To save the style to a file, left-click the style's name once to select it, then left-click Save at the bottom of the "Styles" window.
The "Save As..." window appears where you can choose to save the new style in either My Cmaps or Places. To create a style sheet with the file name you have supplied, left-click Save.
Now, the style sheet appears as a new file in the "Views - CmapTools" window.
Link Propositions Between Cmaps 
From two open Cmaps: 
You can link propositions between Cmaps that have been saved to either My Cmaps or Places. Begin connecting concepts and/or linking phrases between multiple Cmaps by first opening and positioning the Cmaps, so that overlapping is not a problem.
Two or more Cmaps can be linked to each other in much the same way as concepts and linking phrases connect to one another on a single Cmap. Left-click and drag from the arrows at the top of a concept or linking phrase, then release the mouse above a Cmap you want to link to. 
Now when viewing the Cmaps, a concept appears on each Cmap with a shortcut arrow on its bottom right corner, indicating that the new concept links to another Cmap when left-clicked. Shortcut concepts, and any linking phrases or lines that they are connected to, can be modified to your liking. (The sections Create a New Proposition from One Concept and Create a Proposition from Existing Concepts further explore various connection possibilities that may
also be used to connect multiple Cmaps.)
Using Autolayout 
CmapTools contains a tool that can arrange your Cmaps in a logical manner. 
From an open Cmap: 
Select Format, then Autolayout... 
If you want to do Autolayout on the entire Cmap, do not have any concepts or linking phrases selected. 
On larger Cmaps, you can use Autolayout on parts of the Cmap by selecting the objects you wish to format.
This will open the Autolayout window. 
The two tabs (Hierarchial & Force Directed) near the top of this window contain options for different ways of formatting the Cmap.
The Hiearchial options will layout the Cmap in a very structured, organized manner, often discarding the Cmap's existing design. 
The Force Directed options will will reduce the amount of space between objects, keeping the Cmap's existing design.
Export Cmap as an Image 
From an open Cmap : 
Click File, then Export Cmap As, then Image File... 
You will now see the "Export Cmap as Image File" window. 
The file name will default to the name of your Cmap. Use the drop down menu to choose what type of image file you want the Cmap saved as. 
Click Save when ready.
Your Cmap has now been saved as an image file on your computer in the location you specified.
Export Cmap as a Web Page 
From an open Cmap : 
Click File, then Export Cmap As, then Web Page... 
You will now see the "Export Cmap as Web Page" window. 
The file name will default to the name of your Cmap. 
Choose the location on your computer to save the web page to. 
Click Save when ready.
Your Cmap has now been saved as a web page on your computer in the location you specified. There will be three files in the location. 
l 
The .html file with the name specified in the Save window. 
l 
A .jpg file, this is the image of the Cmap. 
l 
CmapToolsTrademark.gif, this is IHMC's trademark image.
Send a Cmap in an Email 
To send a Cmap that is still editable by CmapTools: 
It is highly recommended that you save your Cmaps to a Cmap Server if you want to share them with others. 
If you must send a Cmap as an email attachment, follow these steps: 
1. 
Drag and Drop your Cmap and all related resources to your desktop. 
2. 
Compress all your files into a .zip, .sit, .tar etc... file. 
3. 
Attach the compressed file to an email as you would any other file 
To send a Cmap that is viewable by any web browser: 
This method allows people without CmapTools to view a Cmap and browse its resources, though the recipient of the email needs to know how to uncompress files to view the Cmap. 
To email a web page version of your Cmap: 
1. 
Export your Cmap as a webpage. (click here to learn more) 
2. 
Compress the three generated files into a .zip, .sit, .tar etc... file. 
3. 
Attach the compressed file to an email as you would any other file
To send a Cmap that is viewable by any computer: 
This method allows people without CmapTools to view a Cmap, but they can not browse its resources, the Cmap is emailed as a static image. 
To email an image version of your Cmap: 
1. 
Export your Cmap as an image. (click here to learn more) 
2. 
Attach the image file to an email as you would any other file.
Search Places 
You can search through your Places (local Cmaps and Shared Cmaps in Places) like you would any other search engine. 
From an open Cmap: 
Select Tools, Search, then Cmaps and Resources... 
You will now see the Search window.
Enter the search term in the text input field at the top of the window, and click Search. 
The Search window will begin showing the results of the search in the bottom field. Double-click any search result to open it. 
The search tool can automatically search for a term in your Cmap by selecting on the concept or linking phrase, and then starting the search tool as described above.
Search the Internet 
You can use CmapTools to search the internet, just like you would any other search engine. 
From an open Cmap: 
Select Tools, Search, then Web Information ... 
You will now see the Search window.
Enter the search term in the text input field at the top of the window, and click Search. 
The Search window will begin showing the results of the search in the bottom field. Double-click any search result to open it. 
The search tool can automatically search for a term in your Cmap by selecting on the concept or linking phrase, and then starting the search tool as described above.
Find Text in a Cmap 
From an open Cmap: 
Select Edit, then Find... 
You will now see the Find window.
In this window, enter the word, or part of a word you are looking for. Click Find Next or Find All to select the objects in the Cmap that match the text you are looking for.
Using Spell Check 
NOTE! Spell check currently only works in Cmaps with text written in English. 
From an open Cmap: 
Select Tools, then Spelling... 
Once you click Spelling... a status window will appear, and be replaced with the Spelling Checker Summary window when finished.
You can set options for the spell check, by clicking Tools, then Spelling Options... from an open Cmap. 
From here, you can increase the size of the Dictionary File, and set other options that can help reduce unnecessary corrections in your Cmap.
Using the Dictionary and Thesaurus 
NOTE! Dictionary and Thesaurus currently only works in Cmaps with text written in English. 
From an open Cmap: 
Select Tools, then Dictionary and Thesaurus... 
You will now see the Dictionary and Thesaurus window.
In the top left text input, enter the word or term you wish to look up, and click the Look Up Related Word button. 
You will now see all the alternatives for the word you just looked up.
If you had a concept selected when you started this process, you can simply click Replace, and the word will be replaced with your new selection. Otherwise, you can click the Add as a New Concept and a new concept will be created with your selected word.
Validate and Fix Resource Links 
Use the Validate & Fix Links... tool when you have accidently moved resources (images, documents, etc.) from the locations that your Cmap is expecting those resources to be. 
From an open Cmap: 
Select Tools, then Validate & Fix Links... 
You will now see the Validate & Fix Links window. From here, you can choose to Search & Fix or Search Only for broken resource links in the Cmap currently opened.
In this example, we will just search for broken links at first. Click the Search Only button. 
You will now see a window, displaying the results of the search. Click OK.
You will now see the Cmaps with Broken Links to Resources window. This window shows you which Cmaps have broken links (on the left), and resources that are broken (on the right). Click on a broken resource to select it, and activate the buttons at the bottom.
If the resource is no longer needed, simply remove it by clicking the Remove button. 
If you wish to manually fix the broken link, click the Choose button, this will take you to a file browsing interface, and you can manually select the file that the broken resource should link to. 
Click the Try to Fix Broken Link button to let CmapTools automatically search for the missing file, and relink the resource to the file. If the link is fixed, the broken resource will be removed from the Linked Resources Not Found list. 
You can do this process on a group of Cmaps by selecting a folder from the
Views window, and clicking Tools then Validate & Fix Links... .
Collaborate Synchronously 
From an Open Cmap in Places: 
You can collaborate with multiple users of CmapTools at the same time if you have an internet connection. Begin by copying a Cmap you want to work on with others to a place in the CmapTools network. To allow others the opportunity to synchronously collaborate on a shared Cmap, left-click the icon at the top right of the Cmap to release the collaboration lock.
The "Synchronous Collaboration Enabled" dialog window appears, confirming that the Cmap is now ready for synchronous collaboration.
If you are not the owner or administrator of a Cmap, and you want to synchronously collaborate on that Cmap with others, you may request a synchronous collaboration session. The "Request Collaboration Session" window opens automatically when you attempt to edit another's Cmap. Instead of requesting a session, you can alternatively work on your own using a copy of the Cmap by left-clicking Edit a Copy of the Cmap. You can change the User ID that other collaborators will identify you with, as well as establishing the new ID as the default for future use by left-clicking the Set this as the default user ID checkbox. To express to the Cmap owner or administrator your interest in synchronously collaborating on their Cmap, left-click Submit Request.
The "Response to Collaboration Request" window appears to inform a Cmap owner or administrator that a collaboration session request has been made. User ID settings are also offered to the Cmap owner or admin, should they wish to begin the collaboration session by left-clicking Collaborate. 
After a synchronous collaboration session request has been approved by the admin or owner of the Cmap, any Participant listed can modify and add to the Cmap. Any changes made during synchronous collaboration are available for all in the session to see. Users may also chat with one another by typing text in the box to the right of the Cmap, then left-clicking Send.
Permissions & Access Control 
From a "New Folder" window: 
You can control the accessibility and permissions of a folder that is located in either My Cmaps or Places if you created the folder or have administrative privileges over that folder. Just as an administrator of a place decides how others may create and use Cmaps, folders, and resources in that place, any administrator of a folder can permit or deny access to specific features in Cmaps, folders, and resources stored in that folder. To view or change how others may use a folder that you are creating, as well as any files or folders that may be stored in it in the future, left-click Permissions... (You can modify the permissions on an existing folder if you have administrative privileges on that folder. To modify an existing folder's permissions, right-click the folder, then left-click Properties.... From the "Edit Folder Properties" window that appears, you can left-click the Permissions... button.)
The "Permissions List" window opens where you can view and modify the permissions on a specific folder and its contents. The tab This Folder contains a modifiable list of permissions that initially establish the folder's creator as the sole administrator of the folder. The title "Everyone" is used to represent the set of permissions that any user has on the folder. To modify the permissions of a highlighted user in the permissions list, left-click Edit...
The "Edit User" window appears, where you can control user-specific permissions and access to the selected folder, as well as any files or folders it may contain. You can change the password of user accounts that you have set up on a selected folder by left-clicking Change Password. Only users who are listed as administrators of a specific folder can modify the permissions list on that folder, even if they have all of the other individual permissions that are given to administrators. To save effective permissions of a user account on the folder you are working with, left-click OK.
Now when viewing the "Permissions List" window, any changes in permissions for the account you edited appear next to the User ID for that account. The user account "jsmith" highlighted in the image below has the same permissions as an administrator, but lacks the ability to modify the permissions list. You can left-click the Add User... button to create a new permissions account for the selected folder, or highlight a User ID and left- click Remove to delete that user's account. To view or modify the permissions for folders located inside of the selected folder, left-click the Child Folders tab.
We saw in the previous image that "jsmith" lost only the Administrator permission over the selected folder. When no other administrator is specified for a folder, authority over the permissions list of the folder is determined by the first "admin" found in either the folder's parent directory, a subsequent ancestor directory, or even the root. The root directory is either the My Cmaps folder or a place listed in the CmapTools network. If no parent or ancestor directory has an admin listed, the administrator of the root will ultimately inherit full control over the folder where "jsmith" was previously an administrator. Similarly, the creator of a folder stored inside the selected folder (known as a child folder) is given, by default, administrative privileges over their folder. If the permissions list under Child Folders is modified so that no administrators are left, a parent, ancestor, or root folder administrator will acquire full control over all child folders through inheritance. To save changes made in any of the permissions lists, left-click OK.
Child Folders as well as Other Folders that are stored inside the selected folder have, by default, inherited permissions. However, the Inherit permissions list from parent folder box is not checked by default for the selected folder. If you check that box, you will be able to left-click the Show Effective Permissions button to verify which permissions would be inherited from the parent of the selected folder.
The "Effective Permissions" window appears, and all permissions listed would apply to the selected folder if you chose to inherit permissions. Notice that if an administrator chose to inherit permissions for a selected folder, and the folder's parent permitted "Everyone" the privileges of viewing folder contents and creating folders only, then that administrator may not wish to turn on inheritance under the tab This Folder in order to secure a larger range of available permissions for other users of the selected folder.
Copy a Cmap to Places 
From the "Views - CmapTools" window: 
You can copy a Cmap to a place in the CmapTools network, making it possible to share Cmaps with others. Even if the Cmap you want to share does not contain any links to outside resources, someone who has been given access to the shared Cmap may eventually want to add resource links to it. To ensure that all resource links in a Cmap remain valid after copying the Cmap to Places, begin by right-clicking an unused space in "Views" under the My Cmaps heading, then left-click Folder... from the New sub-menu.
The "New Folder" window appears where you can give the folder a name, add searchable keywords, and add a folder description. The section
Permissions & Access Control explains how the Permissions... button can be used to secure folder content. A knowledge model is a folder containing several Cmaps of information that provide detail to a domain of knowledge. A common way of unifying a knowledge model is through the use of a top level Cmap. The Set as Knowledge Model box can be checked to change a folder's icon to the knowledge model icon, indicating that the folder most likely contains a top level cmap that links to other Cmaps also contained in the folder. To finish creating the new folder, left- click OK.
After you have created a folder, select a Cmap and its associated files. To place the selected files into the newly created folder, right-click the highlighted selection, then left-click either Cut or Copy.
Right-click the new folder, then place the Cmap and its associated files into the folder by left-clicking Paste. 
Now, the selected folder has a "+" next to it, indicating that the folder contains the Cmap and associated files. To copy the folder and its contents for placement on the CmapTools network, right-click the folder, then left-
click either Cut or Copy. 
Left-click the Shared Cmaps in Places button to view a list of places in the CmapTools network. If you are unsure of where you should place your Cmap folder, places with "public" in the title typically permit any CmapTools user the ability to copy, or publish, Cmap folders to that place.
Now when opening the place where you pasted your Cmap folder, it appears in the list for anyone who accesses that place.
Add Annotations & Info 
Annotate... Add Info 
From an Open Cmap: 
You can add descriptive text annotations to a Cmap. Annotations can be used to remind you where you left off during the creation of a Cmap. Another way to use annotations is by creating a comment or suggestion for someone else's Cmap. To create an annotation, right-click the Cmap where you want the annotation to appear, then left-click Annotate...
A new annotation will appear with fields for adding text, your name, and an email address. If you left-click the exit button, the annotation will not be saved. To save the annotation, left-click the minimize button. 
Now when viewing the Cmap, the annotation you created appears as a yellow repositionable icon.
From an Open Cmap: 
You can add viewable information and keywords to a concept in a Cmap. To add information to a concept, right-click a concept, then left-click Add Info....
The "Add Info" window opens, where you can add information to the concept. Information that is added in the box next to Mouse Over Info: will appear when the mouse pointer hovers above the concept. Keywords or other phrases may be added to the box next to Hidden Info: for use with the search tool. To transfer information added in the "Add Info" window to the selected concept, left-click OK.
Now when viewing the Cmap, you can mouse over a concept that has additional mouse over info and a box with that info will appear over the concept.
Cmap List View 
From an open Cmap: 
You can view and select concepts, linking phrases, and propositions in a list, as well as add new propositions, using Cmap List View. The Cmap List View is a way to easily navigate and add to Cmaps of any size and complexity. To begin using Cmap List View, click the Cmap List View icon. 
The Cmap List View has four different lists to choose from: Concepts, Linking Phrases, Propositions, and Cmap Outline. The Concepts list view provides quick mouse or keyboard access to a list of concepts in a Cmap that are orderable by clicking the Concept, Links In, and Links Out headings.
The LInking Phrases list view provides quick mouse or keyboard access to a list of linking phrases in a Cmap that are orderable by clicking the Linking Phrase, Links In, and Links Out headings. 
You can navigate a Cmap by proposition, add new propositions to the Cmap, or add to existing propositions in the Cmap by clicking the Add button from the Propositions list view.
The Cmap Outline list view provides a way to abstract the main ideas of a Cmap. Specific propositions may be brought into view quickly with the information hiding feature of the Cmap Outline list view. You can show or hide a proposition from view in the list by clicking on the plus or minus sign next to the linking phrase of the proposition.
Cmap Recorder 
From an open Cmap: 
You can create a recording of the creation of a Cmap using Cmap Recorder. A recording using Cmap Recorder stays as part of the Cmap when the Cmap is saved, whether the Cmap is saved in My Cmaps or Places. To begin recording the creation of a Cmap, select Tools then Cmap Recorder.
The Cmap Recorder opens to the side of the Cmap you are working on. Clicking the Cmap Recorder button will expand or collapse the Cmap Recorder console. Click Record to start recording. Each Cmap item you create or move will be recorded as individual steps, until the Stop button is clicked. Once a recording has been stopped, you can Play, Pause, or navigate to particular steps in the recording using the Back and Forward console. The recorded steps may be exported to a file for use in spreadsheet or data analysis applications by clicking Export to text file.... Click Delete Recording to remove the recording and prevent it from being saved with the Cmap you are working on.
The set of images below is a recording of a Cmap that was created using asynchronous collaboration. The two users
that worked on this Cmap either manually started and stopped the recording each time they edited and saved the Cmap, or made use of the Auto-Record feature located in Preferences... under Edit from the "Views - CmapTools" window.
Presentation Builder 
From an open Cmap: 
You can build a slide show of the creation of a Cmap using Presentation Builder. To begin building a presentation using CmapTools, select Tools then Presentation Builder. 
The Presentation Builder opens to the side of the cmap you are working on. Create a new presentation by clicking the Create New Presentation button.
The "Add Presentation" window opens where you can name the presentation you will be working on. Click Ok to apply the name to the new presentation. 
You can add cmap items to a new slide by selecting the cmap items and clicking the Add Cmap Items button. 
You can update a slide's contents by performing multiple additions and deletions of it's contents, all at once. Click the name of the slide you wish to update (slide names can be changed using F2), select only the cmap items you wish to include in the slide, then click the Update Cmap Items button.
You can insert additional cmap items to a slide by clicking the name of the slide, selecting the additional items, then clicking the Insert Cmap Items button. 
You can copy a selected slide and add selected Cmap items to create a new slide by clicking the name of the slide, selecting the additional items, then clicking the Copy and Add button.
A new slide appears that contains all the Cmap items from the copied slide, plus items in the Cmap that were selected to be added. 
Cmap items may be deleted from a slide by clicking the slide's name, selecting the Cmap items to delete from
the slide, and clicking the Remove Selected button. It is worth mentioning that you can delete the entire slide if it is selected using Remove Selected. To delete an entire presentation, select the presentation to delete using the drop-down box, then click the Delete Presentation button. 
Presentation Builder lets you view the slides in the current window, or it can use the full screen dimensions of the monitor. You can preview the presentation in the current window by clicking Preview in Current Window, then using the blue navigational buttons that appear. The Scale map to fit fullscreen window. box may be used when Showing the presentation in full screen mode. is clicked. 
The image below shows a slide of a cmap scaled to fit the entire screen. In fullscreen mode, a presentation may be navigated using either the blue navigational buttons on the bottom right, or by clicking on specific slide icons lining the bottom left. To leave fullscreen mode, press Esc, or click the Preview Mode icon located left of the blue navigational buttons.
The set of images below is a presentation with corresponding cmap items listed next to each slide.
Suggestions 
From an open Cmap: 
You can get a list of suggestions for concepts to add to a Cmap. The CmapTools Suggester is available to use once you have accessed one or more items on the Cmap, and at least a few concepts or linking phrases on the Cmap are labeled. To begin gathering suggestions for a Cmap, either select Concepts from the Suggestions submenu under Tools, or click the Suggestions button (This button may also be used to expand or collapse the Suggestions console). 
The Suggestions console opens to the side of the Cmap you are working on. Click the blue arrows button to obtain a list of suggestions relative to the latest contents of the Cmap.
Click the stop and go button to change the red indicator light to green if you want to allow the suggester to automatically refresh the list of suggestions as the Cmap changes, otherwise the suggester will only refresh the list when you click the blue arrows button. You can drag and drop individual concept suggestions from the list that appears onto the Cmap using the mouse. 
A concept that has been dragged and dropped onto the Cmap appears as new concept.
Discussion Threads 
From the "Views - CmapTools" window: 
You can create a new discussion thread which provides a means to share ideas about a topic of knowledge. To create a new discussion thread you can: select a concept on an open cmap then choose New Discussion Thread... from the Collaboration menu, select a folder in Places then New Discussion Thread... from the File menu, or choose Discussion Thread... from the New submenu of the folder's context menu. 
The "New Discussion Thread" window opens where you can set the discussion threads initial properties. To create the new discussion thread, it must be given a name in the box next to the heading Name:, assigned the User ID and Password of the DT administrator, as well as the DT administrator's Email address. You may choose to ask for user registration, set when the DT and/or individual messages expire, keep thread messages anonymous, and control when email notifications are sent. To create the new discussion thread, click Create.
The "New Message" window opens where you can add a message to a discussion thread. The interface is very similar to that of creating a new email. Attachments may be added, and Spelling may be checked. You may also choose to make the new message anonymous. To create the new discussion thread message, click Send.
The new message appears in the list of the main "Discussion Thread" window. This window also opens when clicking an existing DT icon in Places. Properties of the discussion thread may be viewed or changed by the DT administrator from the File menu. New messages can be checked for by clicking Check New, and new messages can be created by clicking New. Both DT message options may also be accessed from the Thread menu. Click Close to hide the "Discussion Threads" window.
A new discussion thread icon appears in the folder in Places that it was created. As with any other resource, a DT may be dragged onto a cmap concept.
The "Adding Resource Links to [...]" window opens where you can verify and describe the resource properties for the discussion thread. To set the properties for the DT resource, click OK. 
The DT icon appears on the concept to which it was added. If the discussion thread was created by first selecting a concept on an open cmap then choosing New Discussion Thread... from the Collaboration menu, the DT icon will automatically appear on the concept without the need of adding it from Places. A
red DT icon will appear after the cmap has initially been saved and reopened, and only if there are messages in the thread that have not yet been read. Once all messages in the discussion thread have been read, the DT icon will return to its normal yellow color.
Knowledge Soups 
Participate in a Soup Create a Knowledge Soup 
From an open Cmap: 
You can participate in the sharing of concept map ideas and propositions through the use of Knowledge Soups. To begin participating in a knowledge soup, select Collaborate then Join Cmap to Soup....
The "Select Soup to Join" window opens and begins to automatically search for existing soups to join. You can manually search for a particular soup to join by clicking Browse.... Click Join to join the selected soup. 
The Knowledge Soup console opens to the side of the cmap you are working on. All propositions in the cmap appear as soup claims in a list under the My Claims heading. You can Publish, Unpublish, or Delete any of your claims from the soup by clicking
the appropriate button next to the My Claims heading. Soup claims that are published to the soup appear under the heading Soup Claims. You can View Claim Publishers, Add Discussion Thread to Claim, Refresh the list of published claims, or Disconnect from the Soup using the appropriate button next to Soup Claims. To add a new claim to the cmap, select a published claim under Soup Claims then drag and drop it onto the cmap. 
The image below shows the results of publishing the claim Plants have Leaves to the knowledge soup, as well as dragging and dropping the claim Sunlight helps Plants onto the cmap. A thumbtack icon appears next to the claim under My Claims to indicate that it has been published, and Plants have Leaves also appears with the rest of the published claims under Soup Claims. Sunlight
helps Plants appears on the cmap as a new proposition that can be incorporated into the design of the Anatomy of a Plant cmap. 
From the "Views - CmapTools" window:
You can create a new knowledge soup where others can join to share their cmap claims. To create a new knowledge soup, you can select a folder in Places and either select New Soup... from the File menu, or Soup... from the New submenu of the folder's context menu.
The "Create Knowledge Soup" opens where you can set the knowledge soup's initial properties and members. To create the new soup, it must be given a name in the box next to the heading Soup Name:. You may choose to set when the soup will expire, as well as set the description of the soup. As the soup's administrator, you have the ability to Add User..., Remove User, and Delete User's Claims. Individual claims may be added and removed, and a claims filter may also be applied. If the Place where the soup's folder is located supports Discussion Threads, you may Add DT, Remove DT and Open DT. Other member permissions may be determined at creation using the checkboxes seen in the image below. To create the new knowledge soup, click Create.
A soup icon appears in the folder where it was created. To edit the soup, double-click the soup icon. The "Edit Knowledge Soup..." window opens where the same information from the "Create Knowledge Soup" may be updated.
Compare Two Cmaps 
From an open Cmap: 
You can compare one Cmap with another and receive a detailed analysis of the comparison. To begin comparing two Cmaps, select Tools then Compare to Cmap.... 
The "Compare to another Cmap" console opens to the side of the cmap you are working on. You may choose to compare the two cmaps using any or all of these options: Propositions, Connections, Linking Phrases, and/or Concepts. Propositions, Linking Phrases, and Concepts may be compared using Full Text, and/or Partial Text to increase the probability of finding match. If you are connected to the Internet, you can make use of any or all of the following text matching options: Keyword, Synonym, and/or Hypernym. The Word Match slider can be adjusted to the percentage of words inside single concepts that must match in order to report the two concepts as "matching". To compare two cmaps click Select Cmap..., browse for the cmap you want to perform the comparison with, then click Compare Cmaps.
The other cmap will open beside the cmap you are working on. Once the comparison has been made, any matches will appear highlighted in green on both cmaps. You can view a detailed comparison of the two cmaps under the Results heading. These results may also be saved to a text file by clicking Export to Text File..., which opens the "Export Compare Results to Text File" window. To perform another comparison, or to remove the green highlighting from the two cmaps, click Reset.
Keyboard Shortcuts 
Views - CmapTools Open Cmap 
From the "Views - CmapTools" Window: 
Open a new Cmap for editing 
File/New Cmap 
Create a new folder 
File/New Folder... 
Open selected Cmaps, folders, and/or resources 
File/Open 
Close the "Views - CmapTools" window 
File/Close 
Print the current view 
File/Print View... 
Exit CmapTools 
File/Exit CmapTools 
Hide CmapTools 
CmapTools/Hide CmapTools 
Hide all other windows except for CmapTools 
CmapTools/Hide Others 
Cut selected Cmaps, folders, and/or resources 
Edit/Cut 
Copy selected Cmaps, folders, and/or resources 
Edit/Copy
Paste files from the clipboard into a selected folder 
Edit/Paste 
Rename a selected Cmap, folder, or resource 
Edit/Rename 
Delete selected Cmaps, folders, and/or resources 
Edit/Delete 
Refresh the contents of the current view 
Edit/Refresh 
Display the properties of a selected Cmap, folder, or resource 
Edit/Properties... 
Close the "Views - CmapTools" window 
CmapTools Icon/Close 
From an open Cmap: 
Open a new Cmap for editing 
File/New Cmap 
Close the active Cmap 
File/Close Cmap 
Save the active Cmap 
File/Save Cmap 
Open the "Save Cmap As" window 
File/Save Cmap As...
Print the active Cmap 
File/Print... 
Exit CmapTools 
File/Exit CmapTools 
Undo the last action performed on the active Cmap 
Edit/Undo 
blacko the last action undone on the active Cmap 
Edit/blacko 
Cut selected Cmap items 
Edit/Cut 
Copy selected Cmap items 
Edit/Copy 
Paste items from the clipboard to the active Cmap 
Edit/Paste 
Delete selected Cmap items 
Edit/Delete 
Select all items on the active Cmap 
Edit/Select All 
Add & edit links to resources 
Edit/Add & Edit Links to Resources... 
Find specific text in the active Cmap 
Edit/Find... 
Find the next instance of text that was found previously 
Edit/Find Next
Open the "Styles" window 
Format/Styles... 
Perform an autolayout on the active Cmap 
Format/Autolayout... 
Hide CmapTools 
CmapTools/Hide CmapTools 
Hide all other windows except for CmapTools 
CmapTools/Hide Others 
Close the active Cmap 
Cmap Icon/Close

More Related Content

Viewers also liked

Presentación experiencia Redes Sociales en el Gabinete de Tele-Educación en l...
Presentación experiencia Redes Sociales en el Gabinete de Tele-Educación en l...Presentación experiencia Redes Sociales en el Gabinete de Tele-Educación en l...
Presentación experiencia Redes Sociales en el Gabinete de Tele-Educación en l...Alegría Blázquez
 
Diccionario marketing, publicidad y social media
Diccionario marketing, publicidad y social mediaDiccionario marketing, publicidad y social media
Diccionario marketing, publicidad y social mediaCarmen Urbano
 
Gestión de información con WordPress para no programadores - WordCamp Santa...
Gestión de información con WordPress para no programadores - WordCamp Santa...Gestión de información con WordPress para no programadores - WordCamp Santa...
Gestión de información con WordPress para no programadores - WordCamp Santa...Alvaro Gómez Velasco
 
El uso de las Redes Sociales para la búsqueda y obtención de Empleo
El uso de las Redes Sociales para la búsqueda y obtención de EmpleoEl uso de las Redes Sociales para la búsqueda y obtención de Empleo
El uso de las Redes Sociales para la búsqueda y obtención de EmpleoAlfredo Vela Zancada
 
Cronograma alfonso lopez
Cronograma alfonso lopezCronograma alfonso lopez
Cronograma alfonso lopezjamechaves
 
Presentación módulo 1. Alfabetización tecnológica y recursos TIC
Presentación módulo 1. Alfabetización tecnológica y recursos TICPresentación módulo 1. Alfabetización tecnológica y recursos TIC
Presentación módulo 1. Alfabetización tecnológica y recursos TICElisa López del Amo
 
Linked in mejora tu identidad digital y conoce su uso educativo
Linked in mejora tu identidad digital y conoce su uso educativoLinked in mejora tu identidad digital y conoce su uso educativo
Linked in mejora tu identidad digital y conoce su uso educativoAlegría Blázquez
 
Uso y ejecución de herramientas tic
Uso y ejecución de herramientas ticUso y ejecución de herramientas tic
Uso y ejecución de herramientas ticGisela Brito
 
Herramientas 2.0 para el docente creación y publicación de contenido
Herramientas 2.0 para el docente creación y publicación de contenidoHerramientas 2.0 para el docente creación y publicación de contenido
Herramientas 2.0 para el docente creación y publicación de contenidoAlegría Blázquez
 
Las Tic Como Recursos Didácticos
Las Tic Como Recursos DidácticosLas Tic Como Recursos Didácticos
Las Tic Como Recursos DidácticosAlexis Robles
 
Un instante en el maravilloso mundo de la lectura
Un instante en el maravilloso mundo de la lecturaUn instante en el maravilloso mundo de la lectura
Un instante en el maravilloso mundo de la lecturajamechaves
 
Reglamento academico administrativo 2
Reglamento academico administrativo 2Reglamento academico administrativo 2
Reglamento academico administrativo 2ICE
 
Cronograma de actividades
Cronograma de actividadesCronograma de actividades
Cronograma de actividadesjamechaves
 

Viewers also liked (20)

Educacion Expandida y Aumentada Beta
Educacion Expandida y Aumentada BetaEducacion Expandida y Aumentada Beta
Educacion Expandida y Aumentada Beta
 
Webquest
WebquestWebquest
Webquest
 
Presentación experiencia Redes Sociales en el Gabinete de Tele-Educación en l...
Presentación experiencia Redes Sociales en el Gabinete de Tele-Educación en l...Presentación experiencia Redes Sociales en el Gabinete de Tele-Educación en l...
Presentación experiencia Redes Sociales en el Gabinete de Tele-Educación en l...
 
Materiales multimedia
Materiales multimediaMateriales multimedia
Materiales multimedia
 
Diccionario marketing, publicidad y social media
Diccionario marketing, publicidad y social mediaDiccionario marketing, publicidad y social media
Diccionario marketing, publicidad y social media
 
Gestión de información con WordPress para no programadores - WordCamp Santa...
Gestión de información con WordPress para no programadores - WordCamp Santa...Gestión de información con WordPress para no programadores - WordCamp Santa...
Gestión de información con WordPress para no programadores - WordCamp Santa...
 
Tutorial google site 2016
Tutorial google site 2016Tutorial google site 2016
Tutorial google site 2016
 
El uso de las Redes Sociales para la búsqueda y obtención de Empleo
El uso de las Redes Sociales para la búsqueda y obtención de EmpleoEl uso de las Redes Sociales para la búsqueda y obtención de Empleo
El uso de las Redes Sociales para la búsqueda y obtención de Empleo
 
Cronograma alfonso lopez
Cronograma alfonso lopezCronograma alfonso lopez
Cronograma alfonso lopez
 
Presentación módulo 1. Alfabetización tecnológica y recursos TIC
Presentación módulo 1. Alfabetización tecnológica y recursos TICPresentación módulo 1. Alfabetización tecnológica y recursos TIC
Presentación módulo 1. Alfabetización tecnológica y recursos TIC
 
Linked in mejora tu identidad digital y conoce su uso educativo
Linked in mejora tu identidad digital y conoce su uso educativoLinked in mejora tu identidad digital y conoce su uso educativo
Linked in mejora tu identidad digital y conoce su uso educativo
 
Infografia para organizar el espacio del aula
Infografia para organizar el espacio del aulaInfografia para organizar el espacio del aula
Infografia para organizar el espacio del aula
 
Uso y ejecución de herramientas tic
Uso y ejecución de herramientas ticUso y ejecución de herramientas tic
Uso y ejecución de herramientas tic
 
Herramientas 2.0 para el docente creación y publicación de contenido
Herramientas 2.0 para el docente creación y publicación de contenidoHerramientas 2.0 para el docente creación y publicación de contenido
Herramientas 2.0 para el docente creación y publicación de contenido
 
Tipos de evaluacion
Tipos de evaluacionTipos de evaluacion
Tipos de evaluacion
 
Herramientas tic
Herramientas ticHerramientas tic
Herramientas tic
 
Las Tic Como Recursos Didácticos
Las Tic Como Recursos DidácticosLas Tic Como Recursos Didácticos
Las Tic Como Recursos Didácticos
 
Un instante en el maravilloso mundo de la lectura
Un instante en el maravilloso mundo de la lecturaUn instante en el maravilloso mundo de la lectura
Un instante en el maravilloso mundo de la lectura
 
Reglamento academico administrativo 2
Reglamento academico administrativo 2Reglamento academico administrativo 2
Reglamento academico administrativo 2
 
Cronograma de actividades
Cronograma de actividadesCronograma de actividades
Cronograma de actividades
 

Similar to Cmaps

Cis407 a ilab 2 web application development devry university
Cis407 a ilab 2 web application development devry universityCis407 a ilab 2 web application development devry university
Cis407 a ilab 2 web application development devry universitylhkslkdh89009
 
Computer Generated Flannel Boards
Computer Generated Flannel BoardsComputer Generated Flannel Boards
Computer Generated Flannel BoardsFantasy BookLover
 
Office 365 Productivity Tips "October Discord"
Office 365 Productivity Tips "October Discord"Office 365 Productivity Tips "October Discord"
Office 365 Productivity Tips "October Discord"Christian Buckley
 
Master class booklet
Master class bookletMaster class booklet
Master class bookletDenis Masseni
 
How to create Stunning graphics using canva?
How to create Stunning graphics using canva?How to create Stunning graphics using canva?
How to create Stunning graphics using canva?Christian Mamansag
 
InDesign Part 3
InDesign Part 3InDesign Part 3
InDesign Part 3Sam Georgi
 
TUTorial By chad neuman in InDesign,Tutorial AT Vishal Dawdy .docx
TUTorial By chad neuman in InDesign,Tutorial AT Vishal Dawdy .docxTUTorial By chad neuman in InDesign,Tutorial AT Vishal Dawdy .docx
TUTorial By chad neuman in InDesign,Tutorial AT Vishal Dawdy .docxwillcoxjanay
 
Promethean ActivInspire IWB Introduction
Promethean ActivInspire IWB IntroductionPromethean ActivInspire IWB Introduction
Promethean ActivInspire IWB IntroductionChristyBusch
 
Digital work station intro
Digital work station introDigital work station intro
Digital work station introWhitney Brooks
 
How to use Canva to create Facebook posts
How to use Canva to create Facebook postsHow to use Canva to create Facebook posts
How to use Canva to create Facebook postsLeonides Dumlao
 
A first tour through Datawrapper - Datawrapper Academy.pdf
A first tour through Datawrapper - Datawrapper Academy.pdfA first tour through Datawrapper - Datawrapper Academy.pdf
A first tour through Datawrapper - Datawrapper Academy.pdfArifulIslamLeeton1
 
Cis 407 i lab 2 of 7
Cis 407 i lab 2 of 7Cis 407 i lab 2 of 7
Cis 407 i lab 2 of 7helpido9
 
Cgc Introduction Gis
Cgc Introduction GisCgc Introduction Gis
Cgc Introduction GistprattHWDSB
 
InDesign Tutorial: Text
InDesign Tutorial: TextInDesign Tutorial: Text
InDesign Tutorial: TextSam Georgi
 
A360 - Guide to Getting Started
A360 - Guide to Getting StartedA360 - Guide to Getting Started
A360 - Guide to Getting StartedAutodesk A360
 

Similar to Cmaps (20)

Cis407 a ilab 2 web application development devry university
Cis407 a ilab 2 web application development devry universityCis407 a ilab 2 web application development devry university
Cis407 a ilab 2 web application development devry university
 
Rubistar tutorial
Rubistar tutorialRubistar tutorial
Rubistar tutorial
 
Canva tutorial for Beginners - Part 2
Canva  tutorial for Beginners - Part 2Canva  tutorial for Beginners - Part 2
Canva tutorial for Beginners - Part 2
 
Computer Generated Flannel Boards
Computer Generated Flannel BoardsComputer Generated Flannel Boards
Computer Generated Flannel Boards
 
Office 365 Productivity Tips "October Discord"
Office 365 Productivity Tips "October Discord"Office 365 Productivity Tips "October Discord"
Office 365 Productivity Tips "October Discord"
 
Canva tutorial for Beginners - Part 1
Canva  tutorial for Beginners - Part 1Canva  tutorial for Beginners - Part 1
Canva tutorial for Beginners - Part 1
 
Master class booklet
Master class bookletMaster class booklet
Master class booklet
 
How to create Stunning graphics using canva?
How to create Stunning graphics using canva?How to create Stunning graphics using canva?
How to create Stunning graphics using canva?
 
Shareist tutorial for Beginners
Shareist tutorial for BeginnersShareist tutorial for Beginners
Shareist tutorial for Beginners
 
InDesign Part 3
InDesign Part 3InDesign Part 3
InDesign Part 3
 
TUTorial By chad neuman in InDesign,Tutorial AT Vishal Dawdy .docx
TUTorial By chad neuman in InDesign,Tutorial AT Vishal Dawdy .docxTUTorial By chad neuman in InDesign,Tutorial AT Vishal Dawdy .docx
TUTorial By chad neuman in InDesign,Tutorial AT Vishal Dawdy .docx
 
Promethean ActivInspire IWB Introduction
Promethean ActivInspire IWB IntroductionPromethean ActivInspire IWB Introduction
Promethean ActivInspire IWB Introduction
 
Digital work station intro
Digital work station introDigital work station intro
Digital work station intro
 
How to use Canva to create Facebook posts
How to use Canva to create Facebook postsHow to use Canva to create Facebook posts
How to use Canva to create Facebook posts
 
Computer Science.pptx
Computer Science.pptxComputer Science.pptx
Computer Science.pptx
 
A first tour through Datawrapper - Datawrapper Academy.pdf
A first tour through Datawrapper - Datawrapper Academy.pdfA first tour through Datawrapper - Datawrapper Academy.pdf
A first tour through Datawrapper - Datawrapper Academy.pdf
 
Cis 407 i lab 2 of 7
Cis 407 i lab 2 of 7Cis 407 i lab 2 of 7
Cis 407 i lab 2 of 7
 
Cgc Introduction Gis
Cgc Introduction GisCgc Introduction Gis
Cgc Introduction Gis
 
InDesign Tutorial: Text
InDesign Tutorial: TextInDesign Tutorial: Text
InDesign Tutorial: Text
 
A360 - Guide to Getting Started
A360 - Guide to Getting StartedA360 - Guide to Getting Started
A360 - Guide to Getting Started
 

More from Camila Roldán

Convocatoria 2018: Escribir sobre la escuela
Convocatoria 2018: Escribir sobre la escuelaConvocatoria 2018: Escribir sobre la escuela
Convocatoria 2018: Escribir sobre la escuelaCamila Roldán
 
My Practicum: Pictures
My Practicum: PicturesMy Practicum: Pictures
My Practicum: PicturesCamila Roldán
 
Didactic sequence animals of my country
Didactic sequence animals of my countryDidactic sequence animals of my country
Didactic sequence animals of my countryCamila Roldán
 
Reflective narrative about my practicum
Reflective narrative about my practicumReflective narrative about my practicum
Reflective narrative about my practicumCamila Roldán
 
Content based, task-based, and participatory approaches
Content based, task-based, and participatory approachesContent based, task-based, and participatory approaches
Content based, task-based, and participatory approachesCamila Roldán
 
Practical N° 15 - Vocabulary
Practical N° 15 - VocabularyPractical N° 15 - Vocabulary
Practical N° 15 - VocabularyCamila Roldán
 
Choose the correct animal
Choose the correct animalChoose the correct animal
Choose the correct animalCamila Roldán
 
Animals Physical Description
Animals Physical DescriptionAnimals Physical Description
Animals Physical DescriptionCamila Roldán
 

More from Camila Roldán (20)

Convocatoria 2018: Escribir sobre la escuela
Convocatoria 2018: Escribir sobre la escuelaConvocatoria 2018: Escribir sobre la escuela
Convocatoria 2018: Escribir sobre la escuela
 
Test School N° 4
Test  School N° 4  Test  School N° 4
Test School N° 4
 
Textbooks analysis
Textbooks analysis  Textbooks analysis
Textbooks analysis
 
Practical N° 14
Practical N° 14   Practical N° 14
Practical N° 14
 
My Practicum: Pictures
My Practicum: PicturesMy Practicum: Pictures
My Practicum: Pictures
 
Didactic sequence animals of my country
Didactic sequence animals of my countryDidactic sequence animals of my country
Didactic sequence animals of my country
 
Reflective narrative about my practicum
Reflective narrative about my practicumReflective narrative about my practicum
Reflective narrative about my practicum
 
Quiz on CLT
Quiz on CLTQuiz on CLT
Quiz on CLT
 
Content based, task-based, and participatory approaches
Content based, task-based, and participatory approachesContent based, task-based, and participatory approaches
Content based, task-based, and participatory approaches
 
Lesson Plan N° 9
Lesson Plan N° 9Lesson Plan N° 9
Lesson Plan N° 9
 
Practical N° 15 - Vocabulary
Practical N° 15 - VocabularyPractical N° 15 - Vocabulary
Practical N° 15 - Vocabulary
 
Lesson Plan N° 10
Lesson Plan N° 10  Lesson Plan N° 10
Lesson Plan N° 10
 
Rare Animals
Rare AnimalsRare Animals
Rare Animals
 
Lesson Plan N° 8
Lesson Plan N° 8   Lesson Plan N° 8
Lesson Plan N° 8
 
Correct the sentences
Correct the sentencesCorrect the sentences
Correct the sentences
 
Choose the correct animal
Choose the correct animalChoose the correct animal
Choose the correct animal
 
Lesson Plan N° 7
Lesson Plan N° 7   Lesson Plan N° 7
Lesson Plan N° 7
 
Lesson plan N° 6
Lesson plan N° 6Lesson plan N° 6
Lesson plan N° 6
 
Animals Physical Description
Animals Physical DescriptionAnimals Physical Description
Animals Physical Description
 
Lesson plan N° 5
Lesson plan N° 5Lesson plan N° 5
Lesson plan N° 5
 

Recently uploaded

Holdier Curriculum Vitae (April 2024).pdf
Holdier Curriculum Vitae (April 2024).pdfHoldier Curriculum Vitae (April 2024).pdf
Holdier Curriculum Vitae (April 2024).pdfagholdier
 
Presentation by Andreas Schleicher Tackling the School Absenteeism Crisis 30 ...
Presentation by Andreas Schleicher Tackling the School Absenteeism Crisis 30 ...Presentation by Andreas Schleicher Tackling the School Absenteeism Crisis 30 ...
Presentation by Andreas Schleicher Tackling the School Absenteeism Crisis 30 ...EduSkills OECD
 
Russian Escort Service in Delhi 11k Hotel Foreigner Russian Call Girls in Delhi
Russian Escort Service in Delhi 11k Hotel Foreigner Russian Call Girls in DelhiRussian Escort Service in Delhi 11k Hotel Foreigner Russian Call Girls in Delhi
Russian Escort Service in Delhi 11k Hotel Foreigner Russian Call Girls in Delhikauryashika82
 
Explore beautiful and ugly buildings. Mathematics helps us create beautiful d...
Explore beautiful and ugly buildings. Mathematics helps us create beautiful d...Explore beautiful and ugly buildings. Mathematics helps us create beautiful d...
Explore beautiful and ugly buildings. Mathematics helps us create beautiful d...christianmathematics
 
Q4-W6-Restating Informational Text Grade 3
Q4-W6-Restating Informational Text Grade 3Q4-W6-Restating Informational Text Grade 3
Q4-W6-Restating Informational Text Grade 3JemimahLaneBuaron
 
BASLIQ CURRENT LOOKBOOK LOOKBOOK(1) (1).pdf
BASLIQ CURRENT LOOKBOOK  LOOKBOOK(1) (1).pdfBASLIQ CURRENT LOOKBOOK  LOOKBOOK(1) (1).pdf
BASLIQ CURRENT LOOKBOOK LOOKBOOK(1) (1).pdfSoniaTolstoy
 
Student login on Anyboli platform.helpin
Student login on Anyboli platform.helpinStudent login on Anyboli platform.helpin
Student login on Anyboli platform.helpinRaunakKeshri1
 
Activity 01 - Artificial Culture (1).pdf
Activity 01 - Artificial Culture (1).pdfActivity 01 - Artificial Culture (1).pdf
Activity 01 - Artificial Culture (1).pdfciinovamais
 
Sanyam Choudhary Chemistry practical.pdf
Sanyam Choudhary Chemistry practical.pdfSanyam Choudhary Chemistry practical.pdf
Sanyam Choudhary Chemistry practical.pdfsanyamsingh5019
 
The Most Excellent Way | 1 Corinthians 13
The Most Excellent Way | 1 Corinthians 13The Most Excellent Way | 1 Corinthians 13
The Most Excellent Way | 1 Corinthians 13Steve Thomason
 
Ecosystem Interactions Class Discussion Presentation in Blue Green Lined Styl...
Ecosystem Interactions Class Discussion Presentation in Blue Green Lined Styl...Ecosystem Interactions Class Discussion Presentation in Blue Green Lined Styl...
Ecosystem Interactions Class Discussion Presentation in Blue Green Lined Styl...fonyou31
 
APM Welcome, APM North West Network Conference, Synergies Across Sectors
APM Welcome, APM North West Network Conference, Synergies Across SectorsAPM Welcome, APM North West Network Conference, Synergies Across Sectors
APM Welcome, APM North West Network Conference, Synergies Across SectorsAssociation for Project Management
 
Software Engineering Methodologies (overview)
Software Engineering Methodologies (overview)Software Engineering Methodologies (overview)
Software Engineering Methodologies (overview)eniolaolutunde
 
Class 11th Physics NEET formula sheet pdf
Class 11th Physics NEET formula sheet pdfClass 11th Physics NEET formula sheet pdf
Class 11th Physics NEET formula sheet pdfAyushMahapatra5
 
BAG TECHNIQUE Bag technique-a tool making use of public health bag through wh...
BAG TECHNIQUE Bag technique-a tool making use of public health bag through wh...BAG TECHNIQUE Bag technique-a tool making use of public health bag through wh...
BAG TECHNIQUE Bag technique-a tool making use of public health bag through wh...Sapna Thakur
 
SOCIAL AND HISTORICAL CONTEXT - LFTVD.pptx
SOCIAL AND HISTORICAL CONTEXT - LFTVD.pptxSOCIAL AND HISTORICAL CONTEXT - LFTVD.pptx
SOCIAL AND HISTORICAL CONTEXT - LFTVD.pptxiammrhaywood
 
Grant Readiness 101 TechSoup and Remy Consulting
Grant Readiness 101 TechSoup and Remy ConsultingGrant Readiness 101 TechSoup and Remy Consulting
Grant Readiness 101 TechSoup and Remy ConsultingTechSoup
 
Disha NEET Physics Guide for classes 11 and 12.pdf
Disha NEET Physics Guide for classes 11 and 12.pdfDisha NEET Physics Guide for classes 11 and 12.pdf
Disha NEET Physics Guide for classes 11 and 12.pdfchloefrazer622
 
Nutritional Needs Presentation - HLTH 104
Nutritional Needs Presentation - HLTH 104Nutritional Needs Presentation - HLTH 104
Nutritional Needs Presentation - HLTH 104misteraugie
 

Recently uploaded (20)

Holdier Curriculum Vitae (April 2024).pdf
Holdier Curriculum Vitae (April 2024).pdfHoldier Curriculum Vitae (April 2024).pdf
Holdier Curriculum Vitae (April 2024).pdf
 
Presentation by Andreas Schleicher Tackling the School Absenteeism Crisis 30 ...
Presentation by Andreas Schleicher Tackling the School Absenteeism Crisis 30 ...Presentation by Andreas Schleicher Tackling the School Absenteeism Crisis 30 ...
Presentation by Andreas Schleicher Tackling the School Absenteeism Crisis 30 ...
 
Russian Escort Service in Delhi 11k Hotel Foreigner Russian Call Girls in Delhi
Russian Escort Service in Delhi 11k Hotel Foreigner Russian Call Girls in DelhiRussian Escort Service in Delhi 11k Hotel Foreigner Russian Call Girls in Delhi
Russian Escort Service in Delhi 11k Hotel Foreigner Russian Call Girls in Delhi
 
Explore beautiful and ugly buildings. Mathematics helps us create beautiful d...
Explore beautiful and ugly buildings. Mathematics helps us create beautiful d...Explore beautiful and ugly buildings. Mathematics helps us create beautiful d...
Explore beautiful and ugly buildings. Mathematics helps us create beautiful d...
 
Q4-W6-Restating Informational Text Grade 3
Q4-W6-Restating Informational Text Grade 3Q4-W6-Restating Informational Text Grade 3
Q4-W6-Restating Informational Text Grade 3
 
BASLIQ CURRENT LOOKBOOK LOOKBOOK(1) (1).pdf
BASLIQ CURRENT LOOKBOOK  LOOKBOOK(1) (1).pdfBASLIQ CURRENT LOOKBOOK  LOOKBOOK(1) (1).pdf
BASLIQ CURRENT LOOKBOOK LOOKBOOK(1) (1).pdf
 
Student login on Anyboli platform.helpin
Student login on Anyboli platform.helpinStudent login on Anyboli platform.helpin
Student login on Anyboli platform.helpin
 
INDIA QUIZ 2024 RLAC DELHI UNIVERSITY.pptx
INDIA QUIZ 2024 RLAC DELHI UNIVERSITY.pptxINDIA QUIZ 2024 RLAC DELHI UNIVERSITY.pptx
INDIA QUIZ 2024 RLAC DELHI UNIVERSITY.pptx
 
Activity 01 - Artificial Culture (1).pdf
Activity 01 - Artificial Culture (1).pdfActivity 01 - Artificial Culture (1).pdf
Activity 01 - Artificial Culture (1).pdf
 
Sanyam Choudhary Chemistry practical.pdf
Sanyam Choudhary Chemistry practical.pdfSanyam Choudhary Chemistry practical.pdf
Sanyam Choudhary Chemistry practical.pdf
 
The Most Excellent Way | 1 Corinthians 13
The Most Excellent Way | 1 Corinthians 13The Most Excellent Way | 1 Corinthians 13
The Most Excellent Way | 1 Corinthians 13
 
Ecosystem Interactions Class Discussion Presentation in Blue Green Lined Styl...
Ecosystem Interactions Class Discussion Presentation in Blue Green Lined Styl...Ecosystem Interactions Class Discussion Presentation in Blue Green Lined Styl...
Ecosystem Interactions Class Discussion Presentation in Blue Green Lined Styl...
 
APM Welcome, APM North West Network Conference, Synergies Across Sectors
APM Welcome, APM North West Network Conference, Synergies Across SectorsAPM Welcome, APM North West Network Conference, Synergies Across Sectors
APM Welcome, APM North West Network Conference, Synergies Across Sectors
 
Software Engineering Methodologies (overview)
Software Engineering Methodologies (overview)Software Engineering Methodologies (overview)
Software Engineering Methodologies (overview)
 
Class 11th Physics NEET formula sheet pdf
Class 11th Physics NEET formula sheet pdfClass 11th Physics NEET formula sheet pdf
Class 11th Physics NEET formula sheet pdf
 
BAG TECHNIQUE Bag technique-a tool making use of public health bag through wh...
BAG TECHNIQUE Bag technique-a tool making use of public health bag through wh...BAG TECHNIQUE Bag technique-a tool making use of public health bag through wh...
BAG TECHNIQUE Bag technique-a tool making use of public health bag through wh...
 
SOCIAL AND HISTORICAL CONTEXT - LFTVD.pptx
SOCIAL AND HISTORICAL CONTEXT - LFTVD.pptxSOCIAL AND HISTORICAL CONTEXT - LFTVD.pptx
SOCIAL AND HISTORICAL CONTEXT - LFTVD.pptx
 
Grant Readiness 101 TechSoup and Remy Consulting
Grant Readiness 101 TechSoup and Remy ConsultingGrant Readiness 101 TechSoup and Remy Consulting
Grant Readiness 101 TechSoup and Remy Consulting
 
Disha NEET Physics Guide for classes 11 and 12.pdf
Disha NEET Physics Guide for classes 11 and 12.pdfDisha NEET Physics Guide for classes 11 and 12.pdf
Disha NEET Physics Guide for classes 11 and 12.pdf
 
Nutritional Needs Presentation - HLTH 104
Nutritional Needs Presentation - HLTH 104Nutritional Needs Presentation - HLTH 104
Nutritional Needs Presentation - HLTH 104
 

Cmaps

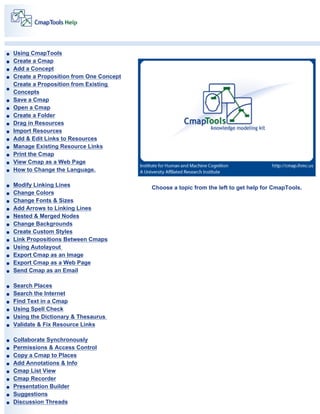
  • 1. Using CmapTools Create a Cmap Add a Concept Create a Proposition from One Concept Create a Proposition from Existing Concepts Save a Cmap Open a Cmap Create a Folder Drag in Resources Import Resources Add & Edit Links to Resources Manage Existing Resource Links Print the Cmap View Cmap as a Web Page How to Change the Language. Modify Linking Lines Change Colors Change Fonts & Sizes Add Arrows to Linking Lines Nested & Merged Nodes Change Backgrounds Create Custom Styles Link Propositions Between Cmaps Using Autolayout Export Cmap as an Image Export Cmap as a Web Page Send Cmap as an Email Search Places Search the Internet Find Text in a Cmap Using Spell Check Using the Dictionary & Thesaurus Validate & Fix Resource Links Collaborate Synchronously Permissions & Access Control Copy a Cmap to Places Add Annotations & Info Cmap List View Cmap Recorder Presentation Builder Suggestions Discussion Threads Choose a topic from the left to get help for CmapTools.
  • 2. Knowledge Soups Compare Two Cmaps Keyboard Shortcuts
  • 3. Using CmapTools The Views window is the organizational center of CmapTools. From here you can organize your Cmaps and Resources in folders, on your computer's hard drive and on remote servers that are shared with the Cmap community. TheViews window contains four main buttons on the left side of the window. Clicking on these buttons will show different locations of Cmaps and Resources in the right side of the window. When CmapTools starts, the Cmaps in My Computer location will be selected.
  • 4. This location contains all of the Cmaps and Resources located on your local computer. You can create Cmaps here, and later move them to Shared Cmaps in Places at a later time.
  • 5. Shared Cmaps are saved to remote Cmap Servers, and are easily viewable, and editable by other CmapTools users around the world. Cmaps saved here are also automatically generated as a web page for anyone with a web browser to see. This is the place to save your Cmaps if you want the rest of the Cmap world to see. The History button will show a log of Cmaps you've viewed or edited.
  • 6. You can clear the history by clicking the Clear button, at the top right of the History list.
  • 7. Cmaps and Resources can be added to your list of Favorites. The Favorites button will show the contents of this list.
  • 8. You can add Cmaps and Resources to your Favorites list by selecting the file in the right side of the window, and then clicking Edit then Add to Favorites.
  • 9. The bottom of the Views window contains two elements of functionality.
  • 10. You can quickly delete things by simply dragging them onto the trash can. Beware, this will DELETE the item, you can not recover it once it is dragged to the trash can. The icons only check box will remove the words from the four main buttons (Favorites, History...) so that there is more room for the content to the right. Use this if you are familiar with the buttons, and don't need to be reminded of what they are.
  • 11.
  • 12. Create a Cmap From the "Views - CmapTools" window: Select File, then New Cmap. (The keyboard shortcut Ctrl+n may also be used.) A new Cmap with the name "Untitled 1" will open.
  • 13. From an open Cmap: Selecting File, then New Cmap will also open a new Cmap. (The keyboard shortcut Ctrl+n may also be used.)
  • 14.
  • 15. Add a Concept From an open Cmap: Using the left mouse button, double-click anywhere on the Cmap. (You may instead right-click anywhere on the Cmap and select New Concept from the menu that appears.) A shape will appear with question marks inside of it. Type in a label to replace the question marks. Left-click on a white portion of the Cmap outside of the shape to set the label. The shape has now become a new concept.
  • 16.
  • 17. Create a Proposition from One Concept From an open Cmap: Left-click on the concept you would like to make a new proposition from. Left-click and drag from the arrows at the top of the concept. As you continue to hold the mouse button down, notice that an arrow from the selected concept will follow around the mouse pointer. (Another way to make the arrow follow the mouse pointer is to left-click once on the concept arrows, then release the button before moving the mouse.)
  • 18. If you chose to drag the mouse from the concept's arrows, drag the arrow some distance away from the concept and release the mouse. (If you left- clicked once on the concept's arrows, let the arrow follow your mouse pointer away from the concept and left-click again.) A new concept will be created, along with a rectangle that connects the two concepts.
  • 19. Type in a label for the rectangle, then left-click on a white portion of the Cmap to set the label. A linking phrase for the new proposition has now been created.
  • 20. Left-click on the new concept and type in a label. Left-click outside the concept to set the label. A new and complete proposition has been created. A proposition can have more elements than two concepts and a linking phrase. You may apply the methods described in this help section as well as Create a Proposition from Existing Concepts to add to your existing propositions.
  • 21.
  • 22. Create a Proposition from Existing Concepts From an open Cmap: Starting with two or more concepts, left-click on a concept you would like to make a new proposition from. Left-click and drag from the arrows at the top of the concept. As you continue to hold the mouse button down, notice that an arrow from the selected concept will follow around the mouse pointer. (Another way to make the arrow follow the mouse pointer is to left-click once on the concept arrows, then release the button before moving the mouse.)
  • 23. If you chose to drag the mouse from the concept's arrows, select another concept to drag the arrow over and release the mouse. (If you left-clicked once on the concept's arrows, let the arrow follow your mouse pointer over another concept you have selected, then left-click again.) A rectangle will appear with lines connecting to both concepts.
  • 24. Type in a label for the rectangle, then left-click on a white portion of the Cmap to set the label. The rectangle will dissappear, leaving a linking phrase in it's place. The linking phrase completes the proposition. A proposition can have more elements than two concepts and a linking phrase. You may apply the methods described in this help section as well as Create a New Proposition from One Concept to add to your existing propositions.
  • 25.
  • 26. Save a Cmap From an open Cmap: Select File, then either Save Cmap if you intend to save editing on an existing Cmap, or Save Cmap As to save a new Cmap. We will use Save Cmap As to demonstrate how to save a new Cmap. The "Save Cmap As" window will appear. Here, you can label your Cmap, give it a focus question, and assign keywords to it. The Author, Organization, and Email text fields are where you can add additional identifying information. These fields may be already filled with default values. The values are taken from Preferences... under Edit from the "Views - CmapTools" window.
  • 27. The next image shows the "Save Cmap As" window filled with identifying information. At the top of the window, there is a computer button that lists the contents of the My Cmaps folder, and a globe button that lists the servers that are a part of Places. The computer and globe buttons give you the option of saving your Cmap locally, or saving it on a Cmap server that you have permission to use. For our example, we will left-click Save to save the
  • 28. Cmap to My Cmaps. The "Saving Cmap" window will show the progress of the save request.
  • 29. Switch to the "Views - CmapTools" window. The Cmap you saved will appear under the My Cmaps heading.
  • 30. Open a Cmap From the "Views - CmapTools" window: Highlight the Cmap that you wish to open. Select File, then Open to have the Cmap open in another window. (Using the left mouse button and double-clicking the title (or icon) of a Cmap, or highlighting its title and pressing Enter, are alternate ways to open a Cmap.)
  • 31. If a Cmap or folder is not highlighted, and either Open is selected from the File menu, or Enter is pressed, the current "View" will open in another window.
  • 32.
  • 33. Create a Folder From the "Views - CmapTools" window: Click File, then New Folder...
  • 34. You will now see the New Folder window in which you can enter the Folder Name (required), and other optional attributes for the folder. Click the OK button, and the new folder will be created in the Views window. This new folder will be placed in the currently selected directory in the Views window. If no directory is selected, it will be placed at the root of the current view.
  • 35. Drag in Resources Desktop to Cmap Desktop to Views Views to Cmap From the desktop to an open Cmap: Resources can be added to concepts on a Cmap by dragging them from the desktop or an open folder. Once the resource is positioned above the concept and the mouse is released, the "Edit Resource Link" window will appear. If the resource is an image that you would like to set as the background for your Cmap, select the radio button labeled Set as Background. The Description and Keywords boxes allow you to add additional information about your resource. Click OK when you are finished editing the resource link.
  • 36. Now when viewing the Cmap, a resource link group icon will appear attached to the concept. The resource link group icon appears with an image that is representative of the type of resources it links to. Each of these icons may list one or more resources of the same type. A concept may have up to 13 different icons attached to it, each icon representing a different type of resource.
  • 37. Left-click the resource link group icon to reveal the title of the resource you have just linked to, then move the mouse over the resource's title. A box with the description of that resource will appear.
  • 38. Left-click the resource title. CmapTools has an image viewer that will open for common image files. An external program will open for any graphic resource not supported by the image viewer. From the "Views - CmapTools" window: Resources can also be dragged into either "My Cmaps" or "Places" that you have permission to add files to.
  • 39. After dragging the resource into the "Views - CmapTools" window, the "Edit Resource Properties" window appears. Click OK when you are finished editing properties for the resource.
  • 40. From the "Views - CmapTools" window: Resources that you have access to from either "My Cmaps" or "Places" can be dragged into a Cmap.
  • 41. After dragging the resource from the "Views - CmapTools" window over a concept in a Cmap, the "Adding Resource Links to..." window appears. Click OK to add the resource link to the selected concept on your Cmap.
  • 42.
  • 43. Import Resources Single Resource Multiple Resources Internet Shortcuts From the "Views - CmapTools" window: To import a single resource, select File then Add Resource(s)... Using the "Add Resources" window, you can manually navigate through folders to add resources for use in Cmaps. To locate resources from the "My Cmaps" or "Places", left-click the corresponding button at the top of the window. When the "Add Resources" window is first opened, the contents on the desktop are shown. To return to the desktop view, you may left-click the "Desktop" button at any time. Once you have located a resource you would like to add to a Cmap in the future, highlight it and left-click the Add button. After left-clicking Add, the "Edit Resource Properties" window appears. Left-clicking the checkbox in this window
  • 44. allows you create a resource shortcut, rather than copying the actual resource, to the "My Cmaps" folder. Left- click OK when you are finished editing the resource's properties. The added resource will now be listed in the "Views - CmapTools" window.
  • 45. From the "Add Resources" window: To add multiple resources at the same time, left-click the plus sign next to Show Resource List. The "Add Resources" window will expand to indicate that more than one resource can now be added to the resource list. Hold down the Ctrl key while left-clicking the title of each resource. Left-click the Add to List button when you have selected the resources you would like to add from the current directory. Using the left mouse button to double-click the boxes under the Description and Keywords headings, you may edit the resource properties for more than one resource. To remove a resource from the list, left-click Remove. To make changes to the properties of an individual resource, highlight the resource and left-click the Edit... button. The "Edit Resource Properties" window will open, and any changes will appear in the "Add Resources" window after left-clicking OK. From the "Add Resources" window, left-click Add All to add resources you would like to use in future Cmaps.
  • 46. The added resources will now be listed in the "Views - CmapTools" window.
  • 47. From the "Views - Cmaptools" window: You can import internet shortcuts to "My Cmaps" or "Places" that you have permission to store files on. To create an internet shortcut link, begin by selecting Add Web Page... from the File menu. The "Add Web Page" window will appear where you can add information to an internet shortcut. Left-click OK to add the web page. From the "Views - CmapTools" window:
  • 48. Now an internet shortcut icon will appear in the folder where you saved it.
  • 49. Add & Edit Links to Resources From an open Cmap: To add a resource link, begin by left-clicking a concept you want to link with a resource. Select Edit then Add & Edit Links to Resources... from the menu bar. (You can also perform this action by right-clicking the selected concept, then left-clicking on Add & Edit Links to Resources... from the menu that appears. Pressing Ctrl+r while a concept is selected is a third option you may use.)
  • 50. Using the "Editing Resource Links for [...]" window, you can manually navigate through folders to add resource links to concepts in Cmaps. The "Editing Resource Links for [...]" window is very similar to the "Add Resources" window (described in the help section Import Resources) because multiple resource links may be added and managed in one location. Once you have located the resources you want linked to the selected concept, highlight them and left-click Add to List.
  • 51. Left-click the box under Description to add or change the description of the selected resource. Remove may be used to remove a resource link from the list. To make further changes to the resource link, highlight the resource and left-click the Edit... button. The "Edit Resource Link" window will open (described in the help section Drag in Resources). Any changes made in the "Edit Resource Link" window will appear in the "Edit Resource Links for [...]" window after left- clicking OK. Left-click the Update button when you are finished editing the selected concept's resource links.
  • 52. Now when viewing the Cmap, a resource link group icon (described in the help section Drag in Resources) will appear attached to the concept. When the resource link group icon is left-clicked, it will reveal a selectable list of resources that have been added to the concept.
  • 53.
  • 54. Manage Existing Resource Links Individual Resource Link Resource Link Group From an open Cmap: To manage an individual resource link, left-click on its resource link group icon (described in the help section Drag in Resources). After a list of resource links is revealed, right-click the title of a resource link to select it. (Instead of right-clicking the title of the resource link, you may highlight it and use one of the following keyboard shortcuts: Cut - Ctrl+x, Copy - Ctrl+c, Delete - Del, Edit - Ctrl+r) If you right-clicked the resource link's title, a menu will appear allowing you
  • 55. to cut, copy, delete, or edit the resource link. Left-clicking Copy will copy the link so that you may paste it (see below) to additional concepts. Delete removes a resource link from the group. You may also edit the resource link using Add & Edit Links to Resources... (described in the help section Add & Edit Links to Resources). We will illustrate how to transfer a resource link from one concept to another using Cut. The icon that linked an image resource to the concept "Roots" has been removed because the resource link that was cut was the only one in the group. Right-click the concept that you want the resource to link to, then left-click the Paste menu item. Paste is also used to attach resource links that have been copied. (Another way to paste a resource link is to left-click
  • 56. a concept, then press Ctrl+v) Now, the icon and the resource link have moved to a different concept.
  • 57. From an open Cmap: An entire group of resource links can be managed by right-clicking a resource link group's icon. Instead of only affecting an individual resource link, a selection from the menu that appears will affect all links of the selected resource type.
  • 58.
  • 59. Print the Cmap When printing a Cmap, it is best to first go to the Print Preview. From an open Cmap: Select File, then Print Preview... You will now see the Print Preview window. From here, you can choose your page orientation, and set how many pages the Cmap should be printed on, using the Page Layout dialogue.
  • 60. Use the Page Setup button to set additional settings, specific to your printer. If you hit the OK button, the settings will be saved and you can print later, or you can hit the Print button to print immediately.
  • 61. View Cmap as a Web Page Cmaps that are saved on CmapServers, are automatically saved with a version that can be viewed as a web page on any web browser. Once your Cmap is saved to a server, you will see an additional status bar at the bottom of the Cmap, indicating its web address, and showing a button that will allow you to view the web page. Click the 'View' button, and Cmap Tools will launch your default web browser, and go to the web page version of the Cmap you are viewing.
  • 62. To share this web page with others, simply copy the web address from your web browser and email it as a link to the people you want to see the Cmap as a web page.
  • 63. How to Change the Language NOTE! You will have to restart CmapTools when doing this. From the Views window: Click Edit, then Preferences... Language information appears near the bottom of the General tab.
  • 64. Choose your language from the drop down menu, then restart CmapTools.
  • 65. You will have to restart CmapTools when doing this.
  • 66. Modify Linking Lines 4pt Bezier 3pt Bezier Splines Vectors Add Control Points Thickness Style From an open Cmap: Modifying linking lines can be useful when adding new Cmap items onto propositions. You can apply the different techniques found in the help sections Create a New Proposition from One Concept and Create a Proposition from Existing Concepts to add concepts to existing propositions. One type of modified link, the curved link, can be used to complete the addition of a concept to a proposition. Left-click the arrows of an existing concept or linking phrase to have an
  • 67. arrow follow the mouse pointer. Select a concept and connect the arrow to it. The linking line will appear positioned behind other objects that are not part of the link.
  • 68. Right-click a linking line that you want to curve. Select Line... from the menu that appears.
  • 69. The "Styles" window will open to the Line dialog. Left-click the button under the Shape heading to reveal the different curving options for your linking line. In our example, we'll use the Make 4pt Bezier. button so that we may fine tune our curve.
  • 70. When you return to the Cmap, you'll notice a small white box in the middle of the line you have selected to curve. The small white box in the middle of the line actually consists of two boxes or points, one on top of the other. Using the left mouse button, drag one of the two overlapping points from the middle of the line out to a desired location on the Cmap.
  • 71. Now drag the remaining middle point out to finish the curve.
  • 72. When you have completed the adjustments of your curve, left-click on a white portion of the Cmap to set the curved link.
  • 73. From the "Styles" window: To curve a linking line by using the corner of an adjustable triangle for reference, left-click the Make 3pt Bezier. button.
  • 74. Using the left mouse button, drag the middle point of the line out to a desired location. When you have completed the adjustments of your curve, left-click on a white portion of the Cmap to set the curved link.
  • 75. From the "Styles" window: The Make Splines. button allows you to curve from a middle point directly attached to the link.
  • 76. Left-click and drag the middle point out to a desired location, then left-click on a white portion of the Cmap to set the curved link.
  • 77. From the "Styles" window: The Make Vectors. button allows you to create angled links, or vectors, using straight lines.
  • 78. Left-click and drag the middle point out to a desired location, then left-click on a white portion of the Cmap to set the vector link.
  • 79. From an open Cmap: You may add additional control points to change the shape of a linking line. Right-click a linking line that you want to curve. Select Add Control Point from the menu that appears.
  • 80. Adding additional control points to a link will give you more control over the link's shape.
  • 81. You can curve links in different ways by adding additional control points, and by making use of Make Splines. from the Line dialog in the "Styles" window.
  • 82. From the "Styles" window: The Line Thickness button allows you to modify how thick, or thin, you want a linking line to appear.
  • 83. Now when viewing the Cmap, the thickness of the linking line you selected has changed.
  • 84. From the "Styles" window: The Line Style button allows you to modify a linking line's appearance with the use of a solid pattern, or a combination pattern of dots and/or dashes.
  • 85. Now when viewing the Cmap, the linking line you selected will appear in the line style you chose.
  • 86.
  • 87. Change Colors Linking Lines Group of Items Single Concept Text Background From an open Cmap: All items of a Cmap, except the resource link group icon (described in the help section Drag in Resources), can change color. To change the color of a linking line, select the line by right-clicking it, then left-click Line... from the menu that appears. (Notice that a linking line may have a different shape than an actual line. More information on different types of linking lines can be found in the help section Modify Linking Lines.)
  • 88. The "Styles" window will open to the Line dialog. Moving the mouse over the Color button makes a box appear that indicates what type of object will be affected when a color change is made. Left-clicking the Color button will reveal a palette of common colors that are selectable using the mouse. No Fill will change the color of an item (other than the background) to transparent. Left-click the More Colors... button to choose a particular color not shown in the palette.
  • 89. The "Choose a Color" window opens to the Swatches dialog where you can pick a color from an expanded palette. The color currently chosen appears in the Preview panel. Selectable swatches of previously chosen colors are under the Recent: heading. Left-click the HSB tab at the top of the window to further explore your color options.
  • 90. The HSB dialog opens, allowing you to select a color using Hue, Saturation, and Brightness values. Clicking either mouse button in the color square will select a color. You may also drag the slidebar with the mouse, specify numeric values in the text boxes, or use a combination of features in the HSB dialog to select a color. The HSB dialog shows corresponding RGB values. You may left-click the RGB tab to fine tune these values.
  • 91. The RGB dialog allows you to select a color by adjusting the color's Red, Green, and Blue values. You may use the slidebars, text boxes, or a combination of features in the RGB dialog to select a color. After you have chosen a color, Left-click the OK button to observe the change in color of the Cmap item.
  • 92. When you return to the Cmap, the item you selected will be in the color you chose. You may also want to change the color of other Cmap items to the selected color.
  • 93. From an open Cmap: You can change the color of multiple Cmap items at the same time. A way to select multiple adjacent Cmap items is by clicking and holding the left mouse button to drag a selection rectangle over the items. By holding down Ctrl and left-clicking on items, more than one non-adjacent item may be selected. A combination of left-clicking and dragging rectangles, all while holding down the Ctrl key, can capture both adjacent and non- adjacent Cmap items into the selection. (Alternate ways of selecting Cmap items can be found in the help section Nested & Merged Nodes.)
  • 94. A new menu appears when right-clicking on a group of selected Cmap items. Left-click on Format Style from the menu. A sub-menu will open where you can left-click an item type that best represents your multiple item selection. (If you only have linking lines selected, then Line... would best represent your selection. To change any other group of items, including groups that contain a variety of different Cmap items, select Object...)
  • 95. The "Styles" window will open to either the Line or Object dialogs, depending on which sub-menu item you selected. After left-clicking the Color button, notice the Added Colors heading. Left-clicking a color will change the color of all items selected.
  • 96. When you return to the Cmap, the group of items you selected will be in the color you chose.
  • 97. From an open Cmap: To change the color of a single concept, select the concept by right- clicking it, then left-click Format Style. A sub-menu appears where you can left-click the Object... menu item.
  • 98. The "Styles" window will open to the Object dialog. Moving the mouse over the Color button makes a box appear that indicates which portion of
  • 99. the concept will be affected when a color change is made. Notice that when the Color button is left-clicked, an additional color appears selected under the Added Colors heading that you did not add. You may left-click the added color at any time to return to the default background color of a concept. You can make a color choice for the background of your concept with either the No Fill button, the palette of common colors, any Added Colors you may have, or left-click on More Colors...
  • 100. When you return to the Cmap, the concept you selected will be in the color you chose.
  • 101. From an open Cmap: To change text color, right-click a concept or linking phrase, then left-click Format Style. From the sub-menu, left-click the Font... menu item.
  • 102. The "Styles" window will open to the Font dialog. Left-clicking the Text Color button will allow you to choose a color.
  • 103. After you have made a color selection, return to the Cmap to view the selected text in the chosen color.
  • 104. From an open Cmap: To change the background color of a Cmap, select a concept or linking phrase by right-clicking it, then left-click Format Style. From the sub- menu, left-click the Cmap... menu item.
  • 105. The "Styles" window will open to the Cmap dialog. Left-clicking the Set Background Color button will allow you to choose a color.
  • 106. After you have made a color selection, return to the Cmap to view the background in the color you chose.
  • 107.
  • 108. Change Fonts & Sizes Font-Size-Style Margin Text Alignment Change Case From an open Cmap: To change text font and size, select any number of concepts and/or linking phrases. (The help sections Change Colors and Nested & Merged Nodes explain different methods of selecting Cmap items.) Right-click the selection, then left-click Format Style. A sub-menu appears where you can left-click the Font... menu item.
  • 109. The "Styles" window will open to the Font dialog. You can change the Font Name and/or Font Point Size using the boxes found under the Font & Size heading.
  • 110. You can emphasize your text using the Bold and/or Italic buttons located under the Style & Color heading. Now when viewing the Cmap, the changes made to font, size, and emphasis can be seen in the text items you selected. From an open Cmap: To change the size of a concept's border without changing the position of the text, begin by selecting the
  • 111. concepts you wish to change. From the "Styles" window, Font dialog: You can insert a new positive integer in the text box under the Margin heading. Now when viewing the Cmap, the distance has changed between the text and the border of the concept.
  • 112. From an open Cmap: It is possible for text to be positioned at any location inside the concept using a combination of CmapTools. For our example, we will begin by selecting a concept that has a background image (described in the help section Change Backgrounds).
  • 113. From the "Styles" window, Font dialog: When using a concept with a background picture, the Margin should be set to 0 if you would like the text to be positioned adjacent to the edge of the concept's border. To move text a specific distance from the concept's border, you may incrementally increase the number in the margin box until the desired text position is achieved. Under the Text Alignment heading, you can choose from Left, Center, or Right justifications to horizontally align text inside of a concept. You can choose from the Top, Middle, or Bottom buttons to vertically align text inside of a concept. Now when viewing the Cmap, the text inside the concept you selected has changed positions. Notice that different combinations of horizontal and vertical alignments may be used to produce specific results.
  • 114. From an open Cmap: You can modify the case of selected text in a Cmap. The Change Case sub-menu, located under Format from the Cmap's menu bar, has four case-modifying menu items to choose from.
  • 115. The illustration below shows the effect that lowercase has on selected text. UPPERCASE converts all letters in the selection to uppercase. Sentence case can be used effectively by selecting concepts or linking phrases that are labeled using more than one word.
  • 116. Title Case makes the first letter of each word in the selection capitalized.
  • 117. Add Arrows to Linking Lines From an open Cmap: You can change the directional emphasis within propositions by using arrows. To change how arrows are used in propositions, begin by selecting the proposition(s). Right-click the selection, then left-click Line... from the Format Style sub-menu. (You may also modify the arrow behavior of specific lines by narrowing your selection to only those lines you want to change. The help section Change Colors explains different methods of selecting Cmap items, including linking lines.)
  • 118. The first concept, that a proposition is created from, is initially treated by CmapTools as the root or parent. To have the linking phrase(s) from the parent concept point at all children concepts, left-click the button illustrated below under the heading Arrowheads.
  • 119. Now when viewing the Cmap, selected linking lines will point from linking phrases to children concepts.
  • 120. From the "Styles" window: When using the top-down approach for building propositions, you may want arrows to point to children concepts only when they are positioned vertically higher than the linking phrases they are connected to. To create these types of arrows, left-click the button illustrated below under Arrowheads.
  • 121. Now when viewing the Cmap, selected linking lines will point only to children concepts that are vertically higher in relation to their connected linking phrases. Notice that the vertical position of the parent concept does not change how arrows are placed using this arrow feature.
  • 122. From the "Styles" window: You can have arrows pointing from parent concepts to linking phrases, and from linking phrases to children concepts. To create these types of arrows, left- click the button illustrated below under Arrowheads.
  • 123. Now when viewing the Cmap, selected linking lines will be pointing from parent concepts to linking phrases, and from linking phrases to children concepts.
  • 124. From the "Styles" window: You can assure that no arrowheads appear on your linking lines. To make linking lines with no arrowheads, left-click the button illustrated below under Arrowheads.
  • 125. Now when viewing the Cmap, no arrows will appear on the linking lines you selected.
  • 126. From an open Cmap: The order in which concepts are created for propositions affects the direction that linking line arrows point. Propositions may not appear logical until the arrow direction is reversed. To reverse the direction that linking line arrows point, begin with a selection that includes these lines. Right-click the selection, then left-click Line... from the Format Style sub-menu. (Instead of using the right- click menu, you may choose Edit, then Reverse Connection Direction from the Cmap's menu bar.)
  • 127. The "Styles" window will open to the Line dialog. Left-clicking the Reverse button (under the Connection Direction heading) will reverse the direction that arrows point.
  • 128. Now when viewing the Cmap, selected propositions that were previously illogical (due to arrows pointing the wrong way) will now make more sense.
  • 129. From the "Styles" window: Some conceptual relationships are conveyed clearer using non-standard means of visual communication. For example, a concept map may illustrate the symbiotic relationship that takes place within a system. Bi-directional arrows, between concepts that represent elements of the system, may be appropriate. To create these types of arrows for linking lines that you have selected, left-click the button illustrated below under Connection Direction.
  • 130. Now when viewing the Cmap, arrowheads will appear on both ends of selected linking lines. (You can link concepts together without creating a linking phrase. Begin by holding down the shift key, then left-click and drag the arrows from the top of a concept. While still holding down the left mouse button and the shift key, release the mouse first, followed by the shift key, above another concept you want to link to.)
  • 131. From the "Styles" window: You can change selected bi-directional arrows back to pointing in only one direction. To create arrows that point in only one direction, left-click the button illustrated below under Connection Direction.
  • 132. Now when viewing the Cmap, the linking lines you selected now point in only one direction.
  • 133.
  • 134. Nested & Merged Nodes Create Nested Nodes Remove from Parent Detach Children Merge Nodes From an open Cmap: You can provide more detail about a subject by putting Cmap items inside of a nested node. Nested nodes are useful when you want to add extra information, with quick accessibility, to an expandable concept. To create a nested node, begin by right-clicking a selection of Cmap items you want to include in the node. (You can select all Cmap items by pressing Ctrl+a) Left-click Nested Node, then left-click Create from the sub- menu.
  • 135. Now, a newly-created nested node surrounds, or nests, the Cmap items you have selected. The nested node initially appears in its expanded mode with a set of arrows on the right. You can collapse a nested node to hide the information it contains. One method of collapsing a nested node is to right-click a clear portion of the node, then left-click Expand from the Nested Node sub-menu to release the checkmark. (You can return to expanded mode by applying the checkmark to the Expand sub-menu item. Also, another way to expand or collapse a nested node is to left-click the set of arrows on the right of the node.)
  • 136. A nested node enters label mode once it is collapsed. In label mode, the nested node may be labeled just as a normal concept would.
  • 137. Cmap items located inside nested nodes may be arranged just the same as if the items were located in their own Cmap. To reveal other Cmap items that may be covered up by an expanded nested node, return the node to its label mode. (To add existing Cmap items to a nested node, hold shift while dragging the selection of items into the node.)
  • 138. After returning any expanded nested nodes to label mode, you can clearly view the main ideas of a Cmap.
  • 139. From an open Cmap: You can remove one or more child Cmap items from a nested node. To detach a selection of child Cmap items from its nested node parent, right-click the selection, then left-click Remove from Parent from the Nested Node sub-menu.
  • 140. Now the parent nested node is only attached to those child Cmap items that were not chosen for removal.
  • 141. From an open Cmap: You can automatically remove all child Cmap items from their parent nested node. To detach all child Cmap items from their parent, right-click a clear portion of the node, then left-click Detach Children from the Nested Node sub-menu.
  • 142. Now all contents in the nested node will be removed, and the nested node's label appears in a separate concept.
  • 143. From an open Cmap: You can combine the contents of multiple nested nodes. To combine the contents of multiple nested nodes into one nested node, right-click a selection of nested nodes, then left-click Merge Nodes...
  • 144. From the "Merging Options" window : You can decide in what way you want to merge Cmap items from selected nested nodes. Concepts and Linking Phrases are examples of Cmap items that may be merged. In the illustration below, only concepts are able to merge into a new nested node. Linking phrases were not inside the original selection of nested nodes to be merged, so they appear grayed out. Selecting the Only merge if node labels match option restricts merging of nested nodes to only those nodes that have the same label. Left-click to fill or clear the checkboxes, then left-click Ok to merge selected nested nodes.
  • 145. Now when viewing the Cmap, the Cmap items from the selected nested nodes have merged into one nested node. The way that nested nodes merge depends on the initial contents and labels of the nested nodes selected, and on how options are set from the "Merging Options" window.
  • 146. Change Backgrounds Change Cmap Background Change Concept Background From an open Cmap: You can make an image appear in the background of a Cmap. To give a Cmap a background image, right-click a clear portion of the Cmap, then left-click Add Background.
  • 147. The "Choose Background" window will open so that you may locate an image file. Left-click OK to place the selected image into the background of the active Cmap. Now when viewing the Cmap, the background image selected appears as the Cmap's background.
  • 148. From an open Cmap: You can make an image appear in the background of a concept. To give a concept a background image, right-click the concept, then left-click Object... from the Format Style sub-menu.
  • 149. The "Styles" window will open to the Object dialog. To continue adding an image to the background of a concept, left-click Select or Change
  • 150. Background. The "Choose Background" window will appear where you can browse for an image. Left-click OK from the "Choose Background" window to add the selected image to the background of a concept. Now when viewing the Cmap, the background image selected will appear as the concept's background.
  • 151.
  • 152. Create Custom Styles From an Open Cmap: You can save the styling used in a Cmap by making a custom styles file. By saving the styling used in a Cmap to a file, the saved style information can be applied to any other Cmap. To begin making a custom style, select one or more Cmap items that contain styling you want to save. When you have finished selecting Cmap items, left-click the selection, then right-click Object... from the Format Style sub-menu.
  • 153. The "Styles" window will open to the Object dialog. To give a name to the style used by the Cmap items you selected, left-click the arrow at the bottom portion of the "Styles" window.
  • 154. The bottom portion of the "Styles" window, Named Styles will open to reveal a list of currently available styles. The Default style (as shown below) is initially set by the program. To add a new style that is taken from the current selection of Cmap items, left-click the New Style button at the bottom of the window.
  • 155. The "New Style" window will open where you can name the new style. You can include any background styling such as background color, for example. Left-click OK to return to the "Styles" window.
  • 156. Now, the style's name appears in the list under Named Styles. You can save the style as a separate file, in either My Cmaps or Places, so that it may be used in other Cmaps. To save the style to a file, left-click the style's name once to select it, then left-click Save at the bottom of the "Styles" window.
  • 157. The "Save As..." window appears where you can choose to save the new style in either My Cmaps or Places. To create a style sheet with the file name you have supplied, left-click Save.
  • 158. Now, the style sheet appears as a new file in the "Views - CmapTools" window.
  • 159.
  • 160. Link Propositions Between Cmaps From two open Cmaps: You can link propositions between Cmaps that have been saved to either My Cmaps or Places. Begin connecting concepts and/or linking phrases between multiple Cmaps by first opening and positioning the Cmaps, so that overlapping is not a problem.
  • 161. Two or more Cmaps can be linked to each other in much the same way as concepts and linking phrases connect to one another on a single Cmap. Left-click and drag from the arrows at the top of a concept or linking phrase, then release the mouse above a Cmap you want to link to. Now when viewing the Cmaps, a concept appears on each Cmap with a shortcut arrow on its bottom right corner, indicating that the new concept links to another Cmap when left-clicked. Shortcut concepts, and any linking phrases or lines that they are connected to, can be modified to your liking. (The sections Create a New Proposition from One Concept and Create a Proposition from Existing Concepts further explore various connection possibilities that may
  • 162. also be used to connect multiple Cmaps.)
  • 163. Using Autolayout CmapTools contains a tool that can arrange your Cmaps in a logical manner. From an open Cmap: Select Format, then Autolayout... If you want to do Autolayout on the entire Cmap, do not have any concepts or linking phrases selected. On larger Cmaps, you can use Autolayout on parts of the Cmap by selecting the objects you wish to format.
  • 164. This will open the Autolayout window. The two tabs (Hierarchial & Force Directed) near the top of this window contain options for different ways of formatting the Cmap.
  • 165. The Hiearchial options will layout the Cmap in a very structured, organized manner, often discarding the Cmap's existing design. The Force Directed options will will reduce the amount of space between objects, keeping the Cmap's existing design.
  • 166. Export Cmap as an Image From an open Cmap : Click File, then Export Cmap As, then Image File... You will now see the "Export Cmap as Image File" window. The file name will default to the name of your Cmap. Use the drop down menu to choose what type of image file you want the Cmap saved as. Click Save when ready.
  • 167. Your Cmap has now been saved as an image file on your computer in the location you specified.
  • 168. Export Cmap as a Web Page From an open Cmap : Click File, then Export Cmap As, then Web Page... You will now see the "Export Cmap as Web Page" window. The file name will default to the name of your Cmap. Choose the location on your computer to save the web page to. Click Save when ready.
  • 169. Your Cmap has now been saved as a web page on your computer in the location you specified. There will be three files in the location. l The .html file with the name specified in the Save window. l A .jpg file, this is the image of the Cmap. l CmapToolsTrademark.gif, this is IHMC's trademark image.
  • 170. Send a Cmap in an Email To send a Cmap that is still editable by CmapTools: It is highly recommended that you save your Cmaps to a Cmap Server if you want to share them with others. If you must send a Cmap as an email attachment, follow these steps: 1. Drag and Drop your Cmap and all related resources to your desktop. 2. Compress all your files into a .zip, .sit, .tar etc... file. 3. Attach the compressed file to an email as you would any other file To send a Cmap that is viewable by any web browser: This method allows people without CmapTools to view a Cmap and browse its resources, though the recipient of the email needs to know how to uncompress files to view the Cmap. To email a web page version of your Cmap: 1. Export your Cmap as a webpage. (click here to learn more) 2. Compress the three generated files into a .zip, .sit, .tar etc... file. 3. Attach the compressed file to an email as you would any other file
  • 171. To send a Cmap that is viewable by any computer: This method allows people without CmapTools to view a Cmap, but they can not browse its resources, the Cmap is emailed as a static image. To email an image version of your Cmap: 1. Export your Cmap as an image. (click here to learn more) 2. Attach the image file to an email as you would any other file.
  • 172. Search Places You can search through your Places (local Cmaps and Shared Cmaps in Places) like you would any other search engine. From an open Cmap: Select Tools, Search, then Cmaps and Resources... You will now see the Search window.
  • 173. Enter the search term in the text input field at the top of the window, and click Search. The Search window will begin showing the results of the search in the bottom field. Double-click any search result to open it. The search tool can automatically search for a term in your Cmap by selecting on the concept or linking phrase, and then starting the search tool as described above.
  • 174.
  • 175. Search the Internet You can use CmapTools to search the internet, just like you would any other search engine. From an open Cmap: Select Tools, Search, then Web Information ... You will now see the Search window.
  • 176. Enter the search term in the text input field at the top of the window, and click Search. The Search window will begin showing the results of the search in the bottom field. Double-click any search result to open it. The search tool can automatically search for a term in your Cmap by selecting on the concept or linking phrase, and then starting the search tool as described above.
  • 177.
  • 178. Find Text in a Cmap From an open Cmap: Select Edit, then Find... You will now see the Find window.
  • 179. In this window, enter the word, or part of a word you are looking for. Click Find Next or Find All to select the objects in the Cmap that match the text you are looking for.
  • 180. Using Spell Check NOTE! Spell check currently only works in Cmaps with text written in English. From an open Cmap: Select Tools, then Spelling... Once you click Spelling... a status window will appear, and be replaced with the Spelling Checker Summary window when finished.
  • 181. You can set options for the spell check, by clicking Tools, then Spelling Options... from an open Cmap. From here, you can increase the size of the Dictionary File, and set other options that can help reduce unnecessary corrections in your Cmap.
  • 182. Using the Dictionary and Thesaurus NOTE! Dictionary and Thesaurus currently only works in Cmaps with text written in English. From an open Cmap: Select Tools, then Dictionary and Thesaurus... You will now see the Dictionary and Thesaurus window.
  • 183. In the top left text input, enter the word or term you wish to look up, and click the Look Up Related Word button. You will now see all the alternatives for the word you just looked up.
  • 184. If you had a concept selected when you started this process, you can simply click Replace, and the word will be replaced with your new selection. Otherwise, you can click the Add as a New Concept and a new concept will be created with your selected word.
  • 185. Validate and Fix Resource Links Use the Validate & Fix Links... tool when you have accidently moved resources (images, documents, etc.) from the locations that your Cmap is expecting those resources to be. From an open Cmap: Select Tools, then Validate & Fix Links... You will now see the Validate & Fix Links window. From here, you can choose to Search & Fix or Search Only for broken resource links in the Cmap currently opened.
  • 186. In this example, we will just search for broken links at first. Click the Search Only button. You will now see a window, displaying the results of the search. Click OK.
  • 187. You will now see the Cmaps with Broken Links to Resources window. This window shows you which Cmaps have broken links (on the left), and resources that are broken (on the right). Click on a broken resource to select it, and activate the buttons at the bottom.
  • 188. If the resource is no longer needed, simply remove it by clicking the Remove button. If you wish to manually fix the broken link, click the Choose button, this will take you to a file browsing interface, and you can manually select the file that the broken resource should link to. Click the Try to Fix Broken Link button to let CmapTools automatically search for the missing file, and relink the resource to the file. If the link is fixed, the broken resource will be removed from the Linked Resources Not Found list. You can do this process on a group of Cmaps by selecting a folder from the
  • 189. Views window, and clicking Tools then Validate & Fix Links... .
  • 190. Collaborate Synchronously From an Open Cmap in Places: You can collaborate with multiple users of CmapTools at the same time if you have an internet connection. Begin by copying a Cmap you want to work on with others to a place in the CmapTools network. To allow others the opportunity to synchronously collaborate on a shared Cmap, left-click the icon at the top right of the Cmap to release the collaboration lock.
  • 191. The "Synchronous Collaboration Enabled" dialog window appears, confirming that the Cmap is now ready for synchronous collaboration.
  • 192. If you are not the owner or administrator of a Cmap, and you want to synchronously collaborate on that Cmap with others, you may request a synchronous collaboration session. The "Request Collaboration Session" window opens automatically when you attempt to edit another's Cmap. Instead of requesting a session, you can alternatively work on your own using a copy of the Cmap by left-clicking Edit a Copy of the Cmap. You can change the User ID that other collaborators will identify you with, as well as establishing the new ID as the default for future use by left-clicking the Set this as the default user ID checkbox. To express to the Cmap owner or administrator your interest in synchronously collaborating on their Cmap, left-click Submit Request.
  • 193.
  • 194. The "Response to Collaboration Request" window appears to inform a Cmap owner or administrator that a collaboration session request has been made. User ID settings are also offered to the Cmap owner or admin, should they wish to begin the collaboration session by left-clicking Collaborate. After a synchronous collaboration session request has been approved by the admin or owner of the Cmap, any Participant listed can modify and add to the Cmap. Any changes made during synchronous collaboration are available for all in the session to see. Users may also chat with one another by typing text in the box to the right of the Cmap, then left-clicking Send.
  • 195.
  • 196. Permissions & Access Control From a "New Folder" window: You can control the accessibility and permissions of a folder that is located in either My Cmaps or Places if you created the folder or have administrative privileges over that folder. Just as an administrator of a place decides how others may create and use Cmaps, folders, and resources in that place, any administrator of a folder can permit or deny access to specific features in Cmaps, folders, and resources stored in that folder. To view or change how others may use a folder that you are creating, as well as any files or folders that may be stored in it in the future, left-click Permissions... (You can modify the permissions on an existing folder if you have administrative privileges on that folder. To modify an existing folder's permissions, right-click the folder, then left-click Properties.... From the "Edit Folder Properties" window that appears, you can left-click the Permissions... button.)
  • 197. The "Permissions List" window opens where you can view and modify the permissions on a specific folder and its contents. The tab This Folder contains a modifiable list of permissions that initially establish the folder's creator as the sole administrator of the folder. The title "Everyone" is used to represent the set of permissions that any user has on the folder. To modify the permissions of a highlighted user in the permissions list, left-click Edit...
  • 198. The "Edit User" window appears, where you can control user-specific permissions and access to the selected folder, as well as any files or folders it may contain. You can change the password of user accounts that you have set up on a selected folder by left-clicking Change Password. Only users who are listed as administrators of a specific folder can modify the permissions list on that folder, even if they have all of the other individual permissions that are given to administrators. To save effective permissions of a user account on the folder you are working with, left-click OK.
  • 199. Now when viewing the "Permissions List" window, any changes in permissions for the account you edited appear next to the User ID for that account. The user account "jsmith" highlighted in the image below has the same permissions as an administrator, but lacks the ability to modify the permissions list. You can left-click the Add User... button to create a new permissions account for the selected folder, or highlight a User ID and left- click Remove to delete that user's account. To view or modify the permissions for folders located inside of the selected folder, left-click the Child Folders tab.
  • 200. We saw in the previous image that "jsmith" lost only the Administrator permission over the selected folder. When no other administrator is specified for a folder, authority over the permissions list of the folder is determined by the first "admin" found in either the folder's parent directory, a subsequent ancestor directory, or even the root. The root directory is either the My Cmaps folder or a place listed in the CmapTools network. If no parent or ancestor directory has an admin listed, the administrator of the root will ultimately inherit full control over the folder where "jsmith" was previously an administrator. Similarly, the creator of a folder stored inside the selected folder (known as a child folder) is given, by default, administrative privileges over their folder. If the permissions list under Child Folders is modified so that no administrators are left, a parent, ancestor, or root folder administrator will acquire full control over all child folders through inheritance. To save changes made in any of the permissions lists, left-click OK.
  • 201. Child Folders as well as Other Folders that are stored inside the selected folder have, by default, inherited permissions. However, the Inherit permissions list from parent folder box is not checked by default for the selected folder. If you check that box, you will be able to left-click the Show Effective Permissions button to verify which permissions would be inherited from the parent of the selected folder.
  • 202. The "Effective Permissions" window appears, and all permissions listed would apply to the selected folder if you chose to inherit permissions. Notice that if an administrator chose to inherit permissions for a selected folder, and the folder's parent permitted "Everyone" the privileges of viewing folder contents and creating folders only, then that administrator may not wish to turn on inheritance under the tab This Folder in order to secure a larger range of available permissions for other users of the selected folder.
  • 203.
  • 204. Copy a Cmap to Places From the "Views - CmapTools" window: You can copy a Cmap to a place in the CmapTools network, making it possible to share Cmaps with others. Even if the Cmap you want to share does not contain any links to outside resources, someone who has been given access to the shared Cmap may eventually want to add resource links to it. To ensure that all resource links in a Cmap remain valid after copying the Cmap to Places, begin by right-clicking an unused space in "Views" under the My Cmaps heading, then left-click Folder... from the New sub-menu.
  • 205. The "New Folder" window appears where you can give the folder a name, add searchable keywords, and add a folder description. The section
  • 206. Permissions & Access Control explains how the Permissions... button can be used to secure folder content. A knowledge model is a folder containing several Cmaps of information that provide detail to a domain of knowledge. A common way of unifying a knowledge model is through the use of a top level Cmap. The Set as Knowledge Model box can be checked to change a folder's icon to the knowledge model icon, indicating that the folder most likely contains a top level cmap that links to other Cmaps also contained in the folder. To finish creating the new folder, left- click OK.
  • 207. After you have created a folder, select a Cmap and its associated files. To place the selected files into the newly created folder, right-click the highlighted selection, then left-click either Cut or Copy.
  • 208. Right-click the new folder, then place the Cmap and its associated files into the folder by left-clicking Paste. Now, the selected folder has a "+" next to it, indicating that the folder contains the Cmap and associated files. To copy the folder and its contents for placement on the CmapTools network, right-click the folder, then left-
  • 209. click either Cut or Copy. Left-click the Shared Cmaps in Places button to view a list of places in the CmapTools network. If you are unsure of where you should place your Cmap folder, places with "public" in the title typically permit any CmapTools user the ability to copy, or publish, Cmap folders to that place.
  • 210. Now when opening the place where you pasted your Cmap folder, it appears in the list for anyone who accesses that place.
  • 211.
  • 212. Add Annotations & Info Annotate... Add Info From an Open Cmap: You can add descriptive text annotations to a Cmap. Annotations can be used to remind you where you left off during the creation of a Cmap. Another way to use annotations is by creating a comment or suggestion for someone else's Cmap. To create an annotation, right-click the Cmap where you want the annotation to appear, then left-click Annotate...
  • 213. A new annotation will appear with fields for adding text, your name, and an email address. If you left-click the exit button, the annotation will not be saved. To save the annotation, left-click the minimize button. Now when viewing the Cmap, the annotation you created appears as a yellow repositionable icon.
  • 214. From an Open Cmap: You can add viewable information and keywords to a concept in a Cmap. To add information to a concept, right-click a concept, then left-click Add Info....
  • 215. The "Add Info" window opens, where you can add information to the concept. Information that is added in the box next to Mouse Over Info: will appear when the mouse pointer hovers above the concept. Keywords or other phrases may be added to the box next to Hidden Info: for use with the search tool. To transfer information added in the "Add Info" window to the selected concept, left-click OK.
  • 216. Now when viewing the Cmap, you can mouse over a concept that has additional mouse over info and a box with that info will appear over the concept.
  • 217.
  • 218. Cmap List View From an open Cmap: You can view and select concepts, linking phrases, and propositions in a list, as well as add new propositions, using Cmap List View. The Cmap List View is a way to easily navigate and add to Cmaps of any size and complexity. To begin using Cmap List View, click the Cmap List View icon. The Cmap List View has four different lists to choose from: Concepts, Linking Phrases, Propositions, and Cmap Outline. The Concepts list view provides quick mouse or keyboard access to a list of concepts in a Cmap that are orderable by clicking the Concept, Links In, and Links Out headings.
  • 219. The LInking Phrases list view provides quick mouse or keyboard access to a list of linking phrases in a Cmap that are orderable by clicking the Linking Phrase, Links In, and Links Out headings. You can navigate a Cmap by proposition, add new propositions to the Cmap, or add to existing propositions in the Cmap by clicking the Add button from the Propositions list view.
  • 220. The Cmap Outline list view provides a way to abstract the main ideas of a Cmap. Specific propositions may be brought into view quickly with the information hiding feature of the Cmap Outline list view. You can show or hide a proposition from view in the list by clicking on the plus or minus sign next to the linking phrase of the proposition.
  • 221. Cmap Recorder From an open Cmap: You can create a recording of the creation of a Cmap using Cmap Recorder. A recording using Cmap Recorder stays as part of the Cmap when the Cmap is saved, whether the Cmap is saved in My Cmaps or Places. To begin recording the creation of a Cmap, select Tools then Cmap Recorder.
  • 222. The Cmap Recorder opens to the side of the Cmap you are working on. Clicking the Cmap Recorder button will expand or collapse the Cmap Recorder console. Click Record to start recording. Each Cmap item you create or move will be recorded as individual steps, until the Stop button is clicked. Once a recording has been stopped, you can Play, Pause, or navigate to particular steps in the recording using the Back and Forward console. The recorded steps may be exported to a file for use in spreadsheet or data analysis applications by clicking Export to text file.... Click Delete Recording to remove the recording and prevent it from being saved with the Cmap you are working on.
  • 223. The set of images below is a recording of a Cmap that was created using asynchronous collaboration. The two users
  • 224. that worked on this Cmap either manually started and stopped the recording each time they edited and saved the Cmap, or made use of the Auto-Record feature located in Preferences... under Edit from the "Views - CmapTools" window.
  • 225.
  • 226.
  • 227.
  • 228. Presentation Builder From an open Cmap: You can build a slide show of the creation of a Cmap using Presentation Builder. To begin building a presentation using CmapTools, select Tools then Presentation Builder. The Presentation Builder opens to the side of the cmap you are working on. Create a new presentation by clicking the Create New Presentation button.
  • 229. The "Add Presentation" window opens where you can name the presentation you will be working on. Click Ok to apply the name to the new presentation. You can add cmap items to a new slide by selecting the cmap items and clicking the Add Cmap Items button. You can update a slide's contents by performing multiple additions and deletions of it's contents, all at once. Click the name of the slide you wish to update (slide names can be changed using F2), select only the cmap items you wish to include in the slide, then click the Update Cmap Items button.
  • 230. You can insert additional cmap items to a slide by clicking the name of the slide, selecting the additional items, then clicking the Insert Cmap Items button. You can copy a selected slide and add selected Cmap items to create a new slide by clicking the name of the slide, selecting the additional items, then clicking the Copy and Add button.
  • 231. A new slide appears that contains all the Cmap items from the copied slide, plus items in the Cmap that were selected to be added. Cmap items may be deleted from a slide by clicking the slide's name, selecting the Cmap items to delete from
  • 232. the slide, and clicking the Remove Selected button. It is worth mentioning that you can delete the entire slide if it is selected using Remove Selected. To delete an entire presentation, select the presentation to delete using the drop-down box, then click the Delete Presentation button. Presentation Builder lets you view the slides in the current window, or it can use the full screen dimensions of the monitor. You can preview the presentation in the current window by clicking Preview in Current Window, then using the blue navigational buttons that appear. The Scale map to fit fullscreen window. box may be used when Showing the presentation in full screen mode. is clicked. The image below shows a slide of a cmap scaled to fit the entire screen. In fullscreen mode, a presentation may be navigated using either the blue navigational buttons on the bottom right, or by clicking on specific slide icons lining the bottom left. To leave fullscreen mode, press Esc, or click the Preview Mode icon located left of the blue navigational buttons.
  • 233. The set of images below is a presentation with corresponding cmap items listed next to each slide.
  • 234.
  • 235. Suggestions From an open Cmap: You can get a list of suggestions for concepts to add to a Cmap. The CmapTools Suggester is available to use once you have accessed one or more items on the Cmap, and at least a few concepts or linking phrases on the Cmap are labeled. To begin gathering suggestions for a Cmap, either select Concepts from the Suggestions submenu under Tools, or click the Suggestions button (This button may also be used to expand or collapse the Suggestions console). The Suggestions console opens to the side of the Cmap you are working on. Click the blue arrows button to obtain a list of suggestions relative to the latest contents of the Cmap.
  • 236. Click the stop and go button to change the red indicator light to green if you want to allow the suggester to automatically refresh the list of suggestions as the Cmap changes, otherwise the suggester will only refresh the list when you click the blue arrows button. You can drag and drop individual concept suggestions from the list that appears onto the Cmap using the mouse. A concept that has been dragged and dropped onto the Cmap appears as new concept.
  • 237.
  • 238. Discussion Threads From the "Views - CmapTools" window: You can create a new discussion thread which provides a means to share ideas about a topic of knowledge. To create a new discussion thread you can: select a concept on an open cmap then choose New Discussion Thread... from the Collaboration menu, select a folder in Places then New Discussion Thread... from the File menu, or choose Discussion Thread... from the New submenu of the folder's context menu. The "New Discussion Thread" window opens where you can set the discussion threads initial properties. To create the new discussion thread, it must be given a name in the box next to the heading Name:, assigned the User ID and Password of the DT administrator, as well as the DT administrator's Email address. You may choose to ask for user registration, set when the DT and/or individual messages expire, keep thread messages anonymous, and control when email notifications are sent. To create the new discussion thread, click Create.
  • 239. The "New Message" window opens where you can add a message to a discussion thread. The interface is very similar to that of creating a new email. Attachments may be added, and Spelling may be checked. You may also choose to make the new message anonymous. To create the new discussion thread message, click Send.
  • 240. The new message appears in the list of the main "Discussion Thread" window. This window also opens when clicking an existing DT icon in Places. Properties of the discussion thread may be viewed or changed by the DT administrator from the File menu. New messages can be checked for by clicking Check New, and new messages can be created by clicking New. Both DT message options may also be accessed from the Thread menu. Click Close to hide the "Discussion Threads" window.
  • 241. A new discussion thread icon appears in the folder in Places that it was created. As with any other resource, a DT may be dragged onto a cmap concept.
  • 242. The "Adding Resource Links to [...]" window opens where you can verify and describe the resource properties for the discussion thread. To set the properties for the DT resource, click OK. The DT icon appears on the concept to which it was added. If the discussion thread was created by first selecting a concept on an open cmap then choosing New Discussion Thread... from the Collaboration menu, the DT icon will automatically appear on the concept without the need of adding it from Places. A
  • 243. red DT icon will appear after the cmap has initially been saved and reopened, and only if there are messages in the thread that have not yet been read. Once all messages in the discussion thread have been read, the DT icon will return to its normal yellow color.
  • 244. Knowledge Soups Participate in a Soup Create a Knowledge Soup From an open Cmap: You can participate in the sharing of concept map ideas and propositions through the use of Knowledge Soups. To begin participating in a knowledge soup, select Collaborate then Join Cmap to Soup....
  • 245. The "Select Soup to Join" window opens and begins to automatically search for existing soups to join. You can manually search for a particular soup to join by clicking Browse.... Click Join to join the selected soup. The Knowledge Soup console opens to the side of the cmap you are working on. All propositions in the cmap appear as soup claims in a list under the My Claims heading. You can Publish, Unpublish, or Delete any of your claims from the soup by clicking
  • 246. the appropriate button next to the My Claims heading. Soup claims that are published to the soup appear under the heading Soup Claims. You can View Claim Publishers, Add Discussion Thread to Claim, Refresh the list of published claims, or Disconnect from the Soup using the appropriate button next to Soup Claims. To add a new claim to the cmap, select a published claim under Soup Claims then drag and drop it onto the cmap. The image below shows the results of publishing the claim Plants have Leaves to the knowledge soup, as well as dragging and dropping the claim Sunlight helps Plants onto the cmap. A thumbtack icon appears next to the claim under My Claims to indicate that it has been published, and Plants have Leaves also appears with the rest of the published claims under Soup Claims. Sunlight
  • 247. helps Plants appears on the cmap as a new proposition that can be incorporated into the design of the Anatomy of a Plant cmap. From the "Views - CmapTools" window:
  • 248. You can create a new knowledge soup where others can join to share their cmap claims. To create a new knowledge soup, you can select a folder in Places and either select New Soup... from the File menu, or Soup... from the New submenu of the folder's context menu.
  • 249. The "Create Knowledge Soup" opens where you can set the knowledge soup's initial properties and members. To create the new soup, it must be given a name in the box next to the heading Soup Name:. You may choose to set when the soup will expire, as well as set the description of the soup. As the soup's administrator, you have the ability to Add User..., Remove User, and Delete User's Claims. Individual claims may be added and removed, and a claims filter may also be applied. If the Place where the soup's folder is located supports Discussion Threads, you may Add DT, Remove DT and Open DT. Other member permissions may be determined at creation using the checkboxes seen in the image below. To create the new knowledge soup, click Create.
  • 250. A soup icon appears in the folder where it was created. To edit the soup, double-click the soup icon. The "Edit Knowledge Soup..." window opens where the same information from the "Create Knowledge Soup" may be updated.
  • 251. Compare Two Cmaps From an open Cmap: You can compare one Cmap with another and receive a detailed analysis of the comparison. To begin comparing two Cmaps, select Tools then Compare to Cmap.... The "Compare to another Cmap" console opens to the side of the cmap you are working on. You may choose to compare the two cmaps using any or all of these options: Propositions, Connections, Linking Phrases, and/or Concepts. Propositions, Linking Phrases, and Concepts may be compared using Full Text, and/or Partial Text to increase the probability of finding match. If you are connected to the Internet, you can make use of any or all of the following text matching options: Keyword, Synonym, and/or Hypernym. The Word Match slider can be adjusted to the percentage of words inside single concepts that must match in order to report the two concepts as "matching". To compare two cmaps click Select Cmap..., browse for the cmap you want to perform the comparison with, then click Compare Cmaps.
  • 252. The other cmap will open beside the cmap you are working on. Once the comparison has been made, any matches will appear highlighted in green on both cmaps. You can view a detailed comparison of the two cmaps under the Results heading. These results may also be saved to a text file by clicking Export to Text File..., which opens the "Export Compare Results to Text File" window. To perform another comparison, or to remove the green highlighting from the two cmaps, click Reset.
  • 253.
  • 254. Keyboard Shortcuts Views - CmapTools Open Cmap From the "Views - CmapTools" Window: Open a new Cmap for editing File/New Cmap Create a new folder File/New Folder... Open selected Cmaps, folders, and/or resources File/Open Close the "Views - CmapTools" window File/Close Print the current view File/Print View... Exit CmapTools File/Exit CmapTools Hide CmapTools CmapTools/Hide CmapTools Hide all other windows except for CmapTools CmapTools/Hide Others Cut selected Cmaps, folders, and/or resources Edit/Cut Copy selected Cmaps, folders, and/or resources Edit/Copy
  • 255. Paste files from the clipboard into a selected folder Edit/Paste Rename a selected Cmap, folder, or resource Edit/Rename Delete selected Cmaps, folders, and/or resources Edit/Delete Refresh the contents of the current view Edit/Refresh Display the properties of a selected Cmap, folder, or resource Edit/Properties... Close the "Views - CmapTools" window CmapTools Icon/Close From an open Cmap: Open a new Cmap for editing File/New Cmap Close the active Cmap File/Close Cmap Save the active Cmap File/Save Cmap Open the "Save Cmap As" window File/Save Cmap As...
  • 256. Print the active Cmap File/Print... Exit CmapTools File/Exit CmapTools Undo the last action performed on the active Cmap Edit/Undo blacko the last action undone on the active Cmap Edit/blacko Cut selected Cmap items Edit/Cut Copy selected Cmap items Edit/Copy Paste items from the clipboard to the active Cmap Edit/Paste Delete selected Cmap items Edit/Delete Select all items on the active Cmap Edit/Select All Add & edit links to resources Edit/Add & Edit Links to Resources... Find specific text in the active Cmap Edit/Find... Find the next instance of text that was found previously Edit/Find Next
  • 257. Open the "Styles" window Format/Styles... Perform an autolayout on the active Cmap Format/Autolayout... Hide CmapTools CmapTools/Hide CmapTools Hide all other windows except for CmapTools CmapTools/Hide Others Close the active Cmap Cmap Icon/Close